Dogway's grading shader (slang)

oh well, many are cosmetics. I mainly implemented corner size since crt-royale doesn’t have that one. Ideally this fits better into image-adjustment (flip, mirror, zoom, translate, etc) but no way I’m going into that territory haha. The other thing was slang versions for lut_x2, gdapt stripes and signal-bandwidth.

BTW, I forgot to say that signal bandwidth for the ntsc passes is emulated through hardware resizing.

Those:

scale_type_x1 = "source"
scale_x1 = "4.000000"
scale_type_x2 = "source"
scale_x2 = "0.500000"

I’m not sure if this is a requirement for ntsc to work or an option, in which case I would replace that “hack” with signal-bandwidth. I guess after the ntsc passes.

1 Like

That’s cake to do personally.

I haven’t updated grade since you posted the non-LUT version of it for me.

Could you elaborate more on this?

1 Like

Yes, well, I really don’t want to mess with my personal presets anymore. I personally don’t use image-adjustment but I guess people do.

On the ntsc bit, if you inspect ntsc-320px-svideo.glslp:

shaders = 2
shader0 = shaders/ntsc-pass1-svideo-2phase.glsl
shader1 = shaders/ntsc-pass2-2phase-gamma.glsl

filter_linear0 = false
filter_linear1 = false

scale_type_x0 = absolute 
scale_type_y0 = source
scale_x0 = 1280
scale_y0 = 1.0
frame_count_mod0 = 2
float_framebuffer0 = true

scale_type1 = source
scale_x1 = 0.5
scale_y1 = 1.0

You find that the image is upscaled to 1280 pixels wide before the ntsc (blur) pass. If you upscale more the blurring will be less prominent. So this is a non accurate way of simulating signal-bandwidth (my interpretation).

1 Like

You can use this method for the first pass of ntsc, I’m pretty as @ProfessorBraun was discussing it in the CRT shader show-off thread. (It’s about 100-200 posts back.)

scale_type_x1 = "source"
scale_x1 = "4.000000"
scale_type_x2 = "source"
scale_x2 = "0.500000"

Ohh I was saying you can pull that stuff out of image-adjustment and place it into grade. (Already have done it myself and then removed the stuff I didn’t need.) Most of it happens in an earlier part of the shader before the void main()

Not sure if you were saying you didn’t want to add image-adjustment as a pass (to the shader preset chain), or that you didn’t want to add any code from image-adjustment.

Personally the only thing I kept from image-adjustment that I ported over into grade was the X/Y Modifiers.

Regardless, look forward to messing with the new grade update, and checking out your updates to the signal bandwidth shader.

2 Likes

I’m a bit late to the party. Is there a write-up or summary describing the new shaders and how they improve on existing shaders? Looks like good stuff from what I’ve seen but info seems a bit scattered.

1 Like

Basically it’s on the shader header, it’s an ubershader that comprises a set of existant shaders to work better in conjunction and ease of use. But I also included new code.

It’s all color/tone related that’s why “grade”. I implemented color-mangler, vignette, lut_x2 and white_point, and added vibrance, black level, corner size, rolled gain, sigmoidal contrast and proper gamma transforms.

This should be you first shader on the stack related to all color work, and next you can do ntsc emulation, blurring, scanlines…

If you can test and give some feedback that would be very welcome since I consider it pretty much done. The only thing I don’t like (and hence default to false) is the HotSpot fix. I need to come up with something better once I have time.

3 Likes

Could you elaborate on the sigmoidal contrast and proper gamma transformation?

Like what is the difference with sigmoidal contrast, and what is different with how you’re doing gamma vs how it was originally handled.

1 Like

TV sets (and therefore many shaders here) consider “contrast” as black lift (in color grading terms).

pasted image 0

For me that’s Lift (called Black Levels in grade.glsl). In the pic you can also see Gain, people commonly call that luminance or brightness. I kept the name Brightness but instead of a straight line I applied a soft curve (roll-off) towards the end, so highlights are not harshly clipped but gently.

In comparison, sigmoidal contrast is a non destructive way of increasing contrast by drawing an S curve shape on the function transform. What you get is brighter brights and darker darks (or the inverse) without clipping.

images

On gamma, after some research I read that while CRTs employed a pure power gamma LCDs abid to sRGB gamma, they are different, sRGB gamma has a linear part on the low end which are better at avoiding crushing the blacks. This was my first attempt but the blacks kept being crushed none-the-less due to the initial pure power linearization. I decided against literature to use sRGB gamma also for the CRT part, after some adjustement on the values what you get is the same image but with better dynamic range (brighter if you like) low range. You can check this on a dark frame real time, toggle Gamma Type on and off and decide which one do you prefer. Most shaders on retroarch use pure power gamma.

5 Likes

@Dogway

Hey, I don’t know if it’s my setup specifically or what, but the black_rgb tint settings seem pointless. If any of them go to 0.01 it immediately makes black that color, I know that is sorta it’s purpose but it’s fairly drastic(like too strong too fast to be of use imo).

You move them in tandem and you get a way stronger version of the black level setting, that’s not anywhere as nice imo.

I mean it’s your decision, but you may want to review the black tint settings and see if you want to phase them out, black lift (level) is great though, the tints are just weird.

I don’t want you to think I’m complaining, as this is an issue with color-mangler as well. I just thought you’d be interested in checking it out.

Shaders great regardless, lol.

1 Like

It’s color-mangler behavior untouched. I agree stepping is too high so I refined it, thanks for the observation.

1 Like

Yeahhh, I knew it was a color mangler issue. Just thought you didn’t really use that setting (possibly being unaware of this), and this was something you’d care about (the ability to fine tune the color profile).

Black RGB tint is no longer useless, lol.

Thanks for the fix!

Alright after going over this thread again I have a question, not really pressing or anything.

The hotspot fix, you said it was to fix overexposed highlights, is it basically a clipping fix for highlights? (Because that’s what it sounds like to me, I’m not super informed about color management so that’s how my brain is interpreting overexposed highlights fix.)

I mean I also feel my explanation is an oversimplification of things as overexposure doesn’t necessarily mean clipping is involved, it just means those colors are kind of getting less contrast between them, idfk. (Also feel this isn’t right either, the contrast thing, not the oversimplification bit.)

Hope you can clarify for me when have the time.

1 Like

I don’t know the real reason but comparing my old default presets against my new presets (which should be more correct) I get more hotspots or overblown highlights. I don’t know why, it’s not grade as it is as transparent as it can be (as default), it happens at the scanline stage.

I think my old presets lowered the brightness in pre-scanline shaders but I have to dig deeper on where it happens. Anyway at worst you can use my Brightness setting which does a rolled gain (good) even for negative values, but a better solution is to don’t touch whites and recover shading in highlights so I need to design a curve specifically for that. Negative contrast is a good start but I have to limit it to highlights only, I think a luma mask can cut it.

EDIT: CRTs weren’t perfect machines as power is lost through the signal. I shouldn’t be surprised if lowered gain is a more correct approach (which later scanlines and bloom would correct).

2 Likes

So I run some tests, I grabbed an old shot as reference, then the new preset with grade, and following the fix (color adjustments) I did just now.

What I did mostly was lower saturation, lower gain, enable hotspot fix and lower white-green. I also added some green to reds to remove that blown pure red. As usual I also add green to blues, this makes skies look better (Azure blue), or Sonic color more natural.

This is something I would think ntsc emulation would suffix but it doesn’t, so there’s something else going on. I tried using the Triniton LUT but it’s not working fine on all systems and I don’t know why. It’s the “Sony Trinitron Std D50 - Edit 1 - Gamma Unadjusted -32px”. I interpret that as a linear 32 points LUT, it changes the white point to D50 (from D65) I guess.

Reference

Mario Kart 64 (USA) OLD2

crt-royale+grade

Mario Kart 64 (USA) OLD

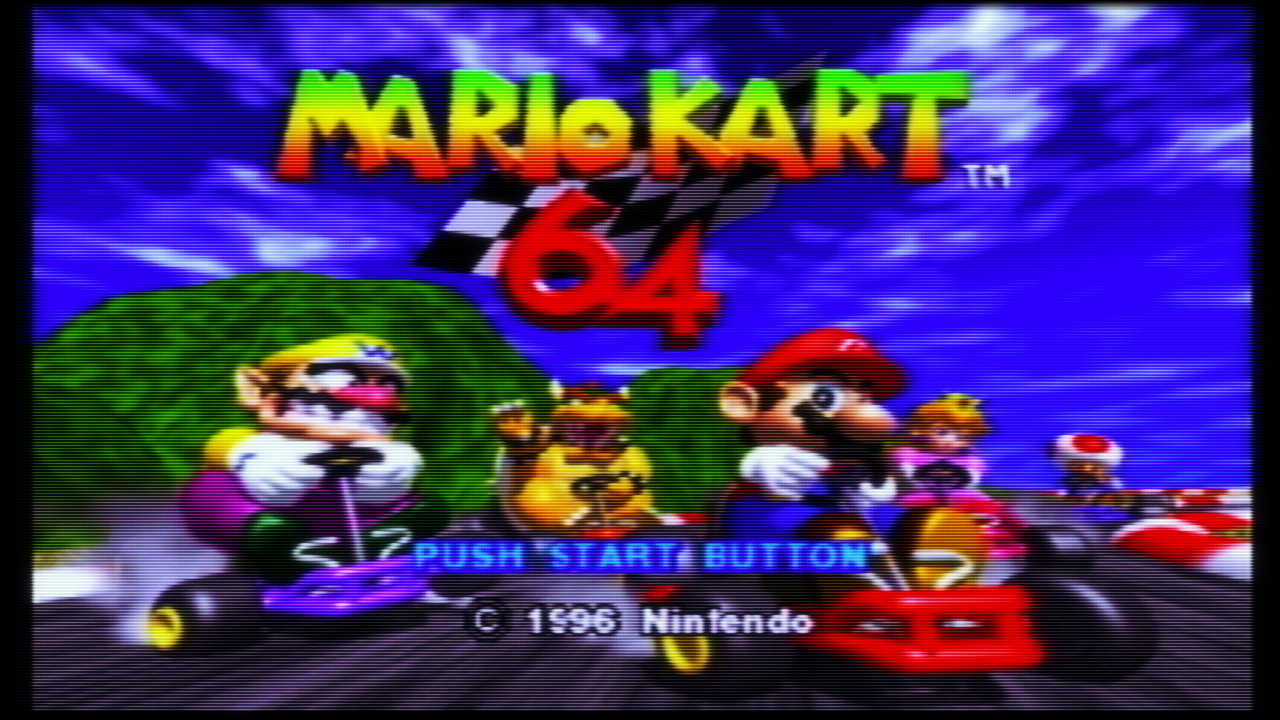
crt-royale+grade (color fix)

Mario Kart 64 (USA) OLD2

*Screenshots have been converted from Display profile to sRGB so it’s not 100% accurate on how I see colors here, but better than if I didn’t convert.

gamma_out = "2.200000"
gamma_in = "2.400000"
gamma_type = "1.000000"
g_vignette = "1.000000"
g_vstr = "40.000000"
g_vpower = "0.250000"
g_csize = "0.000000"
g_bsize = "600.000000"
LUT_Size1 = "32.000000"
LUT1_toggle = "0.000000"
LUT_Size2 = "64.000000"
LUT2_toggle = "0.000000"
wp_temperature = "9311.000000"
g_sat = "-0.020000"
g_vibr = "0.000000"
g_hpfix = "1.000000"
g_lum = "-0.050000"
g_cntrst = "0.000000"
g_mid = "0.500000"
g_lift = "0.040000"
blr = "0.000000"
blg = "0.000000"
blb = "0.000000"
wlr = "1.000000"
wlg = "0.850000"
wlb = "1.000000"
rg = "0.020000"
rb = "0.000000"
gr = "0.000000"
gb = "0.000000"
br = "0.000000"
bg = "0.050000"
3 Likes

@Dogway

Is there somewhere I can grab SLANG versions of your shaders (Grade, NTSC, signal bandwidth)? They seem kind of scattered across multiple forum posts and I want to make sure I’ve got the most current versions. Do you still need to do additional testing before adding these to the repo? In case you can’t tell, I’m eager to add these to my shader presets. :slight_smile:

2 Likes

Scroll up until you find a big box that says GitHub.

It’s his GitHub the things you seek are there, lol.

Sorry I just woke up. So I think I got jokes.

Edit: it’s post 21 here.

1 Like

got it, thanks!

Next question: How do I get these shaders to play nice with guest-dr-venom? Grade seems to break the entire chain when added as the first pass.

1 Like

Uhhh, I did ghetto things for this I just replaced d65-d50 with grade in the preset, as grade is handling white point anyway. (Seems to be working fine on my end.) Make sure to keep the alias# = WhitePointPass thing.

I don’t really see that there’d be an issue with how I’m doing it as d65-d50 only has two jobs in the chain off the top of my head. The first obviously being white point/temperature. The second being setting up avg_lum for the raster bloom (which is still working for me.)

2 Likes

Here I keep my shaders, mods and whatnot, and this is the thread EDIT: we are in the thread lol. The shader is pretty much finished, I recall wanting to refine the hotspot fix but got busy with other things. A lot of code in grade is not mine so it’s not up to me to include in official repo, although it would be very welcome.

2 Likes

That hotspot fix would be cool, as we could get rid of a setting potentially. Your reply cracked me up.

This really does need to be in the repo though.

2 Likes