
GitHub Repo
Lakka for Gaboze Pocaio (or any ILI9341/2)
Interested in running Lakka on your small screen TFT? Look No Further, and Follow Along!
Project Overview
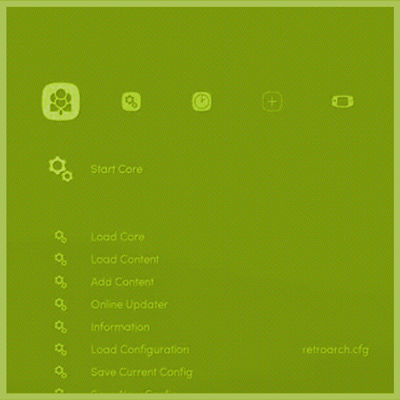
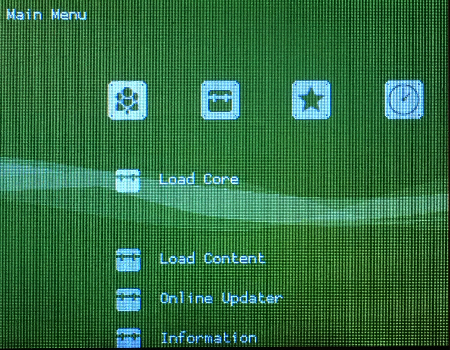
Lakka is a lightweight Linux distribution that transforms a small computer into a full blown retrogaming console. It is the official Linux distribution of RetroArch and the libretro ecosystem.
Enable wide audience to run Lakka on their Gaboze Pocaio (Game Boy Pocket All In One) Device.
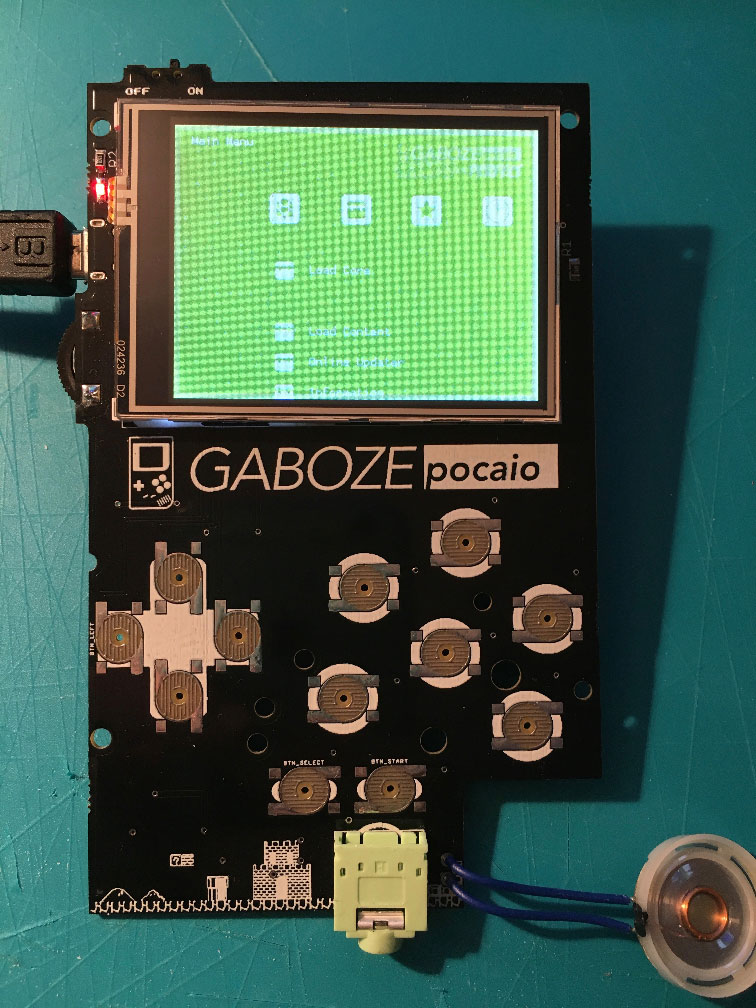
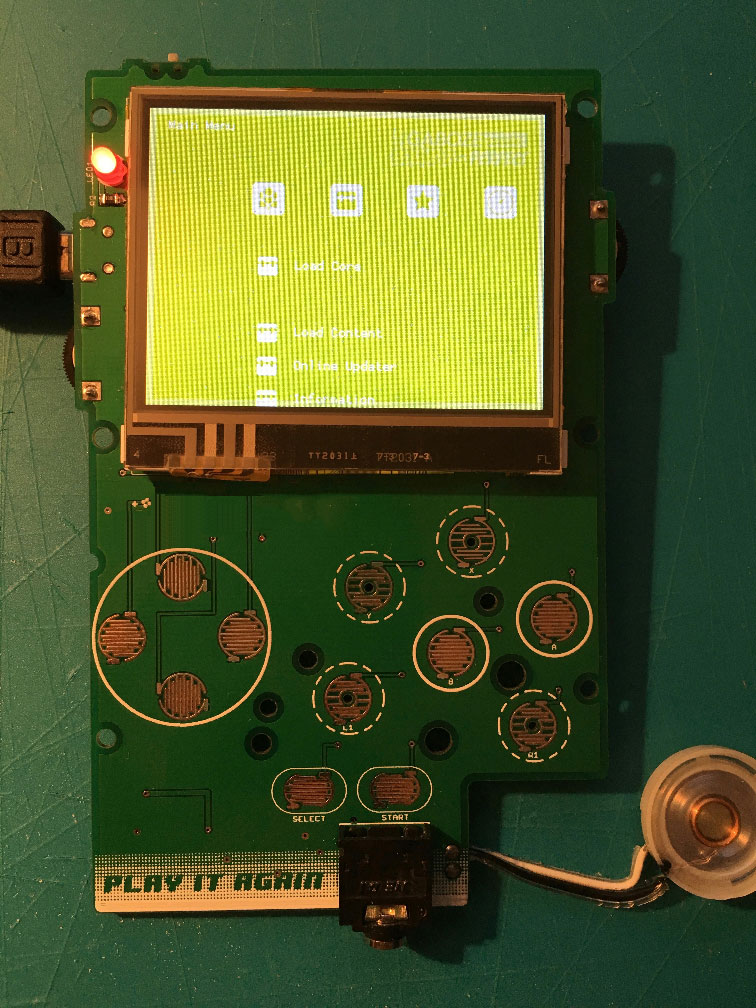
Gaboze Pocaio features both a 2.4" and the updated 2.6" screen (Gaboze Pocaio Plus)
Purpose of Document
Provision clear and concise reference material. Understandable by any level of experience.
Intended Audience
If you have built or purchased a Gaboze Pocaio, or have built a Gaboze Pocaio + and wish to run Lakka instead of RetroPie, then this guide is for you!
This guide also supports both ILI9341 (240x320) and ILI9342 (320x240) TFT driver boards from ILITEK
The ILI9341is typically available from 2.2" to 3.2" whereas the ILI9342 comes in less sizes ranging from 2.2" to 2.6"
Pre Flight
Things you need…
- [ ] A fresh copy of Lakka
- [ ] Raspberry Pi Model (Zero, Zero W, Zero WH)
- [ ] Micro SD Card (Even as small as 1GB)
- [ ] A host computer to burn your Micro SD
- [ ] Software to burn your Micro SD with (List of Options Below, in Ease of Use Order)
- [ ] Etcher
- [ ] Apple Pi Baker
- [ ] Pi Bakery
Why make me download Lakka from source?
Good question, here’s why!
Yes, there are other sources (GitHub, Google Code, Forums) where you can download pre configured variants of operating systems such as RetroPie and Lakka, but you don’t know what else the developers have put in there do you? Or even worse, the developers may have installed malicious things without knowing.
We have seen everything from Keystroke Loggers, Four Way WiFi Handshake, Reverse Tunnel, Snoop, Iptable Masquerading… …you get the point. And we want to keep you safe. Again, it’s about trust and reputation
You also get to learn a few things here and there 
Available for
But Not Limited To

First Boot
Vanilla Lakka
- [ ] HDMI Cable from Pi to Monitor
- [ ] USB Keyboard into USB on Pi
- [ ] Insert Imaged SD Card
- [ ] USB Cable to USB on Pi from Power Source (You can use any USB Port on)
 |
|---|
| You will see the Lakka Flower show up on your screen |
Automatic Resizing
Just wait, let Lakka reboot
On first boot, you will see a list of resizing and automatic commands being run. Don’t stress, this is normal.
 |
|---|
| Lakka will reboot on it’s own into the Graphical User Inteface (GUI) |
Initial Setup
Get your keyboard out
Navigate the GUI using your keyboard’s arrow keys, what follows is a paint by numbers (well follow the pictures) easy step by step initial setup
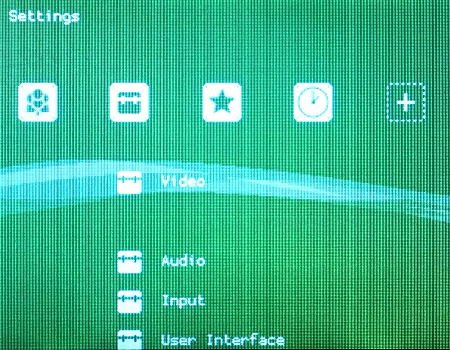
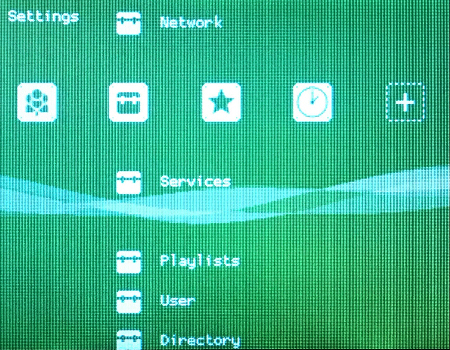
Settings
 |
|---|
| Navigate to Settings |
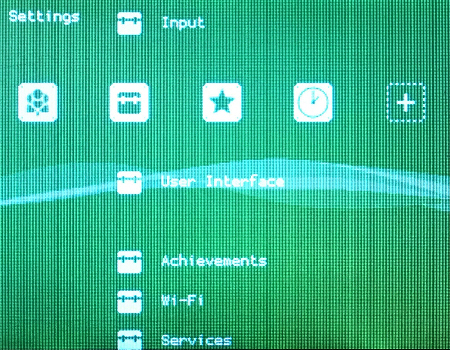
User Interface
 |
|---|
| Navigate to User Interface and hit ENTER |
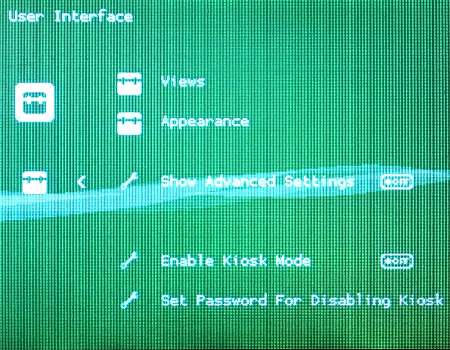
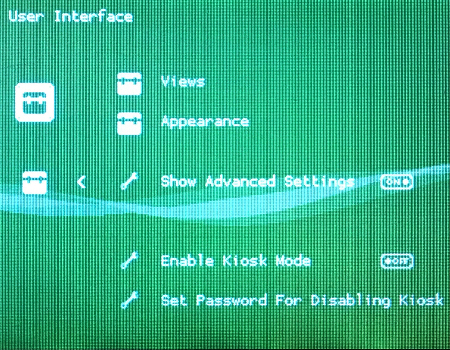
Advanced Settings
 |
 |
|---|---|
| Navigate to Show Advanced Settings | and hit RIGHT ARROW to enable |
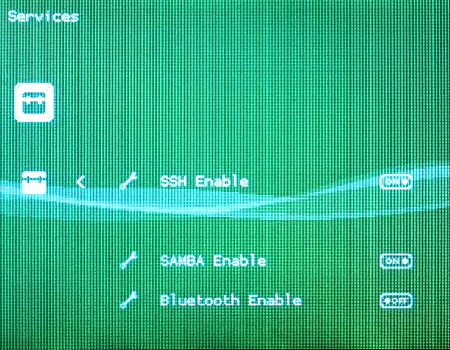
Enable Services
 |
 |
|---|---|
| Navigate to back to Services (use BACKSPACE to go back a level | using RIGHT ARROW turn on SSH Enable and SAMBA Enable |
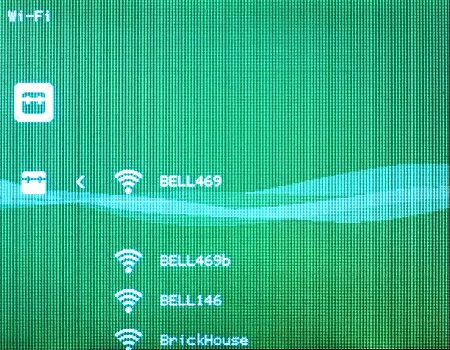
Wi-Fi
 |
|---|
| Navigate to Wi-Fi and hit ENTER |
| Select Your SSID and hit ENTER |
| Enter your password and hit ENTER |
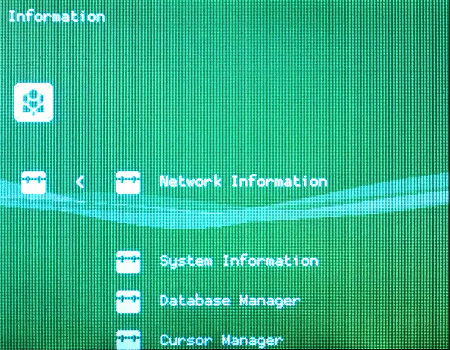
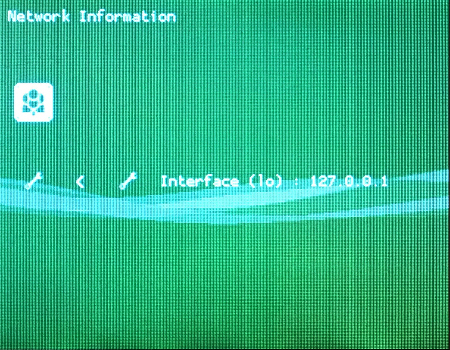
Network Information
 |
 |
 |
|---|---|---|
| Navigate back to the Main Menu and Select Configurations | Select Network Information | Any connections will be listed here |
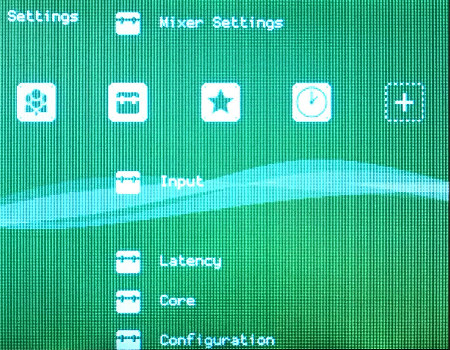
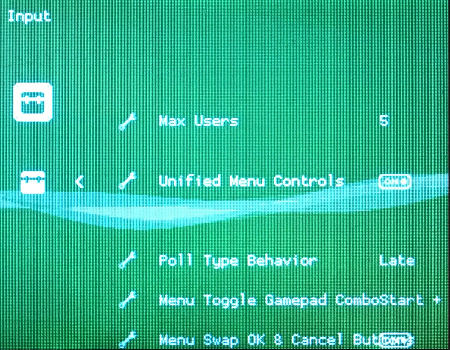
More Input
 |
 |
|---|---|
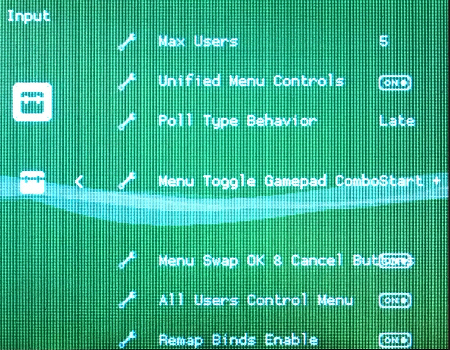
| Navigate to Settings and select Input | using RIGHT ARROW turn on Unified Menu Controls |
WARNING: After setting the Unified Menu Controls to ON you will need to use the Z and X keys on your keyboard for OK & Cancel.
 |
 |
|---|---|
| Navigate to Menu Toggle Gamepad Combo and select Start + Select (Used to exit games) | Navigate to Menu Swap OK & Cancel and select on (Z and X are now reversed) |
Saving the Configuration
All that effort, better believe you want to save it!
 |
 |
|---|---|
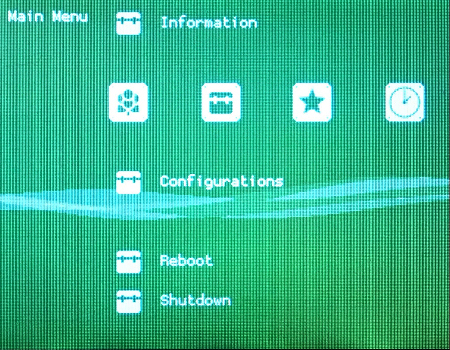
| Navigate to Main Menu and select Configurations | Select and confirm Save Current Configuration |
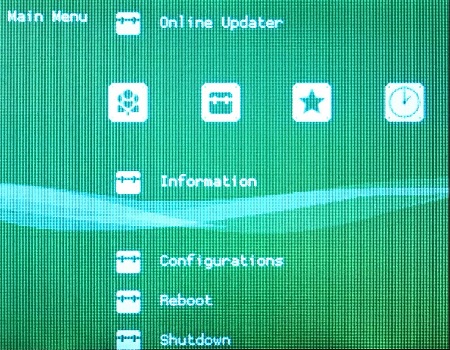
Shutdown or Reboot
 |
|---|
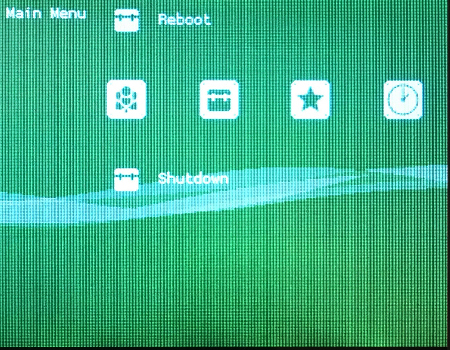
| Navigate to Main Menu and select Reboot or Shutdown This depends on how much energy you have left |
FTP (SCP)
Let’s get some files onto our SD Card
With the Raspberry Pi booted and running Lakka, we will now be moving some files onto the SD Card. If you are familiar command line Secure Copy Protocol (SCP) you can use that, any File Transfer Protocol (FTP) software works just as well and is typically easier.
What you need
- [ ] Computer from which you will be working
- [ ] Terminal (Shell) Software
- [ ] FTP Software (Recommended)
Assets from this repository
Open your Terminal App
Grab this repo
$ git clone https://github.com/32teeth/Lakka-For-Gaboze-Pocaio.git
Some files are for reference, some are required, but we figured we give you the whole picture of what will be going one next.
Move files to Lakka
By default, only the /Storage folder is writable on Lakka
First, you will need to know the IP address of your Raspberry Pi Here’s a polite reminder from before
|
|
|
|---|---|---|
| Navigate back to the Main Menu and Select Configurations | Select Network Information | Any connections will be listed here |
The user:password combo for all vanilla Lakka builds is root:root
You will be moving the retrogame and tft folders to Lakka /storage folder
SCP
Backgrounds
Background Images for Lakka
$ scp -r ~/[path_to_where_you_cloned_the_repo]/backgrounds root@[ip_of_your_raspberry_pi]:
Retro Game
Retrogame Service and Config
$ scp -r ~/[path_to_where_you_cloned_the_repo]/retrogame root@[ip_of_your_raspberry_pi]:
Displays
ILI9341/2 Display Drivers
$ scp -r ~/[path_to_where_you_cloned_the_repo]/tft root@[ip_of_your_raspberry_pi]:
Retroarch
Retroarch Configuration
$ scp ~/[path_to_where_you_cloned_the_repo]/retroarch/retroarch.cfg root@[ip_of_your_raspberry_pi]:.config/retroarch
FTP
Login into the IP address using username:root password:root
Drag and drop retrogame and tft folders into the /storage folder Drag and drop retroarch.cfg into /storage folder
SSH
Back to your computer
Now with all the above items in place, it’s time to edit a few files and create commands
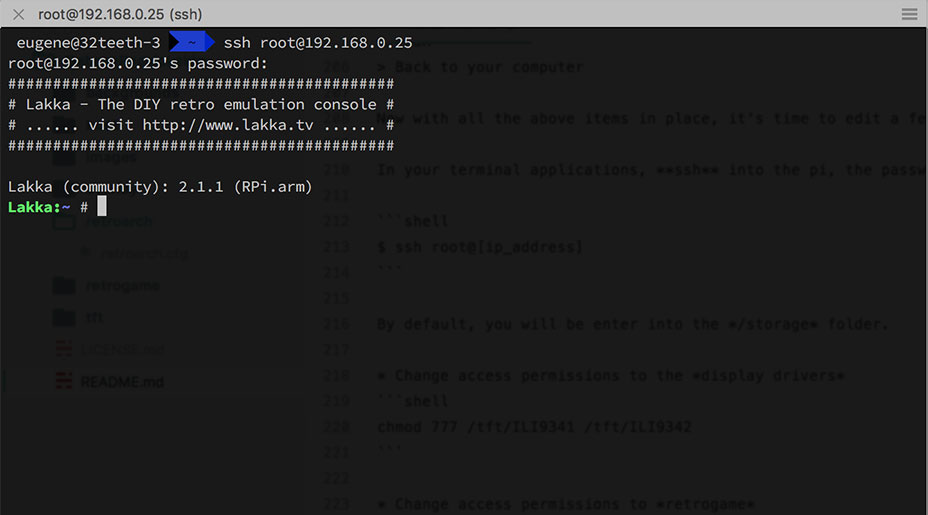
SSH into your Pi
In your terminal applications, SSH into the pi, the password is root
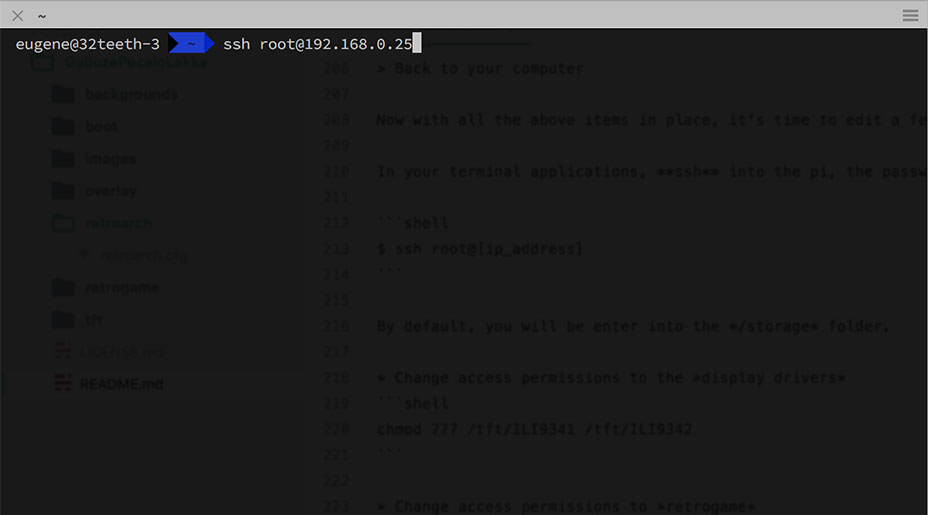
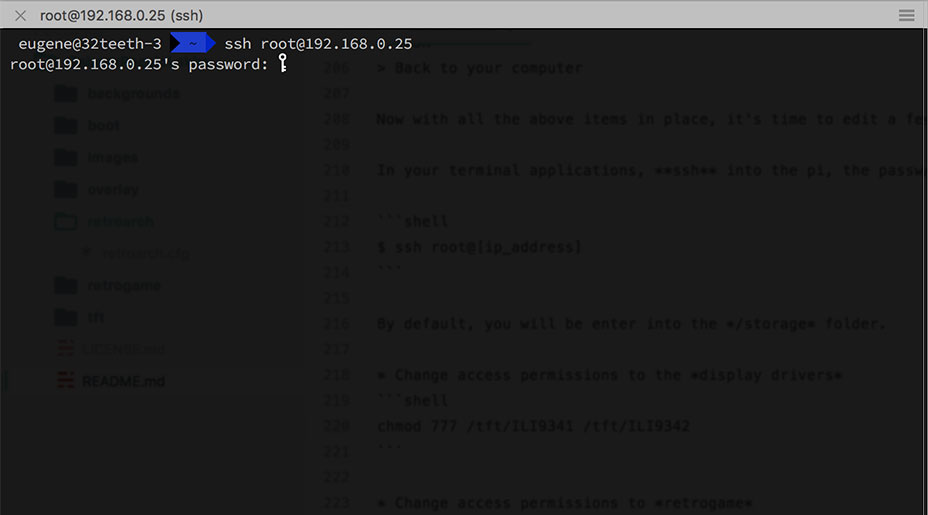
$ ssh root@[ip_address]
By default, you will be enter into the /storage folder.
Change access permissions to the display drivers
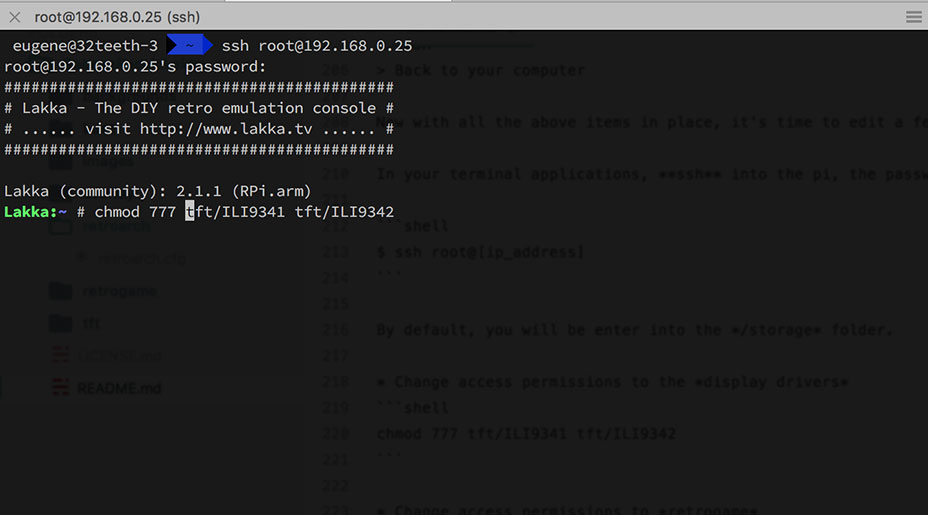
$ chmod 777 tft/ILI9341 tft/ILI9342
Change access permissions to retrogame
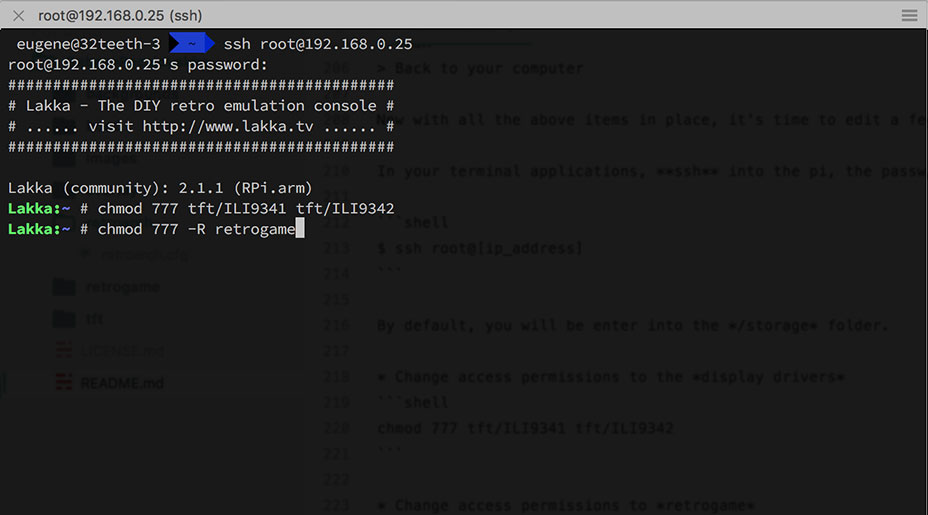
$ chmod 777 -R retrogame
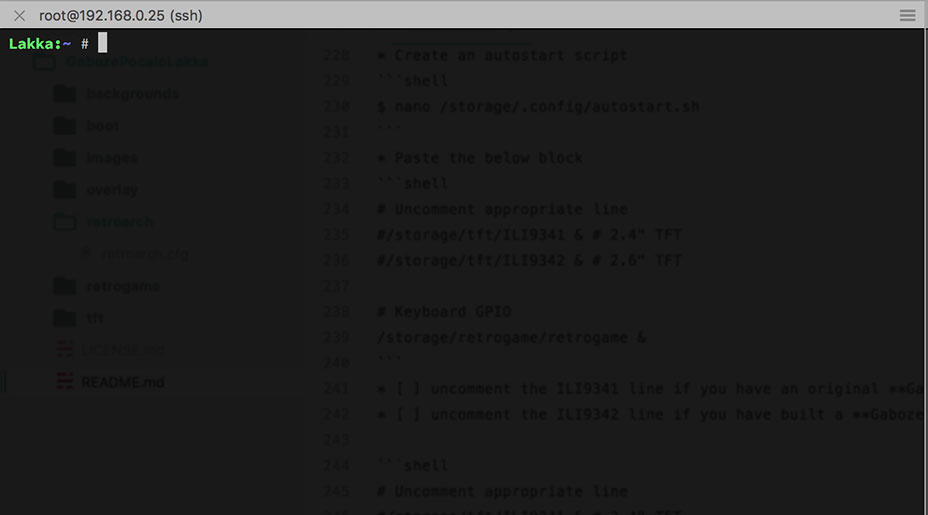
Create an autostart script
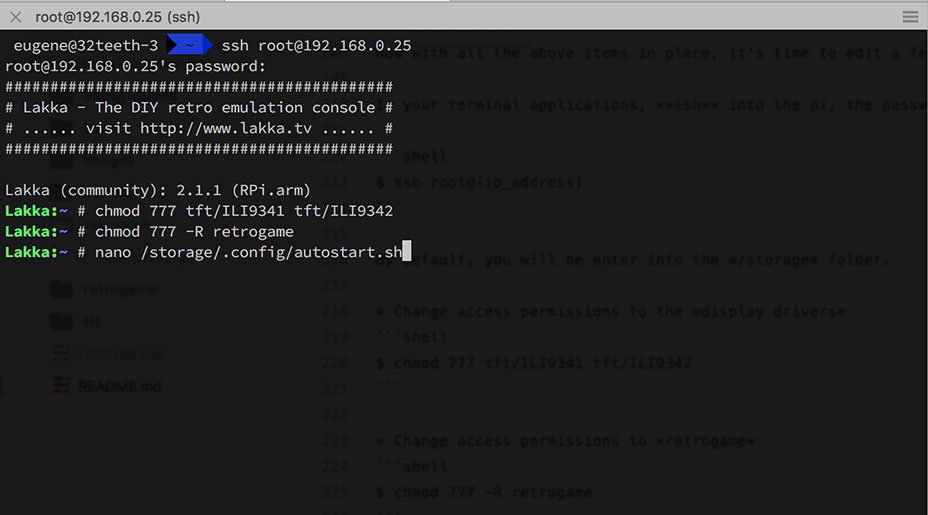
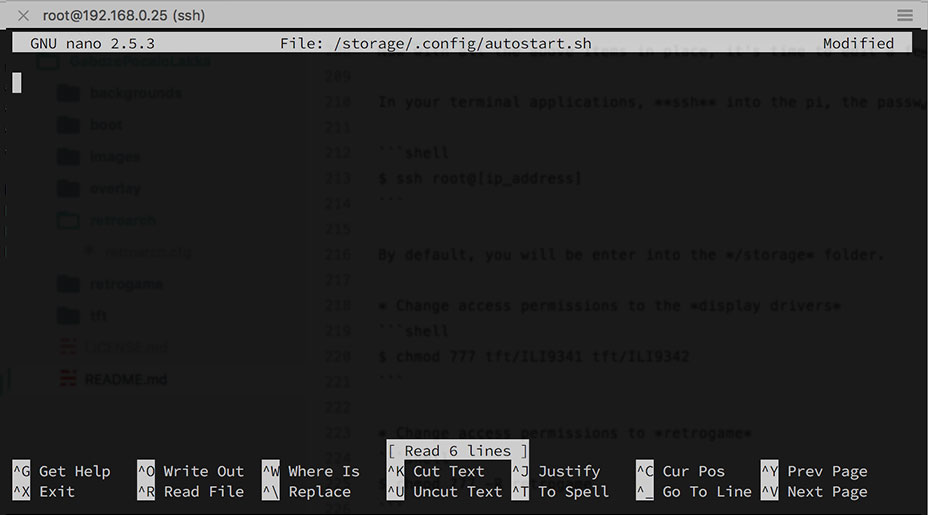
$ nano /storage/.config/autostart.sh
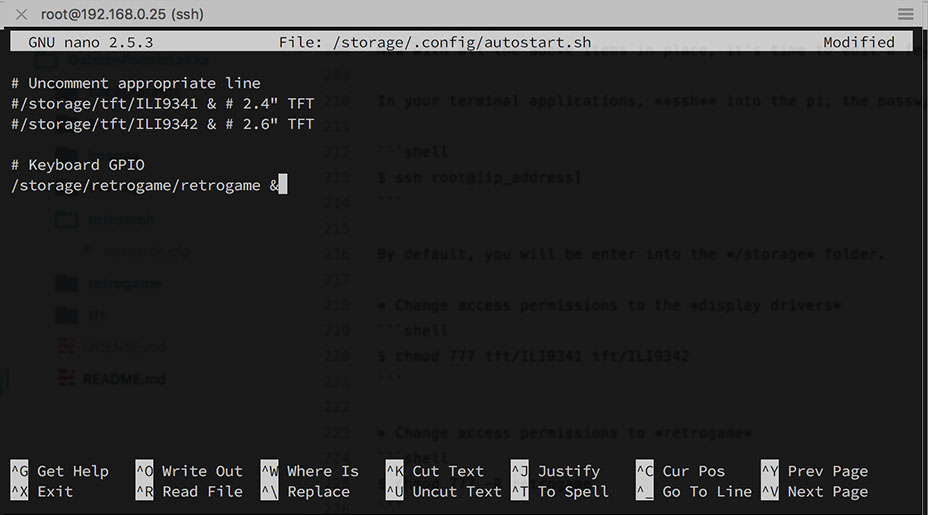
- Paste the below block
# Uncomment appropriate line
#/storage/tft/ILI9341 & # 2.4" TFT
#/storage/tft/ILI9342 & # 2.6" TFT

# Keyboard GPIO
/storage/retrogame/retrogame &
- [ ] uncomment the ILI9341 line if you have an original Gaboze Pocaio with a 2.4" screen
- [ ] uncomment the ILI9342 line if you have built a Gaboze Pocaio Plus with a 2.6" screen
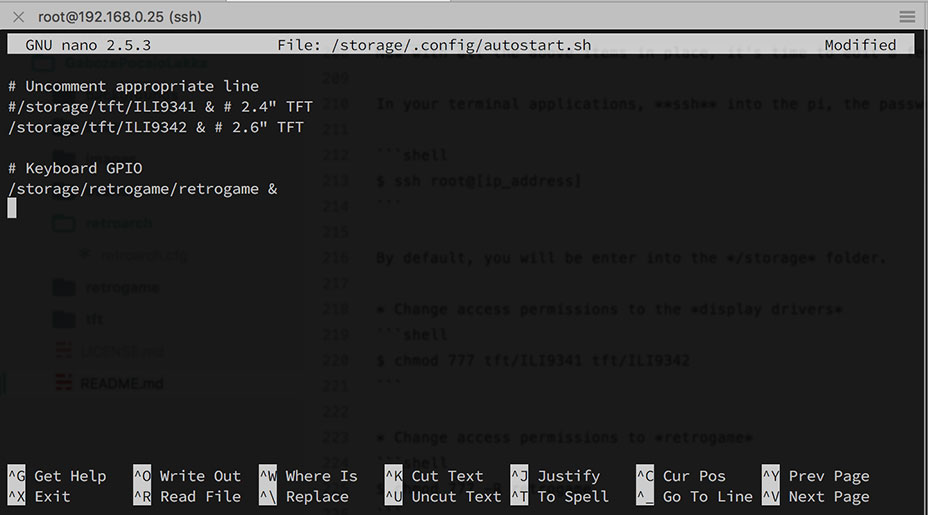
# Uncomment appropriate line
#/storage/tft/ILI9341 & # 2.4" TFT
/storage/tft/ILI9342 & # 2.6" TFT

# Keyboard GPIO
/storage/retrogame/retrogame &
Now hit ctrl+x and hit y
Update the Rules
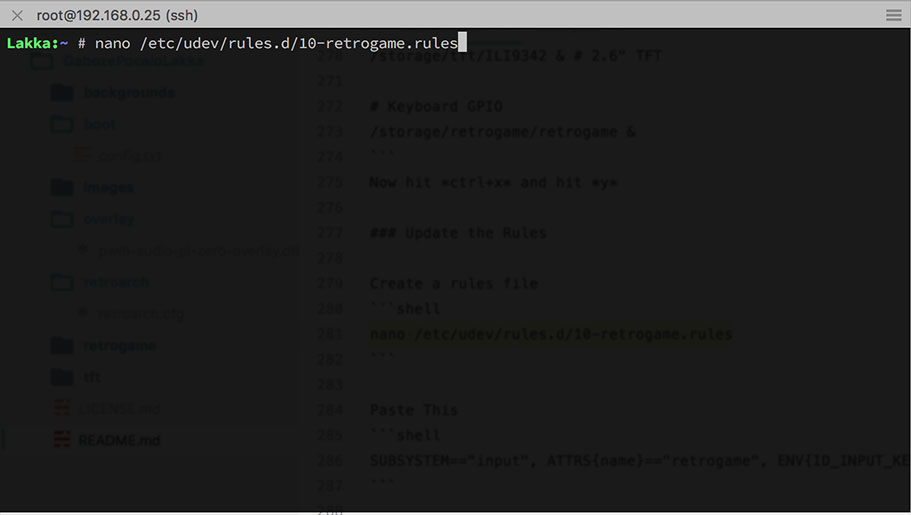
Create a rules file
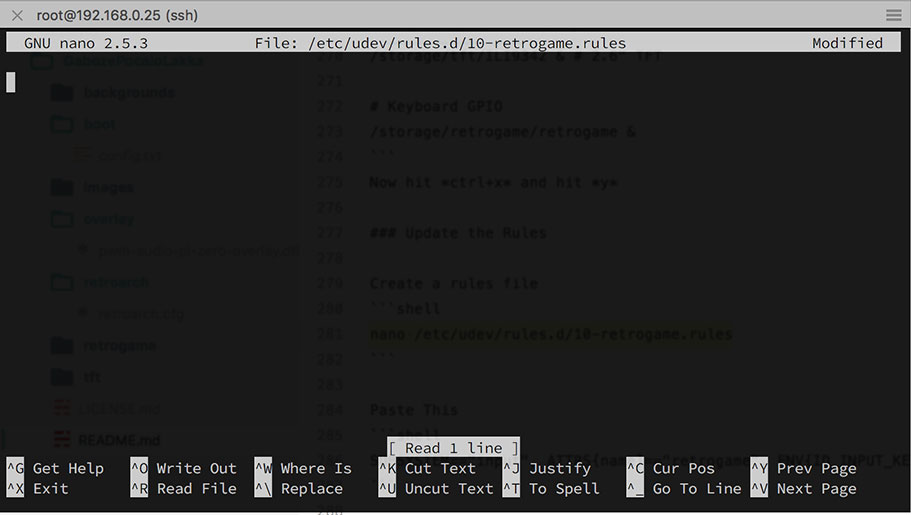
nano /etc/udev/rules.d/10-retrogame.rules
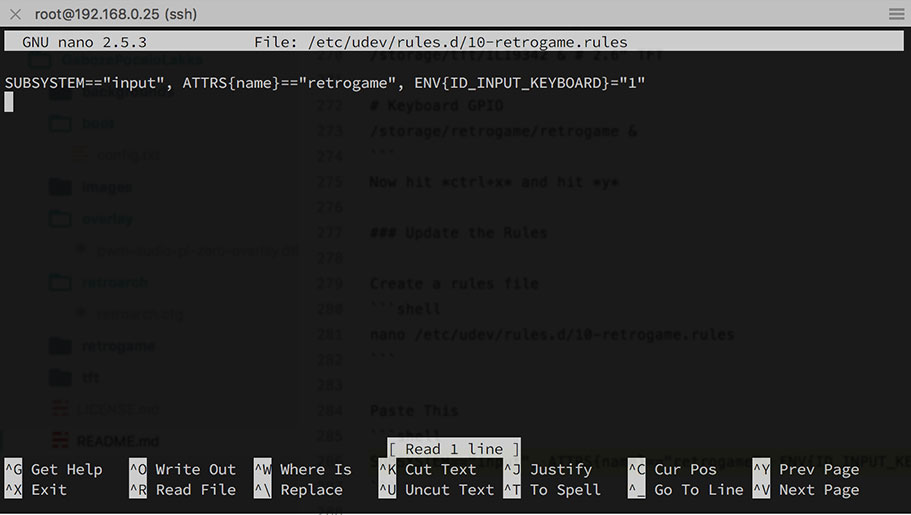
Paste This
SUBSYSTEM=="input", ATTRS{name}=="retrogame", ENV{ID_INPUT_KEYBOARD}="1"
Hit ctrl+x and hit y
Home Stretch
Time to shutdown and edit the main config
Your SSH session should still be open on your desktop.
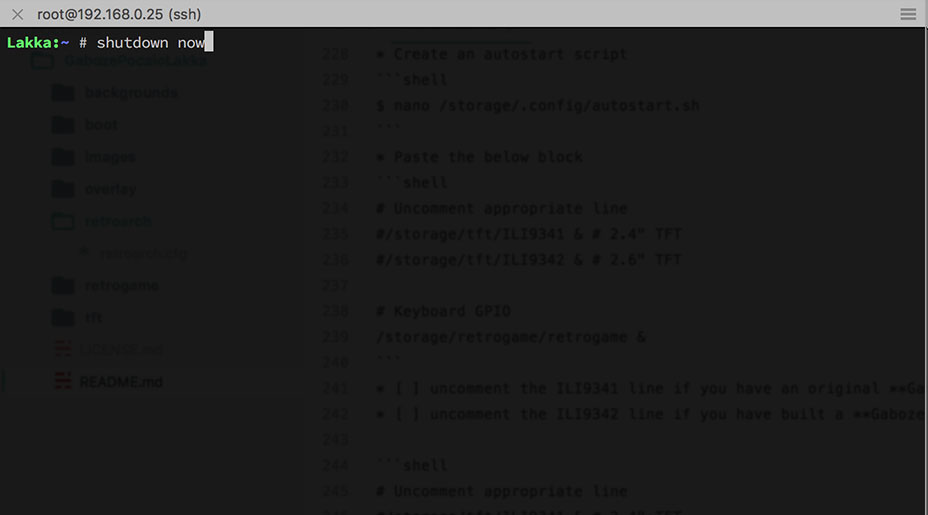
- Shutdown
$ shutdown now
Once the Raspberry Pi has fully shutdown (no activity light blinking)
- [ ] Pull out the SD Card
- [ ] Mount the SD Card on your computer
Once the SD Card mounts onto your computer you will see a directory called overlays
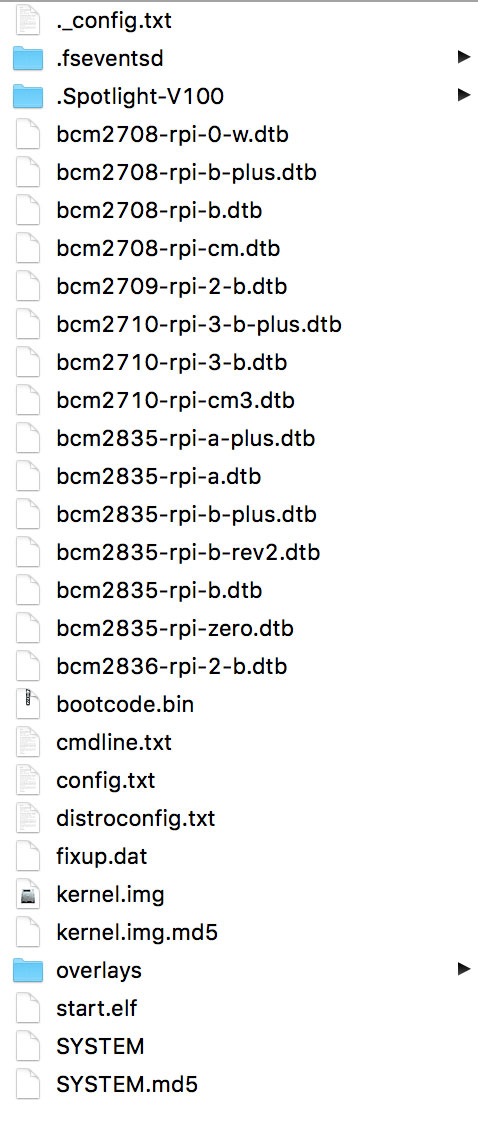
Drag and drop the file named pwm-audio-pi-zero-overlay.dtbo into that directory (it’s in the repo you downloaded) Once that is done, find the file named config.txt located in the root of the SD Card Open that file with your favorite text editor and after the lines
################################################################################
# End of default configuration
################################################################################
Paste this
################################################################################
# 2.6 ILI9342
# 2.4 ILI9341
################################################################################
hdmi_group=2
hdmi_mode=87
hdmi_cvt=320 240 60 1 0 0 0
hdmi_force_hotplug=1
overscan_scale=1

################################################################################
# Audio
################################################################################
dtparam=audio=on
dtoverlay=pwm-audio-pi-zero-overlay
- Eject the SD Card
- Put it back in the Pi
- Boot the Pi
- Enjoy the fruits of your labor!