CRT-Lottes-multipass with halation / diffusion

After a lot of testing and tweaking I’m really starting to like CRT-Lottes-Multipass for my everyday use. Coming from easymode-halation I do miss the halation/diffusion in CRT-Lottes though. The “bloom” setting seems less convincing for me.

Would it be possible to add the halation/diffusion effect from easymode-halation to CRT-lottes-multipass? I.e. is it technically possible, and if yes would it look right (like in easymode) or screw things up?

You can’t just drop it right in, no. You would need to edit the Lottes shader to reference the earlier passes and merge their results in with its own results, which is made more complicated by the multipass nature of the Lottes shader.

Thanks for the reply, I figured it wouldn’t be so easy.

I really have no idea how much work would be involved, but does it possibly tickle your interest enough to take a stab at it?

Personality I think this would create one of the most convincing CRT shaders:

  • believable mask simulation on 1080p
  • realistic scanlines
  • realistic glow
1 Like

I just fixed the paths on the crt-lottes-multipass-interlaced-glow preset, which might do what you’re wanting.

I’m using GL/glsl, the interlaced glow version is only for vulkan / d3d right?

I changed to vulkan and loaded up the slang shader from git. But this is a very different beast from CRT-lottes. At default setting I find it very unrealistic, sorry. (I have both trinitron / Aperture grill and real slotmask crt’s running next to my LCD setup).

I tried some initial tweaks, but it’s nowhere near CRT-Lottes-multipass.

I can’t even just get a plain 1:1 pixel display without distortion, so that I can start tweaking from a neutral base. Is that even possible with this shader? I tried by setting most things at zero, but even then it’s overbright with a lot of AA.

I do like the possibility of the phosphor trail through, so hopefully you can advise on which settings are needed to start from neutral unaltered output.

Edit: I guess I need to change a number of shader passes from lineair to nearest to get it to be more comparable to CRT-lottes in the AA department.

Is this because the “hardPix” setting from Lottes-multipass was left out?

@hunterk thanks for pointing me to that shader. I’ve been further experimenting to try and start from a clean slate with all the (many!) parameters. I turned off the linear filtering in the shader passes and set most parameters to zero. Now I’ve arrived at an almost unfiltered output, such that the process of setting each parameter can begin again.

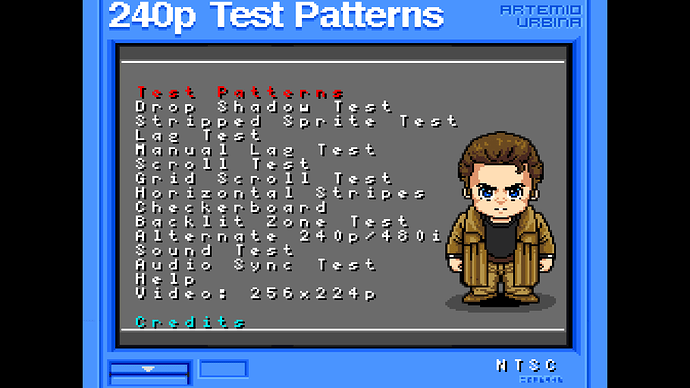
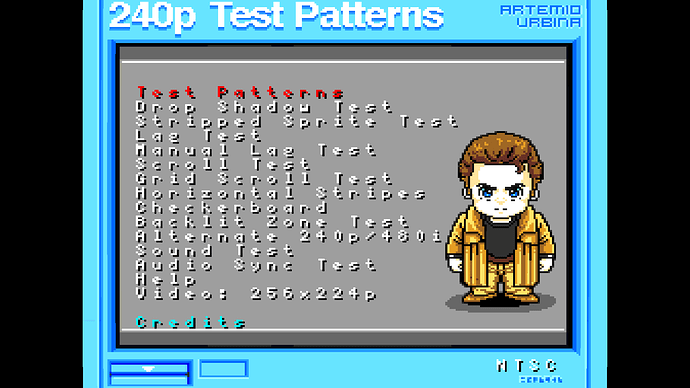
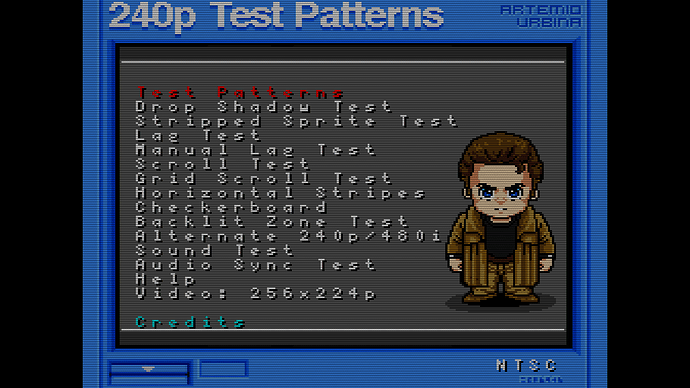
But there’s one thing I can’t get done. For some reason I can’t get the brightness down to normal levels. See below two pictures, first unfiltered, then the interlaced glow. See how the brightness is quite off? Could you possibly help out, what do I need to change to get the brightness to a normal default level?

Or is there possibly a parameter off in the shader code?

That usually has to do with moving it into and out of linear color space. So, if an srgb_framebuffer setting got out of whack somewhere in the preset, or if something is getting added together redundantly, that could happen.

Just as a note, most of those parameters are leftovers from the royale pass that’s only used for linearizing and handling interlaced content. They won’t actually do anything useful here. I believe they should be in the format Category - Setting, e.g. Bloom - Amount. So, no need to worry yourself with those, which should account for more than half of them.

Thanks, I’m getting somewhere now :slightly_smiling_face:

With some of the bells and whistles configured, I’m now running into the issue that the picture is slightly dim, see picture below. Would it be possible to add the “brightness boost” parameter from crt-lottes-multipass back into this version?

Edit: I see there’s some slight artifacts showing up in the attached screenshot, I guess the forum software is doing some compression on attached pictures? The original looks more clean.

Try replacing the last pass with this:

#version 450

layout(push_constant) uniform Push
{
	vec4 OutputSize;
	vec4 OriginalSize;
	vec4 SourceSize;
	float hardScan;
	float warpX;
	float warpY;
	float maskDark;
	float maskLight;
	float shadowMask;
	float bloomAmount;
	float hardBloomScan;
	float shape;
	float glowFactor;
	float gamma;
	float ntsc;
	float brightBoost;
} params;

#pragma parameter hardScan "hardScan" -8.0 -20.0 0.0 1.0
#pragma parameter warpX "warpX" 0.031 0.0 0.125 0.01
#pragma parameter warpY "warpY" 0.041 0.0 0.125 0.01
#pragma parameter maskDark "maskDark" 0.5 0.0 2.0 0.1
#pragma parameter maskLight "maskLight" 1.5 0.0 2.0 0.1
#pragma parameter shadowMask "shadowMask" 1.0 0.0 4.0 1.0
#pragma parameter hardBloomScan "bloom-y soft" -2.0 -4.0 -1.0 0.1
#pragma parameter bloomAmount "bloom amount" 0.15 0.0 1.0 0.05
#pragma parameter shape "filter kernel shape" 2.0 0.0 10.0 0.05
#pragma parameter glowFactor "Glow Strength" 0.15 0.0 1.0 0.01
#pragma parameter gamma "Gamma Adjustment" 1.5 0.0 5.0 0.05
#pragma parameter ntsc "NTSC Colors" 0.0 0.0 1.0 1.0
#pragma parameter brightBoost "brightness boost" 1.0 0.0 2.0 0.05

#define DO_BLOOM
#include "../../../../misc/colorspace-tools.h"

layout(std140, set = 0, binding = 0) uniform UBO
{
    mat4 MVP;
} global;

#pragma stage vertex
layout(location = 0) in vec4 Position;
layout(location = 1) in vec2 TexCoord;
layout(location = 0) out vec2 vTexCoord;

void main()
{
    gl_Position = global.MVP * Position;
    vTexCoord = TexCoord;
}

// PUBLIC DOMAIN CRT STYLED SCAN-LINE SHADER
//
//   by Timothy Lottes
//
// This is more along the style of a really good CGA arcade monitor.
// With RGB inputs instead of NTSC.
// The shadow mask example has the mask rotated 90 degrees for less chromatic aberration.
//
// Left it unoptimized to show the theory behind the algorithm.
//
// It is an example what I personally would want as a display option for pixel art games.
// Please take and use, change, or whatever.

#pragma stage fragment
layout(location = 0) in vec2 vTexCoord;
layout(location = 1) in vec2 FragCoord;
layout(location = 0) out vec4 FragColor;
layout(set = 0, binding = 2) uniform sampler2D horz3minus1;
layout(set = 0, binding = 3) uniform sampler2D horz3plus1;
layout(set = 0, binding = 4) uniform sampler2D horz5minus2;
layout(set = 0, binding = 5) uniform sampler2D horz5;
layout(set = 0, binding = 6) uniform sampler2D horz5plus2;
layout(set = 0, binding = 7) uniform sampler2D horz7minus1;
layout(set = 0, binding = 8) uniform sampler2D horz7;
layout(set = 0, binding = 9) uniform sampler2D horz7plus1;
layout(set = 0, binding = 10) uniform sampler2D HALATION_BLUR;

// Linear to sRGB.
// Assuming using sRGB typed textures this should not be needed.
float ToSrgb1(float c)
{
    return(c < 0.0031308 ? c*12.92 : 1.055*pow(c, 0.41666) - 0.055);
}

vec3 ToSrgb(vec3 c)
{
    return vec3(ToSrgb1(c.r), ToSrgb1(c.g), ToSrgb1(c.b));
}
  
// Distance in emulated pixels to nearest texel.
vec2 Dist(vec2 pos)
{
    pos = pos*params.SourceSize.xy;
    
    return -((pos - floor(pos)) - vec2(0.5));
}
    
// 1D Gaussian.
float Gaus(float pos, float scale)
{
    return exp2(scale*pow(abs(pos), params.shape));
}
  
// Return scanline weight.
float Scan(vec2 pos, float off)
{
    float dst = Dist(pos).y;

    return Gaus(dst + off, params.hardScan);
}
  
// Return scanline weight for bloom.
float BloomScan(vec2 pos, float off)
{
    float dst = Dist(pos).y;
    
    return Gaus(dst + off, params.hardBloomScan);
}
  
// Allow nearest three lines to effect pixel.
vec3 Tri(vec2 pos)
{
    vec3 a = texture(horz3minus1, pos).rgb;//Horz3(pos,-1.0);
    vec3 b = texture(horz5,       pos).rgb;//Horz5(pos, 0.0);
    vec3 c = texture(horz3plus1,  pos).rgb;//Horz3(pos, 1.0);

    float wa = Scan(pos, -1.0);
    float wb = Scan(pos,  0.0);
    float wc = Scan(pos,  1.0);
 
    return a*wa+b*wb+c*wc;
}
  
// Small bloom.
vec3 Bloom(vec2 pos)
{
    vec3 a = texture(horz5minus2, pos).rgb;//Horz5(pos,-2.0);
    vec3 b = texture(horz7minus1, pos).rgb;//Horz7(pos,-1.0);
    vec3 c = texture(horz7,       pos).rgb;//Horz7(pos, 0.0);
    vec3 d = texture(horz7plus1,  pos).rgb;//Horz7(pos, 1.0);
    vec3 e = texture(horz5plus2,  pos).rgb;//Horz5(pos, 2.0);
    
    float wa = BloomScan(pos, -2.0);
    float wb = BloomScan(pos, -1.0);
    float wc = BloomScan(pos,  0.0);
    float wd = BloomScan(pos,  1.0);
    float we = BloomScan(pos,  2.0);
    
    return a*wa+b*wb+c*wc+d*wd+e*we;
}
  
// Distortion of scanlines, and end of screen alpha.
vec2 Warp(vec2 pos)
{
    pos  = pos*2.0-1.0;    
    pos *= vec2(1.0 + (pos.y*pos.y)*params.warpX, 1.0 + (pos.x*pos.x)*params.warpY);
    
    return pos*0.5 + 0.5;
}
  
// Shadow mask.
vec3 Mask(vec2 pos)
{
    vec3 mask = vec3(params.maskDark, params.maskDark, params.maskDark);
  
    // Very compressed TV style shadow mask.
    if (params.shadowMask == 1.0) 
    {
        float line = params.maskLight;
        float odd = 0.0;
        
        if (fract(pos.x*0.166666666) < 0.5) odd = 1.0;
        if (fract((pos.y + odd) * 0.5) < 0.5) line = params.maskDark;  
        
        pos.x = fract(pos.x*0.333333333);

        if      (pos.x < 0.333) mask.r = params.maskLight;
        else if (pos.x < 0.666) mask.g = params.maskLight;
        else                    mask.b = params.maskLight;
        mask*=line;  
    } 

    // Aperture-grille.
    else if (params.shadowMask == 2.0) 
    {
        pos.x = fract(pos.x*0.333333333);

        if      (pos.x < 0.333) mask.r = params.maskLight;
        else if (pos.x < 0.666) mask.g = params.maskLight;
        else                    mask.b = params.maskLight;
    } 

    // Stretched VGA style shadow mask (same as prior shaders).
    else if (params.shadowMask == 3.0) 
    {
        pos.x += pos.y*3.0;
        pos.x  = fract(pos.x*0.166666666);

        if      (pos.x < 0.333) mask.r = params.maskLight;
        else if (pos.x < 0.666) mask.g = params.maskLight;
        else                    mask.b = params.maskLight;
    }

    // VGA style shadow mask.
    else if (params.shadowMask == 4.0) 
    {
        pos.xy  = floor(pos.xy*vec2(1.0, 0.5));
        pos.x  += pos.y*3.0;
        pos.x   = fract(pos.x*0.166666666);

        if      (pos.x < 0.333) mask.r = params.maskLight;
        else if (pos.x < 0.666) mask.g = params.maskLight;
        else                    mask.b = params.maskLight;
    }

    return mask;
}

void main()
{
    vec2 pos = Warp(vTexCoord);
    vec3 outColor = Tri(pos);

#ifdef DO_BLOOM
    //Add Bloom
    outColor.rgb += Bloom(pos)*params.bloomAmount;
    outColor.rgb *= params.brightBoost;
#endif

    if (params.shadowMask > 0.0)
        outColor.rgb *= Mask(vTexCoord.xy / params.OutputSize.zw * 1.000001);
		
	if (params.glowFactor > 0.0)
		outColor = mix(outColor, texture(HALATION_BLUR, pos.xy).rgb, params.glowFactor);
    if (params.ntsc > 0.0)
    FragColor = vec4(NTSCtoSRGB(pow(ToSrgb(outColor.rgb), vec3(1.0 / params.gamma))), 1.0);
    else
    FragColor = vec4(pow(ToSrgb(outColor.rgb), vec3(1.0 / params.gamma)), 1.0);
}

Thanks. The brightness setting works.

Unfortunately after some testing with the 240p test suite in SNES, it becomes apparerent there’s something really off with the gamma.

Could you possibly run the 240p test suite, then the “test patterns” -> “pluge” . Here you see 4 grey/white squares in the middle, and left and right it should show three bars, of which one grey and two in blue. You can press “s” on the keyboard (or the button on your pad), to switch the color of these bars between red, green and blue.

You’ll notice that these bars don’t show at all, unless you set gamma correction to a very high value, which washes out any normal graphics.

I noticed there are three gamma settings in this shader:

  • Simulated CRT Gamma
  • Your Display Gamma
  • Gamma Correction

Of these three “Your Display Gamma” has no effect. Is this meant to be?

Currently I can only have the bars in the pluge test showing up when I set Simulated CRT gamma to 2.5 (default) and Gamma Correction to 1.5. But as said this leads to a wrong gamma overall.

These are issues not apparent in the default CRT-Lottes-Multipass, the pluge test etc can be finetuned to show correct colors without it needing extreme gamma adjustment.

Unless you have an idea whether there’s something weird with having these three gamma settings / something being off with one of them, I’m not sure whether it’s worth pursueing further with this shader.

I do like the phospor glow trail a lot though, another route would be to add that to the CRT-Lottes-multipass, is that a possibility?

Edit: that could be to the crt-lottes single pass version if that would be more straightforward, as I see that the single pass vulkan version seems to run without slowdown on my setup.

@hunterk I added the phosphor glow trail to the lottes-crt-multipass like this:

shaders = 6

shader0 = shaders/glow-trails/glow-trails0.slang filter_linear0 = false scale_type0 = source scale0 = 1.0

shader1 = “…/blurs/blur9fast-vertical.slang” filter_linear1 = “true” scale_type1 = “source” scale1 = “1.0” srgb_framebuffer1 = “true”

shader2 = “…/blurs/blur9fast-horizontal.slang” alias2 = “TRAIL_BLUR” filter_linear2 = “true” scale_type2 = “source” scale2 = “1.0” srgb_framebuffer2 = “true”

shader3 = shaders/glow-trails/glow-trails1.slang

shader4 = shaders/crt-lottes-multipass/bloompass.slang alias0 = BloomPass srgb_framebuffer0 = true

shader5 = shaders/crt-lottes-multipass/scanpass.slang

parameters = “mixfactor;threshold;trail_bright;glowFactor” mixfactor = “0.75” threshold = “0.90” trail_bright = “0.07” glowFactor = “0.10”

Seems to work pretty well :smiley:

Were you the one that created the glow-trail? Could you possibly give some background on the parameters?

  • Motionblur Fadeout
  • Brightness Threshold
  • Phos. Trail Brightness

I’m especially interested in the “brightness threshold”. Also, it looks like the phosphor fade is always in shades of white to black, no color fade. E.g. for a single red object on a black background the trail doesn’t seem to fade from red, but more from white. Is that intentional or a technical limitation?

Hey, glad you like the glow trail shader. Most people don’t care for it, but I think it’s one of the CRT effects that gets most neglected. I made it white because in my observations there wasn’t really much color to the fadeout on my CRTs. Scientifically, it should probably(?) be orange/red, as the green and blue phosphors decay almost instantly (on the order of milliseconds), while the red phosphors hang around for much, much longer (something like up to 2 full seconds). IIRC, this is why the Super Scope’s vision is tied to red pixels from the PPU; it’s a more forgiving target. However, when I tried basing it on just red, it looked weird. I may try to revisit it at some point, though.

The brightness threshold has to do with when things will actually leave trails. Without the cutoff, everything gets smeary.

For the pluge thing, there’s a lot of room in that shader for stuff to get out of whack, as it was my first attempt at multipassing crt-lottes. My second attempt (the 2-pass one) is a little slower but more exact to the single-pass version, as you’ve found.

So, in your preset there, are the glow trails actually visible? I would have expected not, since the lottes-multipass passes both reference the “Original” frame instead of the previous pass (i.e. “Source”).

I’m with you 100% on the glow trail.

In my preset the glow trails are visible, but I noticed they are only visible when “bloom” is set to a positive value. With bloom at “0.00” the trails are not visible. Is it meant to be that way?

I think it would be great if we could work towards a version that is more accurate. Is there a possibility to make the trail settings (fadeout, threshold, brightness) available for Red, Green and Blue? That way it would be possible to more quickly test and find accurate values versus real CRT.

Edit: I’ve just been testing a bit more, and I overall like the picture quality better without using any bloom. So hopefully it’s possible to create a version with glow trails that works when bloom is set to 0.00.

@hunterk I just tried the Vulkan single pass CRT-Lottes and it works just fine on my setup (opposed to the GL version which slows down very much).

Would adding the glow trails to the single pass CRT-Lottes be more straightforward compared to the multi-pass?

Sorry to keep bugging you with this :blush:

hey, no worries. I haven’t had a ton of time to work on it, but I did fix up some slang multipass presets (including a ‘glow’ version that just uses easymode’s glow passes, and an interlaced/glow version that has the glow trails, too) that seem to be more gamma-exact (the pluge bars are roughly as visible as single-pass lottes). I haven’t pushed them up to the repo yet, though. If you’re not using the old multipass, I may just get rid of it entirely and replace it with the new presets.

Ah that’s great. I’m currently using the single pass, as I find it to be the best looking.

Will be nice to try out the new stuff!

Btw, what do you exactly mean with “pluge bars”?

I was referring to these:

Ah of course, now where’s the blush icon :blush:

Are you updating the two-pass or the multipass (or both)? As one other issue I had with the old multipass, was that the AA wasn’t as crisp as in the Lottes single pass (or the two-pass even) with using the hardPix setting. Is that okay too now in the multipass?

I’m just updating the 2-pass version. It looks the same as the singlepass AFAICT.