New CRT Shader [Slang]

Hey there folks!

I started working on my own CRT shader by accident. I had been making a few slight modifications to Easymode’s CRT shader to make my gaming experience a little better, but with the whole Covid-19 thing, and a lot of time on my hand, I ended up with something that didn’t have much left of the original. It took me about three weeks to get to this point, and I think it’s about time I create my own topic in order to gather opinions, so here are some of the key features that I ended up adding, and some screenshots to illustrate them:

Halation:

The radius setting is adjustable, and so is the number of samples:

Freely adjustable R G B color levels

RGB and Magenta Green Phosphors (with invertable phosphor order!)

Adjustable shift between odd and even scanlines

Color Bleeding (intense colors will bleed into adjacent phosphors)

And many others

Here are a few more shots with default parameters, followed by shots with custom parameters. All of it is adjustable :slight_smile:!

I will post the shader in the first comment. Feel tree to tell me your thoughts! :heart:

8 Likes

The code:

#version 450

layout(push_constant) uniform Push
{
	uint FrameCount;
	float HALATION_INTENSITY;
	float HALATION_RADIUS;
	float HALATION_SAMPLES;
	float HALATION_RANDOM;
	float HALATION_DEBUG;
    float SHARPNESS_H;
    float SHARPNESS_V;
	float BLUR_H;
	float BLUR_V;
    float GAMMA_INPUT;
    float GAMMA_OUTPUT;
	float GAMMA_SAMP;
	float RED_LVL;
	float GREEN_LVL;
	float BLUE_LVL;
    float BRIGHTNESS_LVL;
	float CONTRAST_LVL;
	float SATURATION_LVL;
	float COLOR_BLEED;
	float UNPURE_BLACKS;
	float PHOSPHOR_SIZE;
	float SPLIT;
	float PHOSPHORS;
	float TRIAD_INV;
	float MASK;
	float SCANLINES;
	float SCAN_THICK;
	float FIELD_SHIFT;
} params;

#pragma parameter HALATION_INTENSITY "Halation Intensity" 0.15 0.0 2.0 0.05
#pragma parameter HALATION_RADIUS "Halation Radius" 7.0 0.0 50.0 1.0
#pragma parameter HALATION_SAMPLES "Number of Halation Samples" 28.0 4.0 800.0 4.0
#pragma parameter HALATION_RANDOM "Halation Randomness" 1.0 0.0 1.0 1.0
#pragma parameter HALATION_DEBUG "Halation Output" 0.0 0.0 1.0 1.0
#pragma parameter SHARPNESS_H "Sharpness Horizontal" 0.0 0.0 1.0 0.1
#pragma parameter SHARPNESS_V "Sharpness Vertical" 0.0 0.0 1.0 0.1
#pragma parameter BLUR_H "Horizontal Blur" 1.0 0.0 10.0 0.1
#pragma parameter BLUR_V "Vertical Blur" 1.0 0.0 10.0 0.1
#pragma parameter GAMMA_INPUT "Gamma Input" 2.5 0.1 5.0 0.1
#pragma parameter GAMMA_OUTPUT "Gamma Output" 2.2 0.1 5.0 0.1
#pragma parameter GAMMA_SAMP "Sampling Gamma" 2.0 0.1 5.0 0.1
#pragma parameter RED_LVL "Red Level" 1.0 0.0 2.0 0.1
#pragma parameter GREEN_LVL "Green Level" 1.0 0.0 2.0 0.1
#pragma parameter BLUE_LVL "Blue Level" 1.0 0.0 2.0 0.1
#pragma parameter BRIGHTNESS_LVL "Brightness" 5.0 0.0 10.0 0.1
#pragma parameter CONTRAST_LVL "Contrast" 5.0 0.0 10.0 0.1
#pragma parameter SATURATION_LVL "Saturation" 5.0 0.0 10.0 0.1
#pragma parameter COLOR_BLEED "Color Bleed" 0.2 0.0 1.0 0.1
#pragma parameter UNPURE_BLACKS "Brightness of pure blacks" 0.0 0.0 1.0 0.1
#pragma parameter SPLIT "Split" 0.0 -1.0 1.0 0.1
#pragma parameter PHOSPHOR_SIZE "Phosphor Size" 3.0 2.0 3.0 1.0
#pragma parameter PHOSPHORS "Phosphors" 0.5 0.0 1.0 0.1
#pragma parameter TRIAD_INV "Invert Phosphor Order" 0.0 0.0 1.0 1.0
#pragma parameter MASK "Slot Mask" 0.5 0.0 1.0 0.1
#pragma parameter SCANLINES "Scanlines" 0.0 0.0 1.0 0.05
#pragma parameter SCAN_THICK "Scanline Thickness" 0.5 0.0 1.0 0.05
#pragma parameter FIELD_SHIFT "Alternating Field Shift" 0.0 0.0 2.0 0.1

layout(std140, set = 0, binding = 0) uniform UBO
{
    mat4 MVP;
    vec4 OutputSize;
    vec4 OriginalSize;
    vec4 SourceSize;
} global;

#pragma stage vertex
layout(location = 0) in vec4 Position;
layout(location = 1) in vec2 TexCoord;
layout(location = 0) out vec2 vTexCoord;

void main()
{
    gl_Position = global.MVP * Position;
    vTexCoord   = TexCoord;
}

/*
 *	CRT Shader by Doriphor
 *	(Based on EasyMode's CRT Shader)
 *	License: GPL
 *
 *	A fancy, fast and heavily configurable CRT shader.
 */

#pragma stage fragment
layout(location = 0) in  vec2 vTexCoord;
layout(location = 0) out vec4 FragColor;
layout(set = 0, binding = 2) uniform sampler2D Source;

#define PI 3.141592653589

float rand()
{
	float timer = float(params.FrameCount);
	return fract(sin(vTexCoord.x * vTexCoord.y * timer) * 10000.0);
}

vec4 GammaTexture(sampler2D Source, vec2 coords)
{
	vec2 dx    		= vec2(global.SourceSize.z, 0.0);
    vec2 dy			= vec2(0.0, global.SourceSize.w);

    vec2 pix_co		= (coords + params.SHARPNESS_H/2 * dx + params.SHARPNESS_V/2 * dy) * global.SourceSize.xy - vec2(0.5, 0.5);
    vec2 tex_co 	= (floor(pix_co) + vec2(0.5, 0.5)) * global.SourceSize.zw;

	vec2 x_shift	= params.FIELD_SHIFT * vec2(floor(mod(tex_co.y, 2.0 * dy.y)/dy.y)*dx.x, 0.0);
	vec2 y_shift	= params.FIELD_SHIFT * vec2(floor(mod(tex_co.y + dy.y, 2.0 * dy.y)/dy.y)*dx.x, 0.0);

    vec2 pix_co_x	= (coords + params.SHARPNESS_H/2 * dx + params.SHARPNESS_V/2 * dy + x_shift) * global.SourceSize.xy - vec2(0.5, 0.5);
    vec2 tex_co_x	= (floor(pix_co_x) + vec2(0.5, 0.5)) * global.SourceSize.zw;

    vec2 pix_co_y	= (coords + params.SHARPNESS_H/2 * dx + params.SHARPNESS_V/2 * dy + y_shift) * global.SourceSize.xy - vec2(0.5, 0.5);
    vec2 tex_co_y	= (floor(pix_co_y) + vec2(0.5, 0.5)) * global.SourceSize.zw;

    vec2 dist		= fract(pix_co);
    vec2 dist_x		= fract(pix_co_x);
    vec2 dist_y		= fract(pix_co_y);

	vec3 gamma		= vec3(params.GAMMA_SAMP);

	vec3 col, col2, col3, col4;

	col				= pow(texture(Source, tex_co_x).rgb, gamma);
	col2			= pow(texture(Source, tex_co_x + dx).rgb, gamma);
	col3			= pow(texture(Source, tex_co_y + dy).rgb, gamma);
	col4			= pow(texture(Source, tex_co_y + dx + dy).rgb, gamma);

	col				= mix(col, col2, (1 - params.SHARPNESS_H) * dist_x.x);
	col3			= mix(col3, col4, (1 - params.SHARPNESS_H) * dist_y.x);
	col				= pow(mix(col, col3, (1 - params.SHARPNESS_V) * dist.y), 1/gamma);

	return vec4(col, 1.0);
}

vec3 BlurSampler(vec2 coords)
{
	vec2 dx			= vec2(global.SourceSize.z, 0.0);
    vec2 dy			= vec2(0.0, global.SourceSize.w);
	float x_bleed	= params.BLUR_H / 20.0;
	float y_bleed	= params.BLUR_V / 20.0;
	vec3 gamma		= vec3(params.GAMMA_SAMP);

	vec3 UL, U, UR, L, C, R, DL, D, DR;

	UL				= pow(GammaTexture(Source, coords - dx 	- dy	).rgb, gamma);
	U				= pow(GammaTexture(Source, coords 		- dy	).rgb, gamma);
	UR				= pow(GammaTexture(Source, coords + dx 	- dy	).rgb, gamma);
	L				= pow(GammaTexture(Source, coords - dx			).rgb, gamma);
	C				= pow(GammaTexture(Source, coords				).rgb, gamma);
	R				= pow(GammaTexture(Source, coords + dx			).rgb, gamma);
	DL				= pow(GammaTexture(Source, coords - dx 	+ dy	).rgb, gamma);
	D				= pow(GammaTexture(Source, coords + dy			).rgb, gamma);
	DR				= pow(GammaTexture(Source, coords + dx 	+ dy	).rgb, gamma);

	U				= (UL * x_bleed + U + UR * x_bleed) / (1.0 + 2.0 * x_bleed);
	C				= (L  * x_bleed + C + R * x_bleed)  / (1.0 + 2.0 * x_bleed);
	D				= (DL * x_bleed + D + DR * x_bleed) / (1.0 + 2.0 * x_bleed);

	C				= (U  * y_bleed + C + D * y_bleed)  / (1.0 + 2.0 * y_bleed);

	return pow(C, 1.0 / gamma);
}

vec3 Halation(vec2 coords)
{	 
	vec2 dx			= vec2(global.SourceSize.z, 0.0);
    vec2 dy			= vec2(0.0, global.SourceSize.w);

	float radius	= params.HALATION_RADIUS;
	float samples	= params.HALATION_SAMPLES / 4.0;

	float div_total	= 0.0;
	vec3 col		= vec3(0.0, 0.0, 0.0);

	float ratio		= 1.0;

	if(params.HALATION_RANDOM == 1.0)
		ratio = rand() * 2.0;

	float div = 1.0;

	for( float i = 1	; i <= samples; i++)
	{
		/*div = 1 / pow(radius * i / samples, 2.0);*/
		div = 1/sqrt(i);
		div_total		+= 4.0 * div;

		col		+= texture(Source, coords + vec2(
					radius * i / samples * cos(i * ratio) * dx.x,
					radius * i / samples * sin(i * ratio) * dy.y
				)).rgb * div;

		col		+= texture(Source, coords - vec2(
					radius * i / samples * cos(i * ratio) * dx.x,
					radius * i / samples * sin(i * ratio) * dy.y
				)).rgb * div;

		col		+= texture(Source, coords + vec2(
					radius * i / samples * cos(i * ratio + PI/2) * dx.x,
					radius * i / samples * sin(i * ratio + PI/2) * dy.y
				)).rgb * div;

		col		+= texture(Source, coords - vec2(
					radius * i / samples * cos(i * ratio + PI/2) * dx.x,
					radius * i / samples * sin(i * ratio + PI/2) * dy.y
				)).rgb * div;

	}
	col = max(col, 0.0);
	col /= div_total;
	col = sqrt(col);
	return col;
}


/* main_fragment */
void main()
{
    vec3 col;
	vec3 levels = vec3(params.RED_LVL, params.GREEN_LVL, params.BLUE_LVL);

	if(vTexCoord.x - params.SPLIT - 1.0 > 0.0 || vTexCoord.x - params.SPLIT < 0.0)
	{
		FragColor = texture(Source, vTexCoord);
	}
	else
	{
		col = BlurSampler(vTexCoord);

		col = pow(col, vec3(params.GAMMA_INPUT));

		float p = 1.0 - params.PHOSPHORS;

		vec2 mod_fac = floor(vTexCoord * global.OutputSize.xy);
		int dot_no   = int(mod(mod_fac.x, params.PHOSPHOR_SIZE));
		vec3 mask_weight;
		
		if (params.PHOSPHOR_SIZE == 3.0)
		{
			if (params.TRIAD_INV == 0.0)
			{
				if (dot_no == 0) 
				{
					mask_weight = vec3(1.0, p, p);
				}
				else if (dot_no == 1)
				{
					mask_weight = vec3(p, 1.0, p);
				}
				else
				{
					mask_weight = vec3(p, p, 1.0);
				}
			}
			else
			{
				if (dot_no == 0) 
				{
					mask_weight = vec3(p, p, 1.0);
				}
				else if (dot_no == 1)
				{
					mask_weight = vec3(p, 1.0, p);
				}
				else
				{
					mask_weight = vec3(1.0, p, p);
				}
			}
		}
		else
		{
			if (params.TRIAD_INV == 0.0)
			{
				if (dot_no == 0) 
				{
					mask_weight = vec3(1.0, p, 1.0);
				}
				else
				{
					mask_weight = vec3(p, 1.0, p);
				}
			}
			else
			{
				if (dot_no == 0) 
				{
					mask_weight = vec3(p, 1.0, p);
				}
				else
				{
					mask_weight = vec3(1.0, p, 1.0);
				}
			}
		}

		col /= max(max(1.0, col.r), max(col.g, col.b));
		col *= mask_weight;

		/*col = col - vec3(params.SCANLINES * max(0.0, step(abs(cos(vTexCoord.y * global.SourceSize.y * PI)), params.SCAN_THICK)));*/
		/*col = col - vec3(params.SCANLINES * max(0.0, params.SCAN_THICK - 1.0 + abs(cos(vTexCoord.y * global.SourceSize.y * PI))));*/

		col -= col * max(0.0, pow(cos(vTexCoord.y * PI * 2.0 * global.OriginalSize.y), 1.0 - params.SCAN_THICK) * params.SCANLINES) ;

		if (((mod(ceil(vTexCoord.y * global.OutputSize.y), params.PHOSPHOR_SIZE + 1.0) == 0.0)
		|| (mod(ceil(vTexCoord.x * global.OutputSize.x / params.PHOSPHOR_SIZE), 2.0) == 0.0))
		&& ((mod(ceil(vTexCoord.y * global.OutputSize.y), params.PHOSPHOR_SIZE + 1.0) == 2.0)
		|| (mod(ceil(vTexCoord.x * global.OutputSize.x / params.PHOSPHOR_SIZE), 2.0) == 1.0)))
		{
			col = col * vec3(1 - params.MASK);
		}

		if (params.HALATION_INTENSITY > 0.0)
		{
			if(params.HALATION_DEBUG == 0.0)
				col += params.HALATION_INTENSITY * pow(Halation(vTexCoord), vec3(params.GAMMA_INPUT));
			else
				col = Halation(vTexCoord);
		}

		col = max(vec3(params.UNPURE_BLACKS / 5.0), col);

		/*
		 *OLD BRIGHTNESS AND CONTRAST, PROBABLY NOT WORTH IT
		 *
		 *float brightness = (params.BRIGHTNESS_LVL - 5.0) / 5.0;
		 *float contrast_fac = 10.1 * (params.CONTRAST_LVL + 5)/(10 * (15.1 - params.CONTRAST_LVL));
		 *col = contrast_fac * (col - vec3(0.5)) + vec3(0.5) + brightness;
		 */

		col *= params.CONTRAST_LVL / 5.0;
		col += params.BRIGHTNESS_LVL - 5.0;

		vec3 saturation = vec3(0.3 * col.r, 0.59 * col.g,0.11 * col.b) * (5.0 - params.SATURATION_LVL) / 5.0;
		col = (col * params.SATURATION_LVL / 5.0) + vec3(saturation.r + saturation.g + saturation.b);

		vec3 bleed = vec3(0.0);


		if(params.COLOR_BLEED != 0.0)
		{
			if(col.r > 0.5)
			{
				bleed.g = (col.r - 0.5);
			}
			if(col.g > 0.5)
			{
				bleed.r = (col.g);
				bleed.b = (col.g);
			}
			if(col.b > 0.5)
			{
				bleed.g = (col.b - 0.5);
			}
			if(params.COLOR_BLEED <= 1.0)
				col = max(col, params.COLOR_BLEED * bleed);
			else
				col = bleed;
		}
		col *= levels;
		col = pow(col, vec3(1.0 / params.GAMMA_OUTPUT));

		FragColor = vec4(col, 1.0);
	}
}
3 Likes

I like the Comix Zone shots the most. Are the performance demands still somewhere in Easymode range or significantly higher?

2 Likes

Is the split what’s doing the split image in the screenshots?

1 Like

@Syh Yes! I added it for debugging purposes but it also helped with comparing brightness and colors so I decided to keep it :slight_smile:

@Jamirus It should be a bit higher, but even my Intel® HD Graphics 530 maxes out at 60% on the default settings. :smiley:

1 Like

I actually really like that idea.

Promise the next message will be thoughts on the actual shader, lol.

1 Like

Alright finally got a chance to test some of this out.

Took me a few minutes to wrap my head around how some of the settings worked. Mostly it was just me being stupid.

Like it should have been obvious to me that more halation samples meant cleaner(less blurry) image, but my brain was nah makes too much sense.

Love that split feature!

I enjoyed the halation randomness feature (it’s basically noise/static right?).

I had an issue with the scanlines, I don’t know if it was because I maxed the scanline thickness or what, but if you max out the scanline setting (not the thickness the setting above it) it becomes a blurry mess.

Didn’t really get around to testing the color bleed, want to just didn’t have the time to right now.

Quick question, is this supposed to be ran as nearest or linear filtering?

Hope you keep working on this shader as it’s interesting to see different takes on a CRT! (Also please don’t take any of my thoughts as criticisms, this was fun to test out.)

Sorry for the book.

1 Like

That’s alright I wanted a book :slight_smile:

So:

  • Thank you! The split feature is such a lifesaver, especially if you set the RA UI to be completely transparent, you can adjust your picture without having to go back into the game and you can see the difference it makes on the spot!

  • The halation randomness feature does add a little noise, but the noise is unintentional, the REAL intention behind the randomness is that you need FAR fewer samples to get a similar result, except for screenshots where it looks a little messy because it only captures one frame :slight_smile:

  • The scanlines … well honestly they were good enough for a first draft. I’m not satisfied with them myself, but they look decent enough for now. I want to rewrite them but I’m not sure how :confused:

  • The bleed function I’m not even sure if it’s needed, still, but I remember seeing a closeup shot of a real CRT TV with Super Mario Kart playing, and the red shell in the item box, which uses pure red, had an orange shade to it. This was my way of replicating that. It can lead to some interesting looks though :slight_smile:

  • It’s intended to use “Don’t care” for both settings, and it doesn’t care about bilinear or nearest in the video settings either as far as I can tell, although Scale can give interesting results if messed with :slight_smile:

Thank you again! I intend to continue working on this, the scanlines still bother me, and I already have a working version that can use HSL mixing, but I’m not sure about the benefits right now. I guess I’ll at least keep the hue adjustment feature!

As an additional side note, the Sampling Gamma feature was directly inspired by this video as a means to circumvent ugly intermediate colors :slight_smile:

1 Like

I think for the Mario Kart screen you’re referencing it might better to smear the red channel, if that makes any sense.(also there’s a possibility that CRT just wasn’t calibrated correctly, which resulted in shifting red into orange as that’s an easy mistake to do on a CRT.) The red smear might be a better idea, instead of doing a full RGB color bleed but idk.

Honestly the scanlines looked fine for the most part, just fails at max settings for some reason. (If you’re wanting to change up the scanlines I’d just load up a bunch of CRT shaders and see which has the best looking scanlines for your taste and use that as reference, that’s my personal opinion.)

Does the halation randomness just start changing the amount of samples randomly within a certain range of the sample setting?

Yeah, a few CRT shaders don’t really care about the filtering mode. (At that point you can decide whether you want a softer or sharper image, sometimes is does interesting things to certain effects.)

The hue adjustment might be cool to check out, as I’d imagine it being really similar to a color temperature setting.

That video is interesting you should think about posting it on @Dogway’s Grade shader thread, I imagine he’d be interested. Might not use it but I think he’d find it interesting.

2 Likes

Thank you! I definitely will think about all this! But no, the randomness function keeps the number of samples the same but randomly shifts the sampling angles between 0.5x to 1.5x if I remember right, which just makes the result look far less … repetitive? :slight_smile: I guess it’s easiest to see the results in screenshots:

Here’s the isolated halation layer without the randomness

And here’s with. Both screenshots use 24 samples :slight_smile:

And I’m sure @Dogway will find their way to the video since you mentioned them :stuck_out_tongue:

2 Likes

Yeah that cleared up the sampling randomess.

Yeah realized after I tagged him, I was like well he’s tagged he’s going to see this probably as long as he checks why he was name dropped, lol.

What kind of mask are you using, as it kinda looks like a computer monitor mask? (Might be wrong though. More mask options might be cool, I’m going to stop suggesting things until you do another update, lol.) Can you use the settings to make other mask styles? I don’t really understand the mask settings that well…

1 Like

So, the mask setting is meant to go from the Trinitron look (aperture grille) that was already present in Easymode, which you would probably want to use with scanlines sometimes to the standard CRT look (slot mask). Apologies for the quality of the pictures, but you get the idea, it adds these horizontal lines that create individual groups of phosphors :slight_smile:

And yeah I’ve done some tests to get a CRT PC monitor (shadow mask) look as well. I might get it into the next update if it doesn’t look too bad :slight_smile:

1 Like

Ohhh I was getting the slot-mask by default then (I guess, because that’s what it looked like, lol.) I normally use an apeture mask.

Well, I look forward to testing the shader when it’s updated. (Going to mess with it some more after I wake back up, if I have any new thoughts after that I’ll let you know.) Probably going to test the color bleed some.

Have you thought of a name for the shader?

1 Like

… I really don’t know about the name … The filename was originally crt-lowres.slang because it was meant for low resolution screens, but maybe that’s not accurate anymore :man_shrugging:t2:. Worst case, I’ll call it crt-doriphor
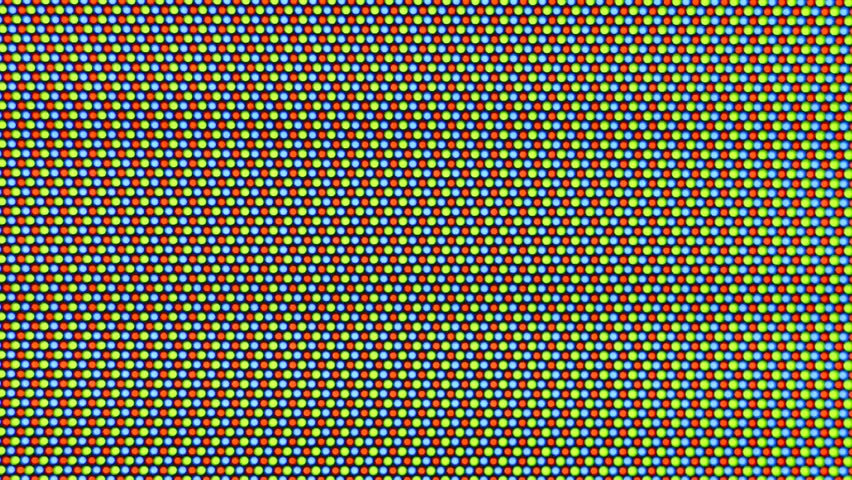
 :joy:

Good night!

1 Like

Oh and here’s an additional screenshot to showcase the shader (in this case it does use HSL sampling, but it only helps a little):

Before

After

2 Likes

Everything in grade is already happening in linear light and float point precision, except for sigmoidal contrast which performs better in gamma space. A few things perform better in gamma space like bloom or sharpening. If any it reminded me to keep a linear chain through signal-bandwidth shader, so it performs in linear light. I will add a gamma function there and see how it performs.

2 Likes

Actually, HSL Sampling (well really it’s HSL mixing) makes a huge difference in Duke 3D (Sega Genesis). I never knew the game wasn’t meant to look like garbage before this! :astonished:

No color adjustments have been made by the way.

No shader: Duke Nukem 3D (B) !-200406-193322 Normal shader: Duke Nukem 3D (B) !-200406-193211 Shader with HSL mixing enabled: Duke Nukem 3D (B) !-200406-193143

3 Likes

I’m not sure if this belongs to its own thread. Feel free to move it if necessary :slight_smile:

So, I thought I wanted to add true NTSC artifacting to my shader and then be done with the feature creep, at least for now, but the sources I can find don’t go deep enough, and I’m kinda stuck here:

a-200408-165437

Which is VERY close, in a way, to the source (scroll down to the midpoint of the article) but yet so far, and it thoroughly messes up any other game’s graphics, so I’m definitely doing something very wrong… Any help would be greatly appreciated.

Here’s the test code if anyone’s interested:

#version 450

layout(std140, set = 0, binding = 0) uniform UBO
{
    mat4 MVP;
    vec4 OutputSize;
    vec4 OriginalSize;
    vec4 SourceSize;
} global;

#pragma stage vertex
layout(location = 0) in vec4 Position;
layout(location = 1) in vec2 TexCoord;
layout(location = 0) out vec2 vTexCoord;

void main()
{
    gl_Position = global.MVP * Position;
    vTexCoord   = TexCoord;
}

/*
 *	NTSC Artifact Test by Doriphor
 *	License: GPL
 */

#pragma stage fragment
layout(location = 0) in  vec2 vTexCoord;
layout(location = 0) out vec4 FragColor;
layout(set = 0, binding = 2) uniform sampler2D Source;

vec3 RGB_HSL(vec3 col)
{
	float R = min(col.r, 1.0);
	float G = min(col.g, 1.0);
	float B = min(col.b, 1.0);

	float C, H, S, V, L;
	
	V = max(R, max(G, B));
	C = V - min(R, min(G, B));
	L = V - C / 2.0;
	
	if(C == 0.0)
		H = 0.0;
	else if(V == R)
		H = mod(60.0 * (G - B) / C, 360.0);
	else if(V == G)
		H = mod(60.0 * (2.0 + (B - R) / C), 360.0);
	else
		H = mod(60.0 * (4.0 + (R - G) / C), 360.0);
		
	if(L == 0.0 || L == 1.0)
		S = 0.0;
	else
		S = (V - L) / min(L, 1 - L);
		
	return vec3(H, S, L);
	
}

vec3 HSL_RGB(vec3 hsl)
{
	float n, a, k;
	float H, S, L;
	float R, G, B;
	
	H = hsl.x;
	S = hsl.y;
	L = hsl.z;
	
	a = S * min(L, 1.0 - L);
	n = 0.0;
	k = mod(n + H/30.0, 12.0);
	
	R = L - a * max(-1.0, min(1.0, min(k - 3.0, 9.0 - k)));

	n = 8.0;
	k = mod(n + H/30.0, 12.0);
	
	G = L - a * max(-1.0, min(1.0, min(k - 3.0, 9.0 - k)));

	n = 4.0;
	k = mod(n + H/30.0, 12.0);
	
	B = L - a * max(-1.0, min(1.0, min(k - 3.0, 9.0 - k)));
	
	return vec3(R, G, B);
}


void main()
{
	vec3 col = texture(Source, vTexCoord).rgb;
	
	col = RGB_HSL(col);
	
	col.x = mod(90.0 + col.x - vTexCoord.x * global.SourceSize.x * 90.0, 360.0);
	col.y = 1.0;
	col.z /= 2.0;
	
	col = HSL_RGB(col);
	
	FragColor = vec4(col, 1.0);
}
1 Like

Most of the ntsc shaders have two passes, from my understanding one is doing the color and artifacts, the other pass is doing blurring/blending and another color transformation. I may be wrong though, there’s a handful of ntsc shaders in the repo.

There’s the ntsc shaders in the ntsc folder, crt-sim has a ntsc shader, mame-hlsl has a ntsc shader, and gtu has a composite mode(ntsc technically). You may check those out for some inspiration.

2 Likes

@Syh Yes! ntsc-xot does just that! I’ll have to study it for a while :slight_smile:

@hunterk I just looked at ntsc-xot, and an obvious improvement (performance-wise) would be to group all the colors where possible. Since your name is in the comments I figured I’d ask. This runs much faster and is also shorter:

#version 450

//  NTSC Decoder
//
//  Decodes composite video signal generated in Buffer A.
//  Move mouse to display the original signal.
//
//  This is an intensive shader with a lot of sampling and 
//  iterated filtering. Reduce filter width N to trade quality 
//  for performance. N should be an integer multiple of four, 
//  plus one (4n+1). Apologies to owners of melted phones.
//
//  hunterk made the shader work in RGB instead of just a single
//  channel, though there's probably better ways to do it than
//  just tripling all of the operations. Improvements are welcome!
//
//  copyright (c) 2017, John Leffingwell
//  license CC BY-SA Attribution-ShareAlike

//  adapted for RetroAch by hunterk from this shadertoy:
//  https://www.shadertoy.com/view/Mdffz7

layout(push_constant) uniform Push
{
	vec4 SourceSize;
	vec4 OriginalSize;
	vec4 OutputSize;
	uint FrameCount;
} params;

layout(std140, set = 0, binding = 0) uniform UBO
{
	mat4 MVP;
} global;

#pragma stage vertex
layout(location = 0) in vec4 Position;
layout(location = 1) in vec2 TexCoord;
layout(location = 0) out vec2 vTexCoord;

void main()
{
   gl_Position = global.MVP * Position;
   vTexCoord = TexCoord;
}

#pragma stage fragment
layout(location = 0) in vec2 vTexCoord;
layout(location = 0) out vec4 FragColor;
layout(set = 0, binding = 2) uniform sampler2D Source;

#define PI   3.14159265358979323846
#define TAU  6.28318530717958647693

//  TV adjustments
const float SAT = 1.0;      //  Saturation / "Color" (normally 1.0)
const float HUE = 1.0;      //  Hue / "Tint" (normally 0.0)
const float BRI = 1.0;      //  Brightness (normally 1.0)

//  Filter parameters
const int   N  = 21;        //  Filter Width (4n+1)
const float FC = 0.125;     //  Frequency Cutoff


const mat3 YIQ2RGB = mat3(1.000, 1.000, 1.000,
                          0.956,-0.272,-1.106,
                          0.621,-0.647, 1.703);

vec3 adjust(vec3 YIQ, float H, float S, float B) {
    mat3 M = mat3(  B,      0.0,      0.0,
                  0.0, S*cos(H),  -sin(H), 
                  0.0,   sin(H), S*cos(H) );
    return M * YIQ;
}

float sinc(float n) {
    if (n == 0.0) return 1.0;
	return sin(PI*n) / (PI*n);
}

float window_blackman(float n, float N) {
	return 0.42 - 0.5 * cos((2.0*PI*n)/(N-1.0)) + 0.08 * cos((4.0*PI*n)/(N-1.0));
}

float pulse(float a, float b, float x) {
    return step(a, x) * step(x, b);
}

void main()
{
	vec2 size = params.SourceSize.xy;
	vec2 uv = vTexCoord.xy;
    
    //  Compute sampling offsets and weights
	vec3 sum = vec3(0.0);
	vec4 offset[N];
	
	//  TEST
    for (int i=0; i<N; i++) {
        float jS = float(i) - (float(N-1)/2.0);
        float k = sinc( 2.0 * FC * jS) * window_blackman(float(i),float(N));
        offset[i] = vec4(jS/size.x, 0.0, k, -k);
        sum += k;
    }
	
    //  Low-pass filter input signal
    vec3 tap[N];
    for (int i=0; i<N; i++) {
        offset[i].zw /= sum.r;
        tap[i] = pulse(0.0, 1.0, uv.x + offset[i].x) * texture(Source, uv + offset[i].xy).rgb;
    }
    offset[(N-1)/2].w += 1.0;
    
    //  Extract luma signal
    vec3 luma = vec3(0.0);
    for (int i=0; i<N; i++) {
        luma += tap[i] * offset[i].z;
    }
    
    //  Extract chroma signal
    vec3 chroma[N];
    for (int j=0; j<N; j++) {
        chroma[j] = vec3(0.0);
	    for (int i=0; i<N; i++) {
	   	    chroma[j] += tap[i+j-(N-1)/2] * offset[i].w;
    	}
    }
	
    //  Generate YIQ signal R
    vec3 Y = vec3(luma);
    vec3 I = vec3(0.0);
    vec3 Q = vec3(0.0);
    for (int j=0; j<N; j++) {
        vec3 subcarrier = vec3(TAU * 0.25 * size.x * (uv.s + float(j+(N-1)/2)/size.x));
        I += cos(subcarrier) * chroma[j] * offset[j].z;
    	Q += sin(subcarrier) * chroma[j] * offset[j].z;
    }
    
        //  Apply TV adjustments to YIQ signal and convert to RGB
    	FragColor.r = (YIQ2RGB * adjust(vec3(Y.r, I.r, Q.r), HUE, SAT, BRI)).r;
		FragColor.g = (YIQ2RGB * adjust(vec3(Y.g, I.g, Q.g), HUE, SAT, BRI)).g;
		FragColor.b = (YIQ2RGB * adjust(vec3(Y.b, I.b, Q.b), HUE, SAT, BRI)).b;
}
1 Like