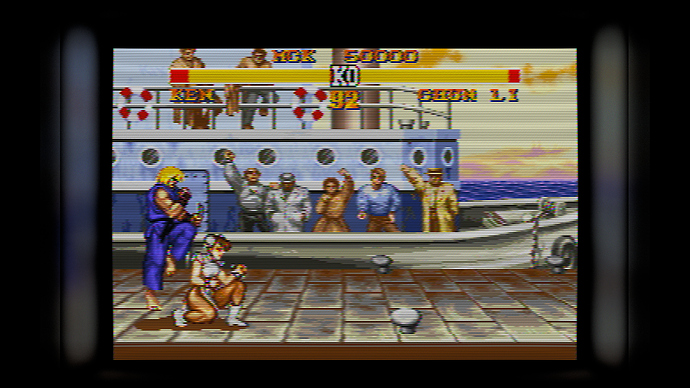
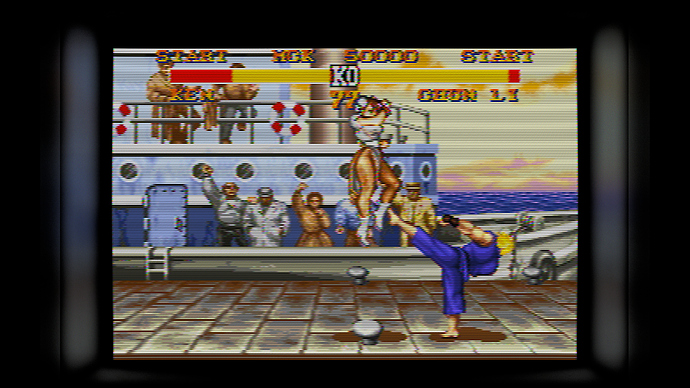
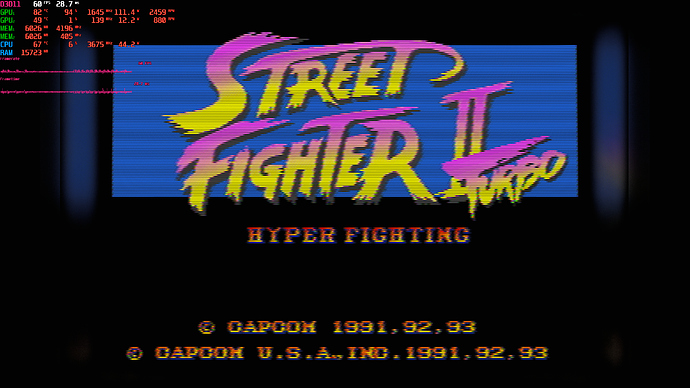
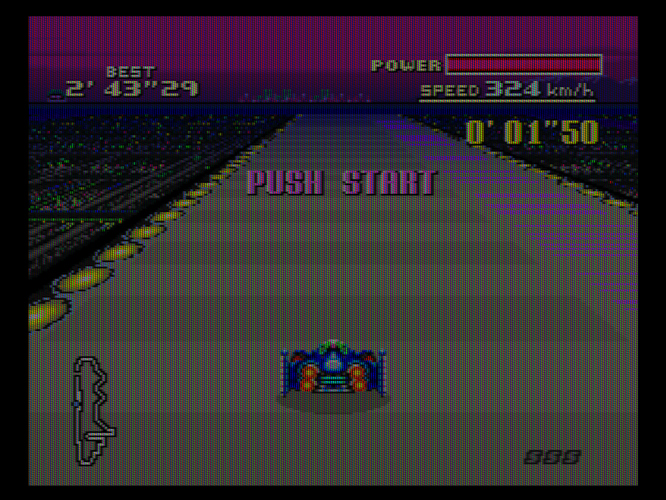
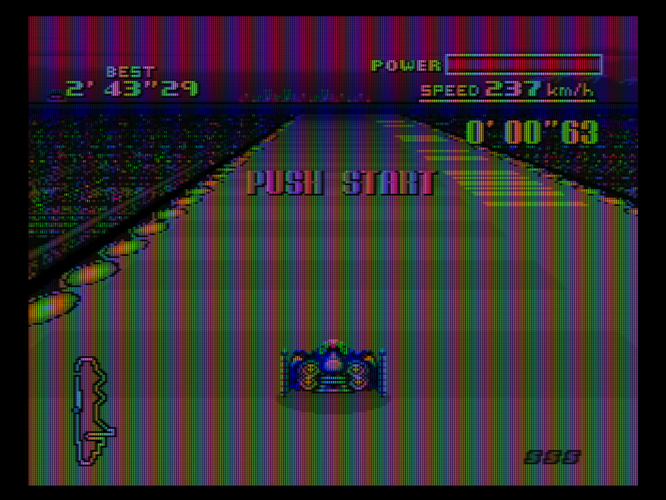
Thanks. I was just relying on PNG-8 format. I will see next time if JPEG will give a better result.
I’ve been playing around with composite on the Mega Drive. I am relying on the Mega Drive timing documented here:
I believe most games run in the H320F mode. In order to restore the dot pattern from the RGB we get from the emulator, we need the number of lines per field (262), horizontal frequency (15.980112 kHz for H320F), and the amount of inactive pixels (100 for H320F mode corresponding to 420 total pixels per line). Horizontal frequency affects the ‘angle’ of rainbow artifacts by changing the dot pattern shift per line. In this case there is not supposed to be any shift per line so we see this colorful prismatic effect on NTSC Mega Drives. Lines and inactive pixels affect the distribution and number of dots we get for each pixel.
The monochrome mode of Scanline Classics NTSC shaders allows us to see the restored dot pattern.
There is some debate about how much the rainbow pattern is supposed to be seen through on an actual television. I have seen a lot of examples, both direct captures and controlled photographs, and they show a wide variation. The components that make up video filters for this are prone to aging, degradation, and poor tolerance. Couple that with the number of questionable mods people have applied to hardware makes matching it perfectly a moving target
Starting with the strongest filtering, Y encoding filter set to 1.8 MHz, we see that the rainbow artifacts are virtually nonexistant, but the picture is also very soft. I am using the feedback decoding filter in Scanline Classic for all these screenshots. This cutoff is based on an analysis of a Japanese Mega Drive or Genesis schematic assuming good isolation between Y input and output for the video encoding chip.
If we set the filter to 3.6 MHz, the rainbow effect becomes quite strong:
Without any encoding filters at all, we get this effect:
It’s quite possible that when the Mega Drives were new, the effect wasn’t as strong, but with aging the effect has become more apparent. A setting of anywhere between 1.8 MHz and 3.6 MHz seems reasonable.
Updates are available in dev branch.
I took a break from composite stuff and made a bezel:
https://github.com/anikom15/scanline-classic/blob/dev/share/bezel-tv.png
So I made a bezel shader for Scanline Classic. It expects the input to be in linear space, so keep that in mind. The glowing effect turned out nicely I think. There is a temperature adjustment as the reflections off a TV look more blue than the screen itself. I also updated the advanced shader. It’s much easier to read and understand now, there are new features for geometry, and the geometry math has been adjusted to be more realistic. Subpixel masks will now follow the curvature of the screen. That results in extreme anistropy so I added a filter to help with that. Still doesn’t look great. Masks are an unsolved problem at least until I get to 8K or maybe we’ll need 16K… No screenshots with masks for that reason, but you can put any mask shader between scanline-advanced and bezel. It just won’t align with the screen curvature.
You can actually use any texture you want for the bezel. The glow effect will work with it, though may look funny.
Preset I used:
# SFC/SNES RGB shader set
#
# All standard models, but not the Jr. and Mini models, have an RGB
# output available without modification. However, its use was only
# officially supported in Japan with the OEM JP-21 connector.

shaders = 6

shader0 = "../src/sys-rgb-bandlimit.slang"
filter_linear0 = "false"
scale_type0 = "source"
scale_x0 = 2.0
scale_y0 = 1.0

shader1 = "../src/display-rgb-bandlimit.slang"
filter_linear1 = "false"
scale_type1 = "source"
scale_x1 = 1.0
scale_y1 = 1.0

shader2 = "../src/phosphor-luma.slang"
filter_linear2 = "false"
scale_type2 = "source"
scale_x2 = 1.0
scale_y2 = 1.0

shader3 = "../src/phosphor-chroma.slang"
filter_linear3 = "false"
scale_type3 = "source"
scale_x3 = 1.0
scale_x3 = 1.0

shader4 = "../src/scanline-advanced.slang"
filter_linear4 = "false"
scale_type4 = "viewport"
scale_x4 = 1.0
scale_y4 = 1.0

shader5 = "../src/bezel.slang"
filter_linear5 = "true"
wrap_mode5 = "mirrored_repeat"
scale_type5 = "viewport"
scale_x5 = 1.0
scale_y5 = 1.0

textures = BORDER
BORDER = "../share/bezel-tv.png"

# sys-rgb-bandlimit parameters
SYS_BANDWIDTH_R = 4.8
SYS_BANDWIDTH_G = 4.8
SYS_BANDWIDTH_B = 4.8

# phosphor parameters
SYS_V_FREQ = 60.0988
PHOSPHORESCENSE_A = "3.0"
PHOSPHORESCENSE_B = "100.0"
PHOSPHORESCENSE_C = "100.0"
PHOS_EXP_A = "4.0"
PHOS_EXP_B = "4.0"
PHOS_EXP_C = "4.0"
PHOS_TRAP_A = "1.2"
PHOS_TRAP_B = "0.75"
PHOS_TRAP_C = "0.75"

# Scanline Advanced parameters
V_FREQ = 60.0988
V_LINES_PER_FIELD = 262
H_BLANK_INACTIVE_LEN = 170
S_CORRECTION_H = -0.02
S_CORRECTION_V = -0.02
ZOOM = 1.03

# Bezel parameters
ASPECT_RATIO_NUM = 8
ASPECT_RATIO_DEN = 7
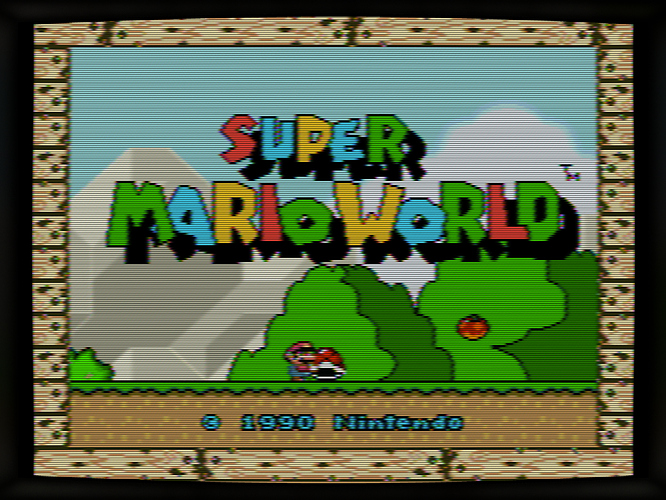
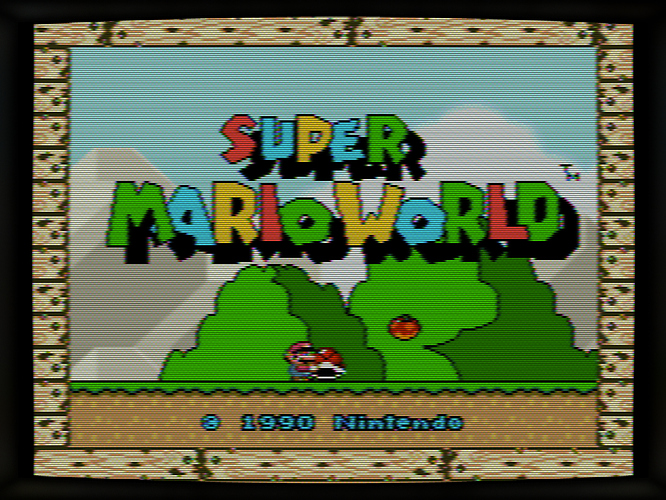
Screenshots; this is SNES so pillar boxes are intentional:
Here is a curved Trinitron bezel with aperture grille and ‘digital’ geometric correction techniques.
Back on the composite code, I have made a much more mathematically rigorous notch filter. I am pretty close to a release, and I just need to work on presets.
Old
New
I’m releasing a beta for Super Nintendo … composite, S-Video, and RGB are supported. No RF or PAL yet. It should be plug and play, but the bezel is included by default and you will need to set your RA aspect ratio to 16:9 if you want to use it. Mask is off by default but you can find them in the scanline-advance settings.
If you have performance issues, remove the bezel first as that is the biggest performance bottleneck.
Any sort of feedback is welcome.
https://github.com/anikom15/scanline-classic/releases/tag/v6.0-sfc-beta
Just did a quick test of this. Out of the box I like it! The default composite effects for example jittering and shaking seem a bit exaggerated.
Colours and filtering seem spot on though, maybe just slightly undersaturated.
I was not able to make out the mask properly.
That Focus % knob made colours look much more CRT-like.
Keep working on this!
The reflective Bezel is a very nice touch as well!
I’m glad it was able to work for you.
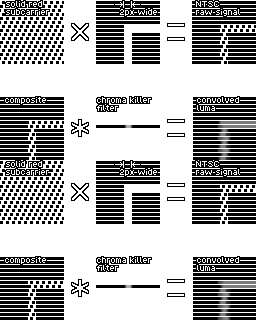
The jitter may be caused by unstable frame time or dropped frames because the chroma shifting every frame should come out as a blur. If you use the K key to step frame-by-frame, you can see how the pattern repeats every other frame. It should blend together rather than present as a jittery image.
This figure is for the NES, but the Super Nintendo is basically doing the same thing:
I was having frame pacing issues with V-Sync on. Once I turned it off (with Sync to Exact On), I was able to get good frame pacing.
If you want to change color saturation, look for the setting “User: Color”, it works exactly like the color knob on a TV. I’m sorry the settings are kind of a mess right now. The User Settings are supposed to be at the very top but I forgot to do that.
On my computer, I noticed that the SNES NTSC composite only behaves right on cores like bsnes-mercury which constantly output 512 horizontal resolution. I got weird results in snes9x, which outputs 256 pixels. This might be what @Cyber was noticing.
With that taken care of, the results looked nice. The Y notch filter is blurry, but I see that you have a user-controlled sharpness setting planned, which would fix that problem. The feedback filter is a good temporary solution, since that’s mathematically similar to a tighter notch filter.
I think it’s looking good so far- I’ll second what @PlainOldPants and @Cyber already mentioned.
I’d like to see a bit more of a mask, too. We talked about how masks can look unnatural with the LCD’s subpixel structure, so maybe just an aperture grille?
Thank you for pointing that out. That is indeed a problem. FYI, I believe plain bsnes is now most up-to-date bsnes core and mercury is obsolete. Correct me if I’m wrong.
@Cyber you won’t be able to use this through presets alone on Snes9x for now, so use bsnes instead. You will need to set Fast PPU of off to force a 512px output.
@Nesguy on a 4K monitor you need to set mask scale to at least 2. I am planning to do a completely different mask technique in the future. These masks are just a temporary measure to see roughly how it looks.
EDIT: @Cyber @PlainOldPants I guess I spoke too soon. This can be fixed with a preset:
# SFC/SNES Composite shader set
#
# For all NTSC models; Cables bundled with the console (along with an RF
# box in North America)

shaders = 9

shader0 = "../src/sys-rgb-bandlimit.slang"
filter_linear0 = "false"
scale_type0 = "source"
scale_x0 = 4.0
scale_y0 = 1.0

shader1 = "../src/sys-component.slang"
filter_linear1 = "false"

shader2 = "../src/composite-mod-prefilter.slang"
filter_linear2 = "false"

shader3 = "../src/composite-demod.slang"
filter_linear3 = "false"

shader4 = "../src/display-rgb-bandlimit.slang"
filter_linear4 = "false"

shader5 = "../src/phosphor-luma.slang"
filter_linear5 = "false"

shader6 = "../src/phosphor-chroma.slang"
filter_linear6 = "false"
alias6 = "PHOSPHOR"

shader7 = "../src/scanline-advanced.slang"
filter_linear7 = "false"
scale_type7 = "viewport"

shader8 = "../src/bezel.slang"
filter_linear8 = "true"
wrap_mode8 = "mirrored_repeat"

textures = BORDER
BORDER = "../share/bezel-trinitron.png"

# sys-rgb-bandlimit parameters
SYS_BANDWIDTH_R = 4.8
SYS_BANDWIDTH_G = 4.8
SYS_BANDWIDTH_B = 4.8

# sys-component parameters
SYS_BANDWIDTH_U = 2.6
SYS_BANDWIDTH_V = 2.6
SYS_CUTOFF_ATTEN_Y = 0.0
SYS_CUTOFF_ATTEN_U = 3.0
SYS_CUTOFF_ATTEN_V = 3.0

# composite parameters
V_FREQ = 60.0988
V_LINES_PER_FIELD = 262
SC_FREQ_MODE = 0
H_BLANK_INACTIVE_LEN = 33.203125
H_BLANK_INACTIVE_UNIT = 2
SHORTEN_ODD_FIELD_TIME = 1

# phosphor parameters
PHOSPHORESCENSE_A = "3.0"
PHOSPHORESCENSE_B = "100.0"
PHOSPHORESCENSE_C = "100.0"
PHOS_EXP_A = "4.0"
PHOS_EXP_B = "4.0"
PHOS_EXP_C = "4.0"
PHOS_TRAP_A = "1.2"
PHOS_TRAP_B = "0.75"
PHOS_TRAP_C = "0.75"

# Scanline Advanced parameters
FOCUS = 0.5
MAGNETIC_CORRECTION = 0.30
SCREEN_ANGLE_H = 30.0
SCREEN_ANGLE_V = 0.0
TRAPEZOID_STRENGTH = 0.08
S_CORRECTION_H = 0.02
S_CORRECTION_V = 0.05
H_SIZE = 0.997
V_SIZE = 0.997

# Bezel parameters
ASPECT_RATIO_NUM = 128
ASPECT_RATIO_DEN = 105
GLOW_DIFFUSION = 6.0
GLOW_COMPRESSION = 0.7
You should now no longer have any shimmering regardless of which emulator or settings you use. The S-Video and RGB presets need to be updated as well, but the effect either cancels out or is indistinguishable on those so I’m not going to share the updated presets for now. What has changed is setting scale_x0 to 4 and setting H_BLANK_INACTIVE_LEN to 33.203125 and H_BLANK_INACTIVE_UNIT to 2.
Now if the emulator does put out 512px you end up with a 2048 source texture. This is overkill, but I can’t see a way of working around it. A scale size of 3 doesn’t work right now because the hue ends up getting shifted. I think this a bug I can fix because my old composite shader worked with 3x scaling. If you are running 1080p and have a 512px emu source you may end up with scaling artifacts, not sure. My video card has 1080p int scaling so I’ll test this when I have a chance. 4K seems fine.
I don’t think we should be writing off Slot and Dot Masks just yet, since beauty is in the eye of the beholder and there have been may examples where users couldn’t tell the difference between photos of LCDs and CRTs in blind tests.
I love dot and slot masks for emulation. Maybe there’s just still room for improvement on the preset and the shader side for those and we haven’t peaked yet.
In very recent times I have been getting some great results via aligning and tweaking scanlines to work better and intersect better with slot masks and I’d argue that due to the “roughness” at the tops and bottoms of the scanlines when using dot masks, this mimics some of the roughness/imperfections we see in analog scanline implementations, which help to sell the idea a bit better.
Summary
https://www.reddit.com/r/crtgaming/s/Jz9ftn472w
https://www.reddit.com/r/crtgaming/s/Y7SzbdMUtN
https://www.reddit.com/r/crtgaming/s/BxnPBIagOM
https://www.reddit.com/r/RetroArch/s/UPX15g9WlC
https://www.reddit.com/r/RetroArch/s/QD7vmOwHeK
https://www.reddit.com/r/RetroArch/s/DwcpsIgC0V
CyberLab Death To Pixels Shader Preset Packs
CyberLab Death To Pixels Shader Preset Packs
CyberLab Death To Pixels Shader Preset Packs
I use BSNES. I’ll have to double check if Fast PPU mode is off but there is an option to deinterlace all content and run it at 480p. Is that the same option?
Does this mean I shouldn’t need to bother checking or changing anything in the core options?
If you use the corrected preset I posted you should be able to use it with any setting and get the same result.
In my experiments, settings that produce adequate photos can still fall short in an IRL comparison, especially regarding brightness.
Anyway, I’m not writing off slot and dot masks, but they are certainly harder to work with. I think of aperture grill as the entry point for those who are mask-hesitant.
I also experienced this with both the original SNES preset as well as the fixed one. Fixed one seemed slower though with both I needed to turn Fast PPU Off.
This shader rocks. I really like your approach and it seems accurate. It also seems distinct from all previous NTSC Shaders I’ve tried so far. With very little tweaking, the presets seem like presets I would make myself or have made myself. I’m very pleased with the manner in which the NTSC Fringing and Artifacts are blended with the content signal.
That Focus %, a little User Colour (+2), Sharpness all the way up (but can be fine tuned) plus that insane Feedback Filter is something that almost any afficionado would want in their CRT Shader! It’s only because User: Sharpness was listed before that, that I increased Sharpness by so much in the first place.
That filter basically corrects sharpness/resolution Loss from filtering in a very precise manner. The Focus % adds scanline Saturation in a very CRT-Like way and the way the artifacts are blended and presented feels very accurate.
Looking forward to seeing you continue to progress and add more systems.
CyberLab Classic Scanline Shader Composite SNES Epic RC1.slangp
#reference "shaders_slang/scanline-classic-6.0.0-sfc-beta1/sys-slangp/sfc-snes-composite.slangp"
COMB_FILTER_TAPS = "3.000000"
USER_COLOR = "0.520000"
USER_SHARPNESS = "0.300000"
FEEDBACK_FILTER_MODE = "1.000000"
FOCUS = "1.000000"
CyberLab Classic Scanline Shader SNES Composite Epic RC2.slangp
#reference "shaders_slang/scanline-classic-6.0.0-sfc-beta1/sys-slangp/sfc-snes-composite-fixed.slangp"
USER_COLOR = "0.520000"
USER_SHARPNESS = "1.000000"
FEEDBACK_FILTER_MODE = "1.000000"
FOCUS = "1.000000"
Yeah, it looks promising, what about the speed? Does it work on weak devices?
Ha, definitely not with the reflective bezel.
The bezel shader consumes more power than the entire rest of the shader chain combined, so if you have issues start there.
The next heaviest shader is scanline-advanced, largely because of anistropic filtering for masks and geometry.
Each shader has a bypass parameter that will eliminate most processing for that shader stage. I made it for debugging and fun, but it also has the benefit of finding out where there are performance bottlenecks.
While I’m developing this on a modern rig, I have a laptop with an iGPU that I’ll use to develop the scanline-basic shader. Originally scanline-basic was just a scanline shader without geometry and phosphors simulation (and it is the one, ported to GLSL, I still use to this day for 86Box). I’m not sure what scope the basic shader will expand to cover, probably a simplified composite/S-video chain, (e.g. notch only and a single YUV filter stage). Work on that probably won’t happen for a while though.
The plan right now is to make presets for all the major consoles from NES to N64. This will cover the majority use case of RetroArch and give enough of a sample to work through a lot of bugs. (I’ve already seemed to fix the scaling issue we discovered, so with the next release you can use an arbitrary scaling factor like 3x instead of 4x and get some performance back.)
Most of the screenshots of the composite/S-video shader you see, the ones before I did the bezel, use a single-pass composite filter. This was a clever implementation, but I soon ran into limitations based on the degree of analog modeling I wanted. Still, the single-pass shader I think still gives good results and I may salvage it for scanline-basic if it is indeed better performing than the two-pass method.
I have come up with something of a sharpening method. I have found the usual sharpening methods to be … clinical. Unsharp mask is probably the most aesthetically pleasing but lacks the analog goofiness I’m trying to discover.
The screenshots here show a completely unsharpened image and a sharpened image with user sharpness of 0.5, both using the notch filter. As the sharpness increases you can see the subcarrier start to come out. The sharpness is only applied to luma and I am pretty certain it’s going to only be a composite/RF feature for my shader, for simplicity. The moire patterns you see are interesting and I believe is due to scanline-advance geometry and scanlines interfering with the subcarrier. You can also, just barely, see a jailbar effect from the sharpening filter itself.
Now in motion you won’t notice the effect as strongly because the subcarrier shift helps cancel it out, and the 0.5 value I think does look better than the unfiltered image. The ‘correct’ way to calibrate sharpness is to generate a sweep pattern and set the sharpness so that you can see as many lines as possible without leading to brigthness shifts, ringing, etc. I can’t really do that because the SNES 240p Test Suite doesn’t have that kind of pattern and it would be too low resolution anyway, but the 0.5 value seems more correct than the unfiltered image.
I may have to finangle with it more to keep the subcarrier out. The issue is that it’s hard to sharpen so broadly while also keeping the subcarrier attenuated.
I’ve been playing around with masking methods. In order to avoid the pixel grid look, we have to do this:
- Filter the sampled input before applying the mask
- Apply the mask
- Filter again on upscale (or downscale)
This essentially creates two separate upscaling stages which makes the overall picture blurrier. However, we can at least control what filters we use at each stage. For now I am using bicubic filtering for both. However, it may be better to switch the second upscaler to Lanczos3 for more sharpness. The bicubic filter has been well-received as mimicking the beam spot.
The design parameter of the mask is TVL, but TVL is not well-defined in relation to a shadow mask, so I tried to keep it simple: 1 TVL is equal to one RGB cluster horizontally. I think this is the most intuitive definition because the patterns for the three shadow mask types (shadowmask, slot mask, aperture grille) are the same horizontally.
To get a better mask, black space is inserted around each dot in a pattern according to the mask. This is the spatial equivalent of ‘black frame insertion’ and does something to our perception to increase definition and clarity. The ‘black’ does not need to be the same as black level, simply being dark enough in relation to the bright dots is good enough. A feathering technique is used to reduce the black a bit and blend the dots a bit. This essentially acts as an anti-aliasing filter.
Aperture and shadow mask look okay, but slot mask has some issues I need to work out. Scanlines are present here but reduced to a 50% weight to provide more clarity to the mask. The TVL was set to 325 to represent a low-TVL screen, doable at 4K. A high TVL screen would need more resolution, but I am working on a grayscale mask that can support high TVL at a lower resolution (even if I had an 8K screen, I don’t think my video card would be able to support development of Scanline Classic on it). The shadow mask being darker is the correct behavior, but the slot mask is a little too light. The horizontal lines are too thin.
Shadow Mask
Slot Mask
Aperture Grille


