
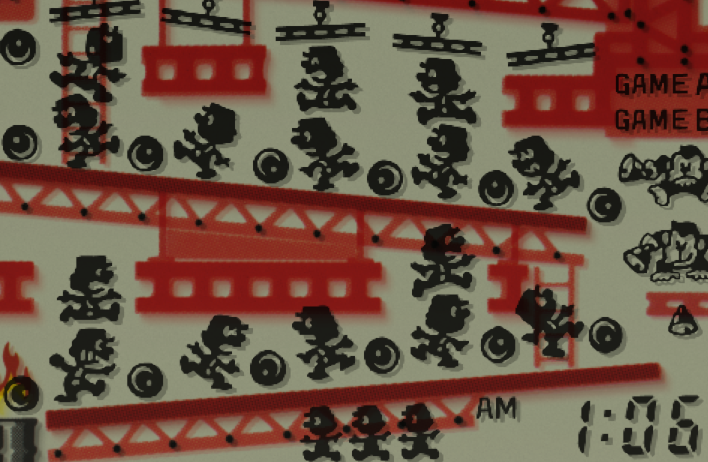
Did you make that vector G&W?
Ah, I see. I was mostly just curious if this section was vector or raster.

It’s probably raster, though. Getting that level of subsurface detail through gradients is difficult.
Hi there, may I refer to my small blog entry on Game & Watch in MAME, there you find two links, and the one to a Google Drive should contain this artwork:
These are the ones I try to convert to MAME in RetroArch. Cheers!
2 Likes
Thank you, I think that answers my question. The frames seem to be Frankensteined from photos/scans of actual units with vector details here and there. I was just curious because I’m basically doing the same thing, but with TVs.
1 Like
Wow, full service as always, thank you very much. The rf noise option really makes a big difference. In comparison, the MAME screens without this tweaking in koko-aio, polished and too perfect compared to this. Many thanks!

EDIT: I see now - in RetroArch MAME, the Alternative Render Option must be activated (normally only for vector games), then the LCDs are crystal sharp! Below with the new koko-aio settings! This is totally beautiful!

2 Likes
That leads to an issue; the shader’s parameter diorama shadow offset is dependant on the input resolution; highering it by selecting an alternate renderer makes it unreliable, since the “core” resolution could vary.
I just pushed a commit that fixes it; Gameboy presets don’t need any adjustment, but I think your does.
Try those values:

Also, since you’re already using an higher input resolution, I suggest you to check if xbrz is improving the image or not; it could be not needed and by disabling it you can spare gpu cycles.
Not only that; provided enough input resolution, the internal 2x upscaling as defined by the default koko-aio-ng.slangp preset may be overkill, you can try to reference the not-upscaled version: Presets_HiresGames_Fast/koko-aio-ng.slangp
- recap: is xbrz useful? no? switch it off and reference presets_HiresGames_Fast/koko-aio-ng.slangp
5 Likes
Thank you so much, and you were totally right: I had quite some performance issues with the higher input resolution of the Alternative Render Option.
The Hires preset completely resolves this. I also turned off any xbrz, as there is no difference for my unprofessional eyes. Also, the Diorama and Offset settings are perfect, as suggested by you.
My favorite game of this time, Mickey Mouse, now runs at stable 60 fps at a good resolution of 1920x1440, where it had struggled before.

Files are uploaded to my repo, including all other necessary files and explanation in the ReadMe. Runahead must also be expressly disabled for better performance. This looks very stable now, grazie mille!
3 Likes
For those who are interested to test the Game & Watch presets and other new stuff. More than a year since the last release, that’s crazy! Special thanks - again - to @kokoko3k for the extra miles around Game & Watch. Very good past memories revive with these handhelds…
6 Likes
Hi @kokoko3k - I know it’s all written down, and I assure you I’ve tried several times, adjusting settings that seemed related, but to no avail. It’s my fault, I’m not capable. Thanking you in advance for your patience, as well as for sharing your valuable work with us, I wanted to understand how to get the image to fit fully on the screen when I decide to use flat geometry rather than round. What value exactly do I need to adjust? I’d like to change it a bit, using your aperture grill preset but in flat mode.


Hi there!
First, under “Bezel”, “Frame Alignment”, move the virtual bezel so that reflections look ok and not “shifted” versus the game content; from the screen you posted, it seems they are not, so maybe it will be sufficient.
But if not, Zoom under Override game geometry (to be enabled) will let you zoom the game content.
1 Like

I should have succeeded - once I activated the game geometry override I changed the zoom value from 100 to 98 - the reflections also seem aligned (if my eye is correct).
Thank you so much, you are very kind as always!
They are not, see a black space between the end of the game and the start of the reflection.
Tune it and don’t mind the geometry thing, the latter has to be tuned after the former is ok.
1 Like
You’re right, looking closer—it’s my fault for insisting on testing with my smartphone, because I actually use your work in conjunction with Duimon overlays on my PC. With my smartphone, the screen is too small and misleading. When I get home, I’ll make the appropriate adjustments following your advice. Thanks again.
1 Like
koko-aio long supported static options, but editing text files may not be the most handy way of managing functionalities, so I’ve just had the idea of a new file based and easier to manage plugin system.
Just committed to the main repo, if you pull it, you’ll see something like that in the config folder:
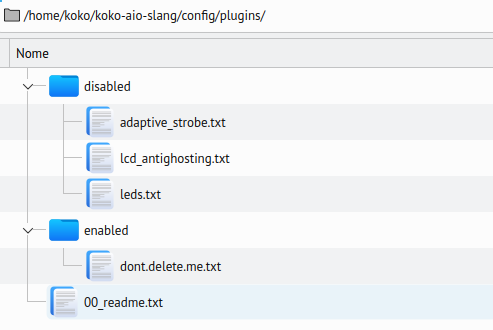
If you open the 00_readme.txt file, you will read:
"Move or copy the files from the disabled directory to the enabled one to enable the extra functionalities"
…and indeed it is what will happen; eg, if you copy the lcd_antighosting.txt file from the disabled to the enabled folder, it will be enabled and the shader will have the lcd antighosting feature added on the next shader reload!
As per the previous approach, not enabled functionalities will not put any extra load on the shader.
-
The PRO versus the previous approach is that the relative shader parameters will be loaded as needed, not polluting the already big parameters list with unbounded parameters anymore.
-
The CON is that if a plugin file is updated, you will need to copy the file again; i’m expecting this not to be a big problem, and assume smart users are smart enough


This idea came after thinking to a way of implementing a led bounded to the floppy drive access for C64/Amiga emulation, as being requested by PiCiJi, the Denise emulator developer.
Retroarch does not expose the needed bits, but Denise does and it seemed very appealing to me, but at the same time I absolutely didn’t want to pollute the retroarch version with something not needed;
…still, the led code may be of interest for some retroarch user, so here is it, still experimental, now under the disabled/leds.txt plugins:


5 Likes
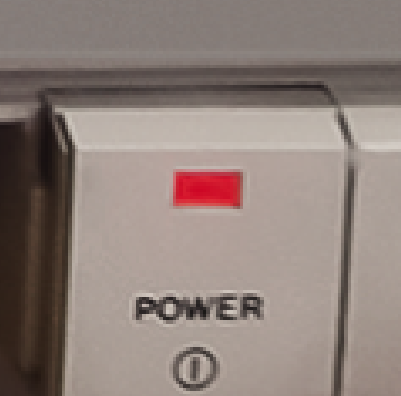
I think I almost finished working on the leds plugin, it should be bug free, maybe there’s still one or two improvements to do to make the exposure less strong when the light is high, but anyway:
The leds survive the “nightification” feature, and also gained a parameter to modulate the overexposure, which in turn is less evident as soon the image gets brighter. Same goes for the halo:


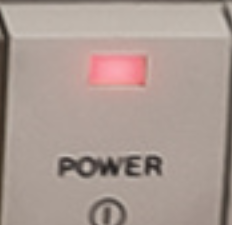
Naked (original image)
Altered opacity (see point 3)
Visible halo and strong overexposure:
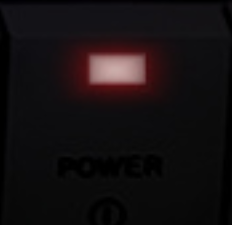
Less halo and less overexposure:
As explained in the past post, to enable it, you have to copy config/plugins/disabled/leds.txt to config/plugins/enabled/ and the led parameters will show up in retroarch:

All presets in koko-aio that show the 1084S has been adapted; the workflow to create and use a “ledified” image is:
- The led plugin needs to be enabled
- The overlay image needs to be enabled and needs to be a foreground image
- The overlay image has to provide one or two “powered on” leds already drawn on it
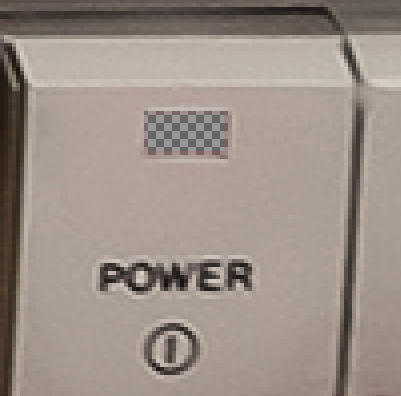
- With a GFX program, make the leds almost transparent, not 100% transparent tho, because the shader needs to access its colors.
- in the shader, move the led halos by changing Power led X and Power led Y values so that its center overlaps the led on the overlay image
- adjust halo size, halo shape (circle or square), aspect, tune exposure as you like.
- set the hue to the same color as the led which was already drawn on the original image.
Done.
-edit-
When using nightification and ambientlight applied over it (immersive preset), you can set now the overexposure to a negative number; doing so will cause the exposure to be dynamically modulated:


The alpha mask:

…Yeah, 1084S+1541 would require 3 leds 
9 Likes
Hi! I’m finally implenting koko-aio for my cabinet. It’s looking beatiful. I have my consoles already configured with nice backgrounds from @Orionsangel.
I wanted to use arcade games overlays like the ones attached, but I’m not sure if koko’s shader implemented monitor orientation detection, and wildcards for the overlay file image, as HSM-MB does.
My PC is not powerful enough for HSM-MB and besides is does not make sense having this very capable shader. Yeah, I could do some batch files, but I just wanted to know.
Thanks.


1 Like
Hey, glad to know!
Not sure what the question is tho, wildcards are supported across all of the shaders, because it is a Retroarch thing.
Aside from that, you should not need to worry about vertical vs horizontal games and wildcards should not be needed to handle rotation as it is autodetected, so keep your overlay straight and everything should work as expected as long as you leave the rotation option to its default value:
Back/foreground image enable -> Rotate/flip : 0
The only caveat is the different behaviour between vulkan and GLCore, when there are hardware accelerated cores like flycast, for a nasty Retroarch behaviour, GLCore flips the external textures over the Y axis.
If you plan to switch video drivers (or use GLCore) then wildcards could be needed, otherwise just use Vulkan and forget about it, at least for what concerns rotation.
2 Likes
Thanks @kokoko3k!! I am planning to use GLCore because is the compatible video driver for my Haswell, although maybe I’ll switch to Vulkan with a graphics card in the future, because even your shader is too much for Nintendo64 emulation as I discovered. Regarding wildcards and rotation, I was thinking to use two generic overlays (one for vertical and one for horizontal) in case of missing artwork, as a default behavior. That’s why I need both things. Thanks for your support!!!
1 Like
Yup, GLCore performs better than Vulkan on Haswell, at least under Linux.
Btw, have you tried presets under Presets_HiresGames_Fast/ ? They trade internal upscale for speed and are suggested for cores that upscale by themselves.
2 Likes