Sony Megatron Colour Video Monitor

Thanks Rafan great chapter! So what I would say is that although we roughly want to get close to that diagram there’s a number of things our side (as well as on the CRT side) that will always stop us getting that close to that perfect luminance distribution. Not least we’re dealing with individual sub pixels rather than continuous strips of coloured phosphor. As in they will have their own luminance lobes.

Then add on there’s no dimensions to the diagram and youre starting to fight a losing battle. What I will point out is that cubic berzier demo stretches the curve over a square and what I do stretch or squeeze that square onto a rectangle which has an effect on the curve shape. See min max scanline lengths.

The way I tackle it is to get close up images of CRTs and just eye ball what the different characteristics of the beam are and then change the values to as closely match that taking photos of the LCD to match and compare i.e use empirical methods and not so much theoretical (although a bit of both are key)

4 Likes

@Jamirus kindly submitted these close up shots of Soul Calibur 2 on GameCube which is a 480p game (or rather 528 because of GameCubes dreadful upscaler (at least I think it’s the GameCubes and not Dolphins).

So I decided to match it which showed up some quite glaring bugs in the higher resolution. That I’ve now fixed. Anyway here’s a comparison shot of where I got to…

8 Likes

Oh yeah I forgot about this. Dolphin is quite possibly not accurate about resolution output, much like N64 emulation is somewhat lacking in this regard. My understanding is that the GameCube has an internal maximum framebuffer size of 640x528 and scaling hardware that can scale it further. 528 is thus a limit for the internal resoluton, not actual pixels to be rendered and the final output which needs to conform to NTSC and PAL standards (thus 480/576 max). The wiki for the GameCube utility “Swiss” has a list of actual resolutions that games use, Soul Calibur II uses 640x448 and scales it to 528 height when using PAL 50 Hz.

https://www.gc-forever.com/wiki/index.php?title=Swiss/Forced_Progressive_Compatibility_List

2 Likes

Yeah we really need a way of getting rid of that horrid upscale - it’ll make the image much better. So can we do this with Dolphin on RetroArch? I can see an option for PAL60 but turning it off doesn’t seem to do much - I presume that just changes the refresh rate not region.

So I looked into how to get the native resolution out of the GameCube Dolphin emulator and found the whole rendering for RetroArch of Dolphin is borked ATM. Basically the libretro version of the dolphin emulator upscales the final console image to the display resolution (4k in my case) and then down-samples that to 640x528 and then passes that image to our slang shader pipeline. Looks like a bit of work to fix it sadly. Hmm one day…

3 Likes

A quick dabble at trying to emulate @Wilch slot mask Philips 21pt4457.

Quite far off but look at the difference in the red and green phosphors compared to the LCD pixels - they’re very yellowey.

5 Likes

Should the sdr presets be reconfigured? They look a bit strange now with the change to the gamma code.

1 Like

Not bad! I’ve uploaded an updated photo to the other thread. It’s less bloomy etc

1 Like

Yes probably! Probably they all need a re-going over. I’ll submit my latest fixes and then I’ll go over these. I’m tempted to try and fix the GameCube’s output but I’m still juggling multiple projects. I’ve got local changes that partially fix the DirectX drivers in TATE mode as well. Too many things to do and not enough time.

4 Likes

Is there any difference so far from the ReShade ver to the RetroArch one? I converted the presets marked SDR to HDR on my side for use in ReShade but i would like to know if the RS version still holds well enough for me to try it. I sadly don’t have a HDR monitor, but still find this shader really pretty.

1 Like

Hi, nice shader you’ve been working on!

I have a couple of questions for you.

1.) How feasible would it be to create a CRT shader with an arbitrary TVL like say 292TVL? Now why 292? Because SNES, Genesis/MD, PSX etc. when they stretch/squish according to their PAR are about 292 horizontal lines wide(with 0 overscan). Conversely would other arbitrary TVLs be possible like 256TVL(SNES with no stretching, many Genesis games with no stretching, Master System, other consoles etc.), 240TVL(GBA 240x160 though a pixel grid LCD style would be better for this), 160TVL(Game Boy/Color 160x144) etc. Basically my idea is to match the TVL to the visible horizontal lines on screen. Conversely the idea of say lowering the TVL to 250 or lower to emulate a small cheap blurry CRT is also interesting to test out with various games etc.

2.) What do you think about the prospect of a universal desktop shader where you load the shader separately from the emulator(Retroarch etc.)? Basically what I’m talking about is some kind of dedicated CRT Emulator program where you open the program and then select a CRT you want to emulate(and also of course being able to load your own presets) and then just apply that and have the monitor basically starting to act exactly like the CRT monitor you selected.

1 Like

OK, nvm, saw that the ReShade one is outdated. Any chance of having it updated aswell? When and if you have time ofc.

1 Like

At a certain point it would be nice to have a guide to the shader explaining scanline attack for those of us who aren’t as mathematically-inclined. I need it explained to me the way you’d explain it to a small child, preferably with pictures :slight_smile:

2 Likes

So what better way to make the cost of living crisis really hit home than to buy a bloody expensive new TV! Yes I’ve told the bailiffs to go f*#k themselves whilst I get pictures for you all of my new Samsung 65" S95B QD-OLED TV (temporarily mine at least until my wife comes home at which point she’ll be divorcing me for spending the children’s shoe money on new AV equipment).

Anyway here are the first few pictures (and yes I need to update all my presets now as the values are radically different to my LCD). More to come tomorrow.

9 Likes

Wow! Looks brilliant! I’m looking forward to hearing about these QD-OLED subpixels and how they work.

1 Like

Hi @Matsilagi yes there are now quite a lot of differences - mainly fixes. I need to port this all over to the ReShade version. It shouldn’t take too long but it’s the time issue again (it doesn’t help that I brought a new toy - S95B - also 🤦🤣). I’ll get there though. Glad you like the SDR version - I’ve found it works pretty good on my laptop.

Hi @zedex some great questions. So with your first question it’s not possible to have arbitrary TVLs with pixel perfect masks. You can of course stretch and squish the image behind the mask to effectively get this but this probably won’t be aspect correct and you have to have a larger TVL to start with. The reason for this is that the mask is a fixed number of pixels - whatever that mask is. So with a typical 4 pixel aperture grille mask in order to calculate the max TVL your display can provide you need to divide the horizontal resolution by the mask size ie for a 4K display 2160/4=540TVL (max ie 16:9).

As for 2 you need some way to do that provided by the OS i.e lobby Microsoft or Apple or whoever makes the OS. Also probably the gfx card manufacturers. There’s probably some security risks with anything like this.

Lol yes will do but I warn you my drawing capability is child like.

1 Like

Hi @MajorPainTheCactus,

Congrats on the new TV! Pretty exciting specs it has!

I noticed your comment about updating all your presets because of the new tv. Will be great to see what comes out of that, it can only get better!

Regarding our earlier discussion on the vertical brightness distribution of a CRT scanline, i.e. the Gaussian profile discussed here, I thought to do a little testing to see how the scanlines in the pictures from your real Sony PVM 2730QM in the very first post of the thread (Randi - Secret of Mana SNES) match up vertically to the idealized gaussian profile.

As a starting point on a 4K TV we have 9 discrete steps for the vertical scanline modelling (2160p / 240p = 9 as scaling factor) . Since the vertical scanline profile is symmetrical from the midpoint to the top and from the scanline midpoint to the bottom, we need 5 discrete steps to start at the midpoint and move 4 steps up or down.

Given the 5 discrete steps in modelling the upper part of a scanline on 4K from brightest midpoint to the “black” in between the scanlines, what I did was I cut out a bit between the eyes from your CRT photograph, cutted it a bit further to the red, green and blue phosphor, then took the upper half of the pixel/scanline and rescaled it with paint package using supersampling to 5 pixel height. Then I measured the “V” with the HSV color system as the measure of brightness for the 5 steps and put it in an excel graph to compare it with the Gaussian Profile from that Chapter 5.

Like this:

to

cutout real 2730QM 1

to

cutout real 2730QM 2

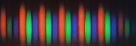
and then the middle of the top half for each primary color, i.e. approximately the yellow stripe in below image:

cutout real 2730QM 2 - middle cutout highlight

and scale that to a height of 5 pixels - using super sampling algorithm best quality from paint package - for getting the top half of the scanline brightness distribution (example below is inflated for visability).

I took the very middle single vertical line for the top half, because we are only interested in the vertical profile. Then use the color checker in the paint program, take note of the “V” value from the HSV color system, make them relative to the midpoint of the scanline being the brightest at 100%. Example for phospor red:

cutout real 2730QM Red with annotation

Then plot the values symmetrically in an excel chart, which gives us the vertical scanline brightness distribution for your Sony PVM 2730QM:

Now super-impose the Gaussian Profile from the earlier discussed chapter 5.1 Generating the Pixel:

And somewhat surprisingly this gives the measured values a very near match to the idealized gaussian profile.

Now I hear you thinking, then what about my Megatron? :smiley:

So I did the exact same exercise for the equivalent Megatron picture from your first post (Randi - Secret of Mana SNES, cutout between the eyes from the Megatron simulation, etc, like above) and put them against the Real CRT measurements for Red, Green and Blue:

Red:

Green:

Blue:

I don’t know what exact preset/settings you used for that 2730QM Megatron shot, as you’ve been changing the presets and some shader code over time, but it seems, especially looking at the blue phospor vertical scanline brightness distribution that the simulation is actually very close to the idealized gaussian profile from the real CRT.

The red from this particular preset could use some tweaking, but the overal conclusion looks to be that the shader is quite able to match the vertical brightness distribution from the real CRT, and for that matter the idealized Gaussian profile from Chapter 5.1! :heart_eyes:

5 Likes

Really great work @rafan!

So on one level we can say just make the red and green mirror the blue settings!

On another level though I’m amazed that matches so closely to the point I’m a bit skeptical as there’s so many factors here. As in when I look at my CRT one area can look quite different to another area just with the naked eye - the beams do all sorts of widths and angles all over the screen and my phone is effectively flattening that all out from one particular area. Then we may not be dealing with perfect colours because of the camera, original colour etc swinging that HSV calculation not to mention all the processing the camera is doing with tonemapping and converting that into jpegs etc. I also took the picture and then screen grabbed a zoomed in version of that so double processing it. Then what is the super sampling algorithm doing and all that processing. It would just seem a bit too good to be true surely?

Then again you’ve shown your workings and crunched the data and mapped it to the diagram so who am I to argue with that - I’m just amazed its come out that close - nearly perfectly. I’m also just as amazed that I got the shape that accurate just by eyeballing it especially as I was mainly looking at the lengths of the phosphors and not in the shape of the falloff particularly.

I suppose at the end of the day though all these things I’ve said haven’t dramatically altered the look as in you are still looking at recognizable images of phosphors and so maybe it will keep all the luminance information pretty much intact. Quite amazing results though and great thinking.

4 Likes