Yet, another CRT Shader

[QUOTE=Hyllian;28732] Hi, Nesguy,[/quote]

After more obsessive fiddling with settings, I think I now actually prefer CRT-Hyllian’s default settings, although I think there is some room to play around with the beam min setting and scanline strength setting.

I’m still using the version of crt-hyllian that is part of the glow preset, without the rest of the preset. I’ve also enabled Hyllian’s anti-ringing filter by altering the related code within the shader. This is the only thing I’ve changed and I think it looks great with the default settings. However, I think color boost might be reduced somewhat based on individual display brightness and room lighting for more accurate color. I found contrast suffers when you reduce color boost, though, so it’s a trade-off that isn’t really worth it, currently. Would it help to have two separate options, one for boosting white level/contrast and one for boosting color? As it stands, the default color boost of 1.30 looks pretty good and I wouldn’t change it.

I’m curious- is there a way to reduce the beam variation even further, or eliminate it?

Also, is there a way to get closer to true “1:1” scanlines, whose width is equal to the visible lines? I fiddled with the beam min/max settings for a while but couldn’t quite get there. Just wondering how this would look.

Thanks again.

Use 1.0 to both MIN BEAM WIDTH and MAX BEAM WIDTH.

[QUOTE=Nesguy;29425] Also, is there a way to get closer to true “1:1” scanlines, whose width is equal to the visible lines? I fiddled with the beam min/max settings for a while but couldn’t quite get there. Just wondering how this would look.

Thanks again.[/QUOTE]

Try using SCANLINES STRENGTH equal to 1.0 too.

I don’t know if it can fullfil your need, but it’s the best I can recommend to you now.

(I can’t try it now because I’m not working on this shader, lately.)

1 Like

Thanks for the reply, that worked really well. I’m surprised how good the shader still looks with everything set to 1.00 except sharpness (2.00) and color boost (1.30). This looks similar to shots I’ve seen of an XRGB-mini with H scale configured to add horizontal blur. Personally, I like the dynamic beam variation, but even without it the shader is still fantastic.

One thing I’ve noticed is that there isn’t an option to do gamma correction with the version of crt-hyllian that is part of the glow preset. I looked at the shader file and I saw stuff relating to gamma but I couldn’t figure it out. How does one alter gamma? Also, when I uncomment a line to activate something, it doesn’t seem to do anything different (for example: “uncomment this line to activate the anti-ringing filter”). I thought to uncomment a line, you just deleted the # that comes before it. Is there more to it than that?

Thanks for answering all my questions!

Shaders use C-style syntax, so it’s not # for comments, it’s // or /* … */.

1 Like

This is the only difference between the default and the glowing ones. I had to deactivate gamma in that multipass version, because it was already corrected inside the first or second pass shaders, and then at the last pass shader. If you’ll only use the crt shader, I recommend you to use the default crt-hyllian and copy the parameters from the glowing one into it.

1 Like

Thanks, it probably would have taken me a whole day to figure that out :stuck_out_tongue:

oh, sweet - thanks for the tip!

1 Like

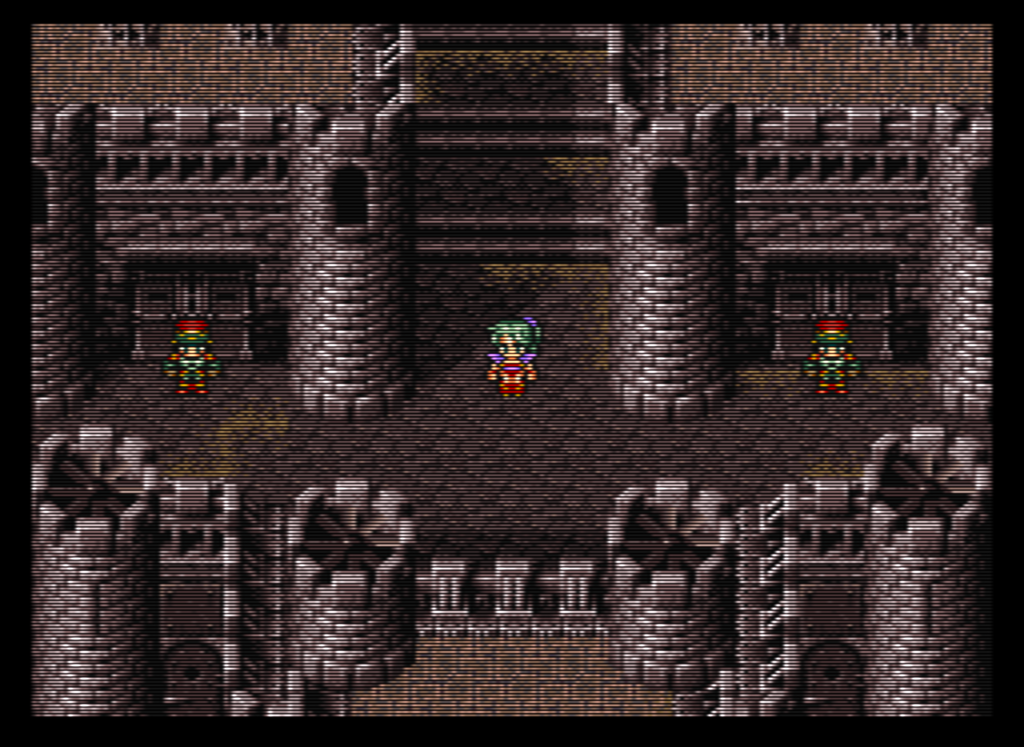
I tried the regular version of crt-hyllian located in the main crt directory, but it results in some pesky artifacts that I can’t seem to get rid of. Compare these two shots:

The first shot is using the version in the crt-hyllian-glow folder. The second shot is using the regular version located in the main crt folder.

In the second shot, pay particular attention to: the door in the bottom left, the square tile above it, the windows in the turrets, and the black border around Terra’s sprite. There are some abrupt transitions from solid black pixels that are unnatural. This is absent in the first shot, however.

Is there a way to eliminate these artifacts to make it look like the first shot?

1 Like

These are results from the gamma correction. If you try other shaders like crt-geom, you will notice them too.

Ah, okay. I think I’ll stick with the non-gamma corrected version. I find that gamma correction and brightness boost/color boost are not necessary once the display has been properly calibrated to the SD color space. When calibrated to the regular HD color space my display winds up looking way too dim and dull for 240p games. When calibrated to the SD color space, the colors are as bright and vivid as they should be.

I think messing with color boost and gamma correction just complicates things; it shouldn’t be necessary on a properly calibrated display. I’m actually getting the best results I’ve ever seen by using CRT-Hyllian (the glow version) with the your anti-ringing configuration, with sharpness at 2.00, scanline strength at 0.70, and everything else at 1.00. This looks simply amazing when the display is calibrated to the SD NTSC standard.

I wrote a lot more on this here: http://libretro.com/forums/showthread.php?t=4209

1 Like

Is there a way to fix dissappearing of scanlines during vertical scrolling?

I asked this question some time ago and people told me they disappear on a real CRT screen too…

Hm, I’ve checked XRGB mini videos on youtube, and it’s seems, that scanlines there do not dissapear that much

XRGB mini scanlines aren’t real, so they’re not a good indication of anything.

I confirm, they also disappear on a real CRT too. It’s an optical effect. There’s nothing you can do i’m affraid :confused: This shader and many others are better than xrgb scanlines. You should take some time to tweak the parameters for your taste.

1 Like

New version (standalone) added to common-shaders. I got rid of all #define params and put them as params to change in real time through shader menu. Phosphor now is on by default, but you can change it in RA menu too. Anti-ringing now is tweakable, I added a param that can go from 0.0 to 1.0.

Thanks for updating this shader, however it dosn’t work any more with the d3d driver … :confused: ( i need to use it for several reasons ) Did you update the phosphor rendering also ? It would be great to have a tweakable phosphor grain.

Do you know the last version that worked for you?

I tested here in d3d and yes, doesn’t work… even older versions don’t work.

EDIT: Nevermind! Found the bug. It’s already fixed. Grab it in common-shaders.

Thank you, it works like a charm now ! :slight_smile: ( I hope you’ll continue to work on it especially with the phosphors not to reproduce perfectly a monitor but to add some nice “grain” ! )

I’ve been using this shader for a long time now and I love it. Today I thought of a way to have better contrast with the phosphor effect on by making it inversely proportional to the colors’ brightness. The darker the color is, the stronger the phosphor effect is, thus making bright colors stand out a lot more.

Here’s 2 screenshots of the result (click to open the full image) :

_

I’ve modified the last part of the shader dealing with the phosphor effect :


#ifdef PHOSPHOR

    float mod_factor = VAR.texCoord.x * IN.output_size.x * IN.texture_size.x / IN.video_size.x;

[b]    float col_factor = PHOSPHOR_STRENGTH*(color.r + color.g + color.b)/3 + (1 - PHOSPHOR_STRENGTH);[/b]

    float3 dotMaskWeights = lerp(
                                 float3(1.0, [b]col_factor[/b], 1.0),
                                 float3([b]col_factor[/b], 1.0, [b]col_factor[/b]),
                                 floor(fmod(mod_factor, 2.0))
                                  );
#endif

PHOSPHOR_STRENGTH can be set from 0 (no effect) to 1 (full phosphor effect, strong contrast). I used 0.8 for the screenshots. I also use color manipulation before the phosphor code to fit my personal liking :


// boost medium brightness and add blue tint to dark pixels :

    float colsum = (color.r + color.g + color.b)/3;
    float colpow = pow(1 - colsum, 2);

    color.r = pow(color.r, 0.9) + 0.05 * colpow;
    color.g = pow(color.g, 0.9) + 0.05 * colpow;
    color.b = pow(color.b, 0.9) + 0.18 * colpow;

Maybe someone will find this interesting… :slight_smile:

Thanks for The tips. I’ll look at it later to see The effects.