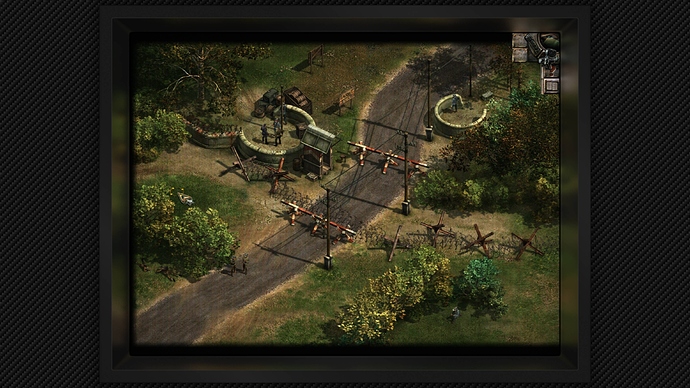
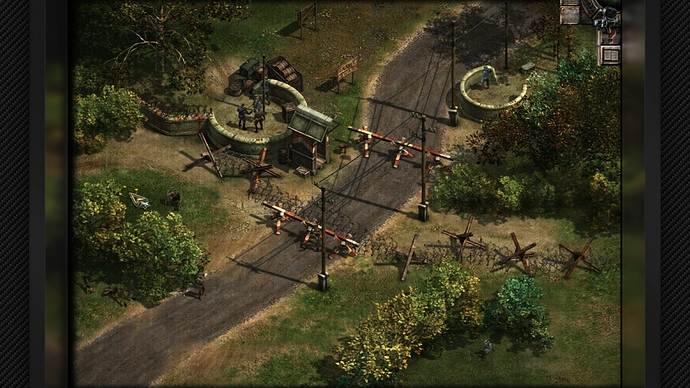
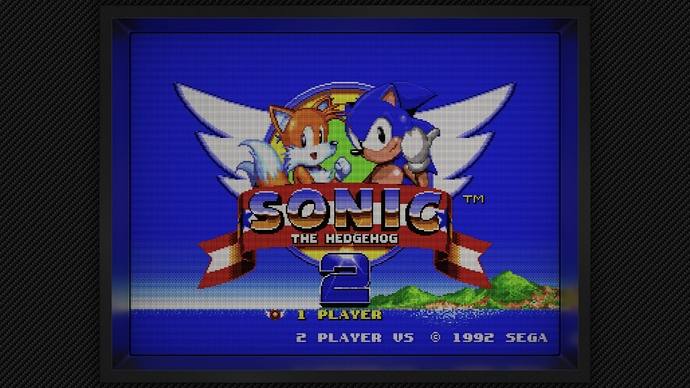
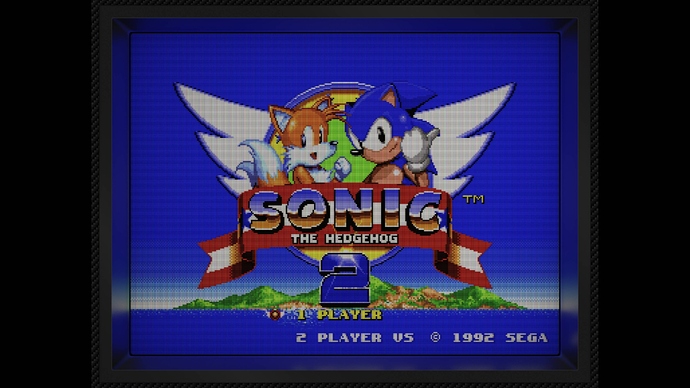
Hmmm…this might be due to the fact that the overwhelming majority of my presets use Integer Scale mode. You can probably adjust the size of the screen by adjusting the Integer Scale Offset. Or just change Integer Scale Mode to Non-Integer Scale mode.
Hi @Cyber!
As a matter of fact I’m already using Integer Scale OFF, as making it ON only makes the things even smaller  (BTW, I believe Mega Bezel install instructions includes making the Integer Scale OFF)
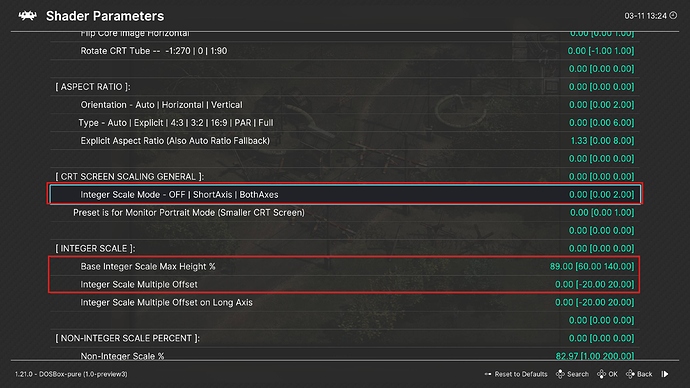
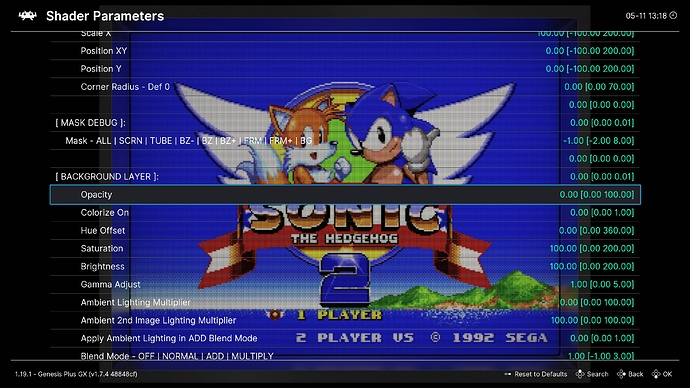
Here is my “default” settings:
Now some screenshots to help (Windows 98 installation on Dosbox-pure Core with a 1024x768 resolution on Windows desktop):
"Pure" Meg Bezel presets with Integer Scale OFF
“MBZ__0__SMOOTH-ADV” preset with 640x480 in-game resolution - Integer Scale OFF
“MBZ__0__SMOOTH-ADV” preset with 1024x768 in-game resolution - Integer Scale OFF
Please notice that only the game window has changed - naturally, the lower resolution makes the game “less zoomed”.
Now the CyberLab presets with Integer Scale OFF:
“CyberLab__Computer-Monitor-Smooth__ADV” preset with 640x480 in-game resolution - Integer Scale OFF
“CyberLab__Computer-Monitor-Smooth__ADV” preset with 1024x768 in-game resolution - Integer Scale OFF
And the CyberLab presets with Integer Scale ON:
“CyberLab__Computer-Monitor-Smooth__ADV” preset with 640x480 in-game resolution - Integer Scale ON
“CyberLab__Computer-Monitor-Smooth__ADV” preset with1024x768 in-game resolution - Integer Scale ON
Please notice that, for instance, the smooth preset with Integer Scale ON (on both in-game resolutions) not only turn out the smallest window, but the background doesn’t even fill the entire screen (I’m using a 4K OLED TV).
Any ideas?
Thanks a lot!
Hi @Cyber!
Sorry, when you said “Integer Scale Offset” or “Integer Scale Mode” you were refering to the settings below, right?
If I change the Integer Scale Mode to OFF, it works as I wanted to:
On the other hand, if I change the “Integer Scale Offset” from 0 to 1 (for instance), the screen change like this (the screen goes beyond the limit):
And by the way, If I change the Base Integer …% from 89 to some other value, nothing happens UNTIL it does (I believe from around 105) - when the screen appears exactly like the image above.
Non of these settings I’m referring to are in the Settings–»Video–»Scaling Menu. They are all Shader Parameters.
Quick Menu–»Shaders–»Shader Parameters
Hi @Cyber!
Please, a word of advice. I want to play only with the TV border, not the entire external bezel.
To do so, I just changed Settings > Video > Scalling > Aspect Ratio from “Full” to “Core provided”. In doing so, I got this:
After that, I just changed the “BACKGROUND LAYER” > “Opacity” from 100.00 to 0.00.
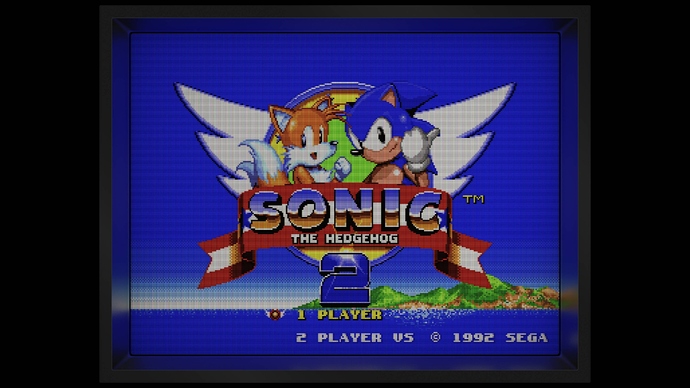
And the result is what I wanted:
BUT, maybe there’s a catch - as I changed the aspect ratio (Mega Bezel recommends the “Full” option), is there any undesired effects on the game itself (the main window I mean) in doing that (not only for this core, any other core)? Or the “Full” option is really just to show the Bezel?
Thanks in advance!
Mega Bezel uses its own Scaling parameters for various functions so Aspect Ratio needs to be set to Full in the Settings–»Video–»Scaling Menu in order to bypass the Aspect Ratio settings there.
You don’t need to interfere with the Scaling settings to turn off or alter the visibility of the Background Graphic.
All layers can be adjusted by using the controls in their sections.
I suggest you familiarize yourself with the Mega Bezel readme.
Hi @Cyber!
Thanks, you’re always helpful.
I apologize, but I forgot another important detail about why I find it interesting to leave the Aspect Ratio setting as “Core provided”. Although I primarily use the CyberLab presets, I have a few others installed, and all of them require to have the Aspect Ratio as “Core provided” (if it’s on “Full”, naturally, the image streches over the screen using those shaders).
Therefore, it would be beneficial for me to leave the Aspect Ratio as “Core provided” so I don’t have to change this setting depending on the shader being used.
That’s why I tried setting the aspect ratio to “Core provided” and tweaking the remaining border settings until it looked the way I wanted.
As it has to be “Full” on the Cyberlab shaders, any ideas on how to reconcile the use of both shaders?
There are no CyberLab Shaders, only Presets (Settings) for shaders made by other people.
You do realize that you are asking primarily about Mega Bezel Reflection Shader functionality but this is not the Mega Bezel Reflection Shader thread.
I hardly use Mega Bezel Reflection Shader anymore so for me to answer many of your questions, I actually have to go looking in the places you should be looking and asking.
In my case, if I have to switch Scaling settings to use a border shader, I just go to the menu and make the change. My default settings are based on what I primarily use.
Hi @Cyber - I need your advice: I’ve got my hands on a 50-inch full HD TV and wanted to move my Mini PC there after formatting it. So I wanted to use @soqueroeu’s work along with yours, which is included in your package, but I’m unclear on a couple of things:
1 - Are Blargg’s filters necessary for good results or optional? Of course, if I use them, I’ll use your updated version.
2 - I saw that you have a preset for Sony PlayStation as well as for the classic Super Nintendo and Sega Megadrive, could it also be good to use with Sega Saturn and Nintendo 64?
Thank you so much for your patience with me and for the work you put into helping us.
If the preset filename says “For Blargg” then it’s strongly recommend to use Blargg if not, things might not look as they should.
If it says “Blargg recommended” then it is up to you if you want to use it.
I never intended to support all systems, only the ones I play, like or are interested in. N64 is one of my least favourite systems and it generally hasn’t aged well in my opinion. Due to this it’s just an afterthought in my preset pack if thought of at all.
You can just try any preset and see what you think looks best to you. There are different ways to combine Soqueroeu’s-TV-Backgrounds with my presets.
The second way involves converting Soqueroeu’s-TV-Backgrounds presets to params files then loading them as a second reference with my presets as the main reference.
An example of this can be found in my CyberLab_Special_Edition folder but the “BackgroundImage” line has to be replaced with the second reference line.
You’re welcome.
Perfect - you were very clear - thanks as always for your work. PS I agree with you that the N64 has aged rather poorly, but Super Mario 64 is so much fun!
I recently made a good N64 preset for my Epic preset pack and I also have N64 presets scattered around my various preset pack offerings.
In the past, I’ve also used my NES presets as good starting points for N64 emulation but the key to a great N64 emulation experience using CRT shaders may actually lie in how you setup your N64 emulator.
That can either make or break the experience.
By the way, what make and model is it? If it’s bright enough you can try some of my Sony Megatron miniLED Epic presets.
It’s a TLC 50BP615. I’ve actually had it for 2 years and was using the Mini PC on an old TV in the bedroom to make it “Smart.” But now I’m buying some “Smart TV” sticks and as soon as they arrive I should be able to remove the PC and format it. The TV says it’s 4K, but from some tests I did in the past, the PC had difficulty handling even a shader like CRT-Royale at this resolution. While at 1080p I have no problems with most shaders, except for the emulation of “heavier” systems like the PS2 for example. Since I read that the Sony Megatron is a fairly lightweight shader, I absolutely have to try these works of yours in 4K mode as soon as I can—but I have to wait until the weekend between the arrival of the sticks and the formatting of the PC. Thanks so much for the tip. I hadn’t thought of doing these tests; I’m still stuck at 1080p.
CyberLab Megatron miniLED 4K HDR Game BFI Turbo Duo_DC Composite CyberTron Epic CAR9x8x or CAR7x6x.slangp and CyberLab Megatron miniLED 4K HDR Game BFI Turbo Duo_DC Composite CyberTron Epic CAR9x8x or CAR7x6x.slangp
Hi Cyber, been a fan of your presets for a while- even invested in a miniLED (partly) because your newest presets were made with the tech in mind… and those presets look great, but even though I set the subpixel layout in the Shader Parameters to RGB, when zooming in, the shader still outputs BGR somehow. Any idea where in the pipeline could be causing this?
Sincerely, a fan.
As far as I can tell, this is normal behavior.
Are you talking about a photo of the screen, or a screenshot?
Reversing the phosphor order is normal for these masks. E.g., with RGB subpixels you’ll get
xxBxGxRxx
If you didn’t reverse the subpixels you’d get this
RxxxGxxxB
Which places the B and R right next to each other, which causes those phosphors to blur together and become magenta.
All miniLED displays are not the same. What’s the make and model? miniLED is a backlighting technology, the panel type can vary and even among the same panel types subpixel layouts can vary.
Send a screenshot as this will show what the shader is outputting. Also your settings and/or the name of the specific preset.
A close-up photo of the screen might also help using low ISO to allow the subpixel detail to be captured. Something white or grey would contain all of the subpixel colours.
Deconvergence settings can make the emulated phosphors shift around, Shadow (Dot Mask) patterns are subpixel agnostic.
Lower TVL’s spread the phosphor colours over several pixels so once they are close enough or spaced evenely enough, things might not look that bad even if the wrong layout is chosen.
Here is a perfect example of a user using the “wrong” layout for their display but with things still seemingly working out for them. At the end of the day use whatever looks best to you.
CyberLab Megatron miniLED 4K HDR Game BFI Turbo Duo_DC Composite CyberTron Epic CAR9x8x or CAR7x6x W3.slangp
featuring Sony Megatron Colour Video Monitor and CRT-Guest-Advanced-NTSC 2025-11-11r1 NTSC Section


