Koko-aio shader discussions and updates

Oh yes I know. You’re pretty much one of my “go-to’s” when I want to take a break from using my own presets, both you and Hyllian’s pack. I always go to your “slot mask bloom” preset.

I’m going through something similar tweaking Shadow Mask at 4k, I really dislike that green/magenta look ugh.

If it comes down to it that one looks good as well, the rgbx one gives a crisp sharp look while the rgb one looks smoother. I could see myself switching between them both during a gaming session for different experiences. I say keep the rgbx one around and maybe play around with it some more if you think it can be improved more somehow.

1 Like

These shaders are excellent. PC users appreciate it. :pray:t2:

Sorry to open such an old topic, I have discovered some things that may be interesting. @ROBMARK85

This is an IBM technology Initially known as “Double Scan and Border Support” and later “Double Scanning…”.

Not all modes (adapters/monitors) produced double lines.

The modes prior to VGA; Hercules, CGA, EGA Tandy, etc worked at 15.6kHz and produced 200 lines, and 21.5 kHz for 350 lines. VGA is 31.5kHz/60Hz for 480p and 31.5kHz/70Hz for 400p.

Line doubling is unique to VGAonly, it takes 200p content and draws each line twice to enter 400p mode. SVGA on the other hand, loads the 200p content in 480 mode and stretches the image using polarity of the sync signal. The visual result is identical.
Computers and micros of the time produced 240p maximum, with the exception of PC-98 which had 400 lines on a 24kHz monitor.

That is, when you load a 200p/350p CGA/EGA game on the original hardware you see single lines, and when you load it on VGA/SVGA hardware you see double lines. In this video PhilsComputerLab makes a good comparison.

In this sense, DOSBox is faithful to the original hardware and when you load a 200p EGA/VGA game with the VGAonly adapter, the vertical resolution doubles from 200 to 400. And any shader will produce double lines (in some cases you have to disable interlacing).

And also, Schelling is currently implementing an option for DOSBox Pure, which duplicates the lines in all modes. This is very interesting.

And I have also seen several shaders that are capable of drawing double lines in 200p content, duplicate/split or adjust the resolution. There is one that I really like, the crt-blurPi…

4 Likes

Thanks a lot for the info @alexb3d - I was a happy owner of 386 and Pentium later with VGA monitor and the shader of @kokoko3k brought back to mind exactly those feelings, so much so that for the moment I abandoned the idea of smoothing to search for a shader style more faithful to what was my past experience, and I’m rediscovering a world now gone by for several decades. If I’m not mistaken however the kokoaio shader uses the “Double Scan” mode in the specific PC preset.

PS In fact, thanks to these technologies, I have always considered the computer to be clearly superior to console images in terms of video quality. Unfortunately, it was cheated by the availability of titles and brands, many remained tied to consoles, even if lately the gap has almost closed.

2 Likes

But, running a game at 480p even if it was 2D, required power. Look at Quake, there was nothing similar on consoles. There are many games that were very powerful. 320x200 resolution was the PC standard until VGA came along.

I too am reminiscing a lot of things, one after another. Those were good times.

Hi Koko,

About the new Mask Helper funtion, I still do not get what it does. Could you please illustrate what are the advantages of this feature? Please highlight the details that typically demonstrate this feature. Thank you.

Best regards

Hi there,
I thank you for the question, because this means that the docs are not clear enough; it is a tricky setting that depends on other apparently unrelated parameters, so this is an opportunity to improve the documentation for the ones who do not follow every single post of this thread.

The new mask helper feature resides in the halo section for an implementation optimization issue; also, halo and mask helper shares a parameter.

What docs-ng.md file states is:

    Mask Helper: Additional brightness if horizontal mask clips
        To maximize horizontal mask coverage while maintaining full brightness, use the Mask Helper. 
        This feature selectively adds color to pixels where the mask alone falls short.
        
        How to Use Mask Helper:
        -----------------------
            Activate the "Horizontal mask" parameter.
            Set "Phosphors width Min, Max" to the minimum.
            Set "Phosphors width min->max gamma" to the maximum.
            Adjust "Input signal gain" based on mask size:
                ~2.0..3.0 for 2-sized (gm, wx)
                ~3.0..4.0 for 3-sized (gmx, rgb,rbg)
                ~4.0..5.0 for 4-sized (rgbx, rbgx)
                
        Note: Halo-tagged parameters do not affect Mask Helper.

    (Halo and Mask helper): Light up scanline gaps and dot grid gaps too:
        Theoretically Halo and Mask helper have to be applied
        "over" everything, because that is the way it works in nature.
        But you can choose to cheat and prefer to see more scanlines gaps, instead.
        Do this if you like much more pronunced scanlines, even at the
        cost of some graphical artifacts visible on high contrasted areas.
        The same apply for the grid emulated via dot matrix emulation feature.

You know, an horizontal mask, typically RGB, lights the R from the first monitor pixel, G from the second and B from the third, showing on the final RGB subpixel screen like this:
“R - - | - G - | - - B”
…this means that if one uses just a pure mask, it would light 1/3 pixels, leading to a maximum brightness of 1/3.

The majority of the shaders deal with this by adding bloom, glow, halo, mask mitigations, you name it, but in the end the effect is to not dim completely the pixels that are not stricly part of the mask.

To make things clearer, if “R,G,B” are very bright components and “rgb” not so bright components, the mask mitigation process would turn the previous:

“R - - | - G - | - - B”

…to something like:

“R g b | r G b | r g B”

And this effectively helps in retaining brightness, but by sacrifying the mask.

Till now, koko-aio was able to do something like that via halo,bloom and horizontal mask parameters, but none of those were able to mitigate the mask when and only when it is needed, so usually the added colors leaked over places where the mask itself was still able to reproduce the colors perfectly;

The goal is to avoid unneeded leaks -> sacrify the mask only when necessary.

As said before, a standard RGB mask itself is able to reproduce the lights till 1/3 (33%), so if you apply iton a full black to white ramp, you’ll have a darker screen.

But.

What If you push the initial signal gain (almost first parameter) to 3.0 and keep using only the mask?

That would produce a boost of brightness, but the mask would be still able to reproduce 33% max, this would mean that the signal (reproduced via the mask) will be “clipped/saturated” pretty early

If you Imagine a gray ramp the chain would be:

  1. signal(10%) -> signal boosted by 3x = signal(30)%-> apply mask -> no clip -> ok
  2. signal(33%) -> signal boosted by 3x = signal(100)%-> apply mask -> no clip -> ok
  3. signal(50%) -> signal boosted by 3x = signal(150)%-> apply mask -> clip

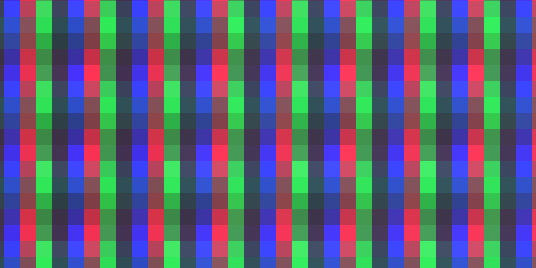
2 and 3 would appear exactly the same, see the following at 100% zoom and please don’t mind the fact that clipping occurs at about 60% and not 33% (I spare you the reason to not clutter this already bloated post).

So we have a mask that is perfect till the clip point, but after that it needs help to reach the full brightness, that help is given by the mask helper (please open at 100%)

This function is able to detect when the mask is clipped and add the color exactly when is needed and exactly how much is needed.

You may see some discontinuity exactly in the switch point; that would mean your monitor is not well gamma calibrated.

For this feature to work some other parameters need to be tweaked:

  • “Input signal gain”, as said, needs to be high (eg: 2 for gm 3 for rgb mask, 4 for rgbx mask)
  • Every mask component needs to be exactly 1px wide, so “Phosphors width Min, Max” needs to be set to minimum.

As I’ve already covered, another problem that could arise is that some monitors do weird things when so much mask is used, so in the following real-life examples, the mask strength has been lowered, thus allowing some of the color to leak even on darker tones.

Still the mask saturation is very high, we have still almost 80% full mask when the mask has reached its 95% capacity, that limit can be higher if you trust your monitor calibration and if your monitor does not go crazy with weird masks:

Screenshot_20240903_175034

Examples:
This is using a standard RGB mask, useful for use with bigger screens (see at 100%):

parameters-rgb
DO_CCORRECTION = "1.000000"
IN_GLOW_POWER = "3.499997"
TEMPERATURE = "8000.000000"
IN_GLOW_GAMMA = "2.000000"
GAMMA_OUT = "0.400000"
DO_SHIFT_RGB = "1.000000"
OFFSET_STRENGTH = "0.250000"
SHIFT_R = "-20.000000"
SHIFT_G = "20.000000"
SHIFT_B = "0.000000"
DO_IN_GLOW = "1.000000"
IN_GLOW_BIAS = "0.000000"
IN_GLOW_SPREAD = "2.400002"
IN_GLOW_W = "-0.599999"
IN_GLOW_H = "-0.599999"
DO_PIXELGRID = "1.000000"
DO_PIXELGRID_H = "0.800000"
PIXELGRID_COREY_FAKE_SCAN = "0.000000"
PIXELGRID_MIN_H = "0.300000"
PIXELGRID_MAX_H = "0.800000"
PIXELGRID_GAMMA_H = "4.200004"
PIXELGRID_DECON_R_H = "-0.600000"
PIXELGRID_DECON_G_H = "0.600000"
PIXELGRID_H_DEDOT = "1.000000"
DO_PIXELGRID_W = "0.970000"
PIXELGRID_H_PRST = "5.000000"
PIXELGRID_H_COUNT = "4.000000"
PIXELGRID_B_SHIFT = "3.000001"
PIXELGRID_MIN_W = "0.050000"
PIXELGRID_MAX_W = "0.050000"
PIXELGRID_GAMMA_W = "8.000000"
PIXELGRID_BASAL_GRID = "0.050000"
PIXELGRID_Y_MASK = "0.400000"
PIXELGRID_Y_MASK_HEIGHT = "0.375000"
PIXELGRID_Y_MASK_STEEP = "1.000000"
PIXELGRID_Y_MASK_ON_WHITE = "0.000000"
DO_HALO = "1.000000"
HALO_NO_PREGAIN = "1.000000"
HALO_POWER = "-0.000000"
HALO_SHARPNESS = "7.000000"
HALO_GAMMA = "3.500000"
HALO_DO_MASK_HELPER = "1.000000"
HALO_VS_SCAN = "0.500000"
DO_BLOOM = "1.000000"
BLOOM_MIX = "0.170000"
BLOOM_QUALITY = "2.000000"
BLOOM_GAMMA = "4.000000"
BLOOM_GAMMA_OUT = "1.200000"
BLOOM_POWER = "1.000001"
BLOOM_EYE_ADPT_SRT = "0.000000"
DO_CURVATURE = "1.000000"
GEOM_WARP_X = "0.270000"
GEOM_WARP_Y = "0.290000"
GEOM_CORNER_SIZE = "0.008000"
GEOM_CORNER_SMOOTH = "150.000000"
DO_BEZEL = "1.000000"
BEZEL_INNER_ZOOM = "0.000000"
BEZEL_FRAME_ZOOM = "0.180000"
BEZEL_R = "-0.300000"
BEZEL_G = "-0.300000"
BEZEL_B = "-0.300000"
AMBI_POWER = "1.000000"
DO_VIGNETTE = "1.000000"
V_SIZE = "1.200000"
S_SIZE = "0.400000"
S_POWER = "0.100000"
DO_DYNZOOM = "0.000000"
SERVICE1 = "0.520000"

This is using an unusual RGXB mask (that works well across the monitors i tested).
Being wider, the mask is more evident but it works better on smaller screens or at higher viewing distance (see at 100%):

Parameters
DO_CCORRECTION = "1.000000"
IN_GLOW_POWER = "4.499998"
TEMPERATURE = "8000.000000"
IN_GLOW_GAMMA = "2.000000"
GAMMA_OUT = "0.400000"
DO_SHIFT_RGB = "1.000000"
OFFSET_STRENGTH = "0.250000"
SHIFT_R = "-20.000000"
SHIFT_G = "20.000000"
SHIFT_B = "0.000000"
DO_IN_GLOW = "1.000000"
IN_GLOW_BIAS = "0.000000"
IN_GLOW_SPREAD = "2.400002"
IN_GLOW_W = "-0.599999"
IN_GLOW_H = "-0.599999"
DO_PIXELGRID = "1.000000"
DO_PIXELGRID_H = "0.800000"
PIXELGRID_COREY_FAKE_SCAN = "0.000000"
PIXELGRID_MIN_H = "0.300000"
PIXELGRID_MAX_H = "0.800000"
PIXELGRID_GAMMA_H = "4.200004"
PIXELGRID_DECON_R_H = "-0.600000"
PIXELGRID_DECON_G_H = "0.600000"
PIXELGRID_H_DEDOT = "1.000000"
DO_PIXELGRID_W = "0.970000"
PIXELGRID_H_PRST = "8.000000"
PIXELGRID_H_COUNT = "4.000000"
PIXELGRID_B_SHIFT = "3.000001"
PIXELGRID_MIN_W = "0.050000"
PIXELGRID_MAX_W = "0.050000"
PIXELGRID_GAMMA_W = "8.000000"
PIXELGRID_BASAL_GRID = "0.050000"
PIXELGRID_Y_MASK = "0.300000"
PIXELGRID_Y_MASK_HEIGHT = "0.375000"
PIXELGRID_Y_MASK_STEEP = "1.000000"
PIXELGRID_Y_MASK_ON_WHITE = "0.000000"
DO_HALO = "1.000000"
HALO_NO_PREGAIN = "1.000000"
HALO_POWER = "0.250000"
HALO_SHARPNESS = "7.000000"
HALO_GAMMA = "4.000000"
HALO_DO_MASK_HELPER = "1.000000"
HALO_VS_SCAN = "0.500000"
DO_BLOOM = "1.000000"
BLOOM_MIX = "0.150000"
BLOOM_SIZE = "1.000000"
BLOOM_QUALITY = "2.000000"
BLOOM_GAMMA = "4.000000"
BLOOM_POWER = "1.000001"
BLOOM_EYE_ADPT_SRT = "0.000000"
DO_CURVATURE = "1.000000"
GEOM_WARP_X = "0.270000"
GEOM_WARP_Y = "0.290000"
GEOM_CORNER_SIZE = "0.008000"
GEOM_CORNER_SMOOTH = "150.000000"
DO_BEZEL = "1.000000"
BEZEL_INNER_ZOOM = "0.000000"
BEZEL_FRAME_ZOOM = "0.180000"
BEZEL_R = "-0.300000"
BEZEL_G = "-0.300000"
BEZEL_B = "-0.300000"
AMBI_POWER = "1.000000"
DO_VIGNETTE = "1.000000"
V_SIZE = "1.200000"
S_SIZE = "0.400000"
S_POWER = "0.100000"
DO_DYNZOOM = "0.000000"
SERVICE1 = "0.520000"

Sorry for the long post, but being synthetic in a foreign language is not my superpower.

After all the explaination, hoping it is clear now,
what, in the docs, you think is not clear enough?
Any suggestion to improve it?

4 Likes

Thanks Koko, I think I get the brightness concept. But I am still unsure about what IQ gain I should expect with this new feature, compared to the traditional method. Is it better definition in bright area ? Better dynamic range ? Anything else ?

The goal is to fully exploit the display capabilities (mask and brightness) within a fixed diplay brightness.

So, pure mask (or almost pure mask, depending on your monitor) in the darker tones till the mask limitations themselves allow it and maximum brightness by mitigating the mask elsewhere.

If you “don’t care enough” for the mask itself, then probalby you won’t notice any difference versus the previous mask mitigation methods tho.

Just added Monitor-MaxMask_RGB-Bright and Monitor-MaxMask_RGXB-Bright presets to the main git repo.

6 Likes

In general it makes the CRT emulation look as well as behave closer to a real CRT.

This should look awesome if combined with RetroArch’s HDR feature, for example on a monitor which barely passes the DisplayHDR certification, like some DisplayHDR400 and DisplayHDR600 displays. it might even open the door for things like BFI on displays which might otherwise been out of the question to use that feature while maintaining an exceptional CRT Shader emulation experience!

I’m sure @Nesguy would relish a feature such as this if he was still active here.

1 Like

There, you can see a fair comparison between the best achievable of both worlds, both with an RGXB mask:

The first one lets the phosphors grow gradually, even on dark tones:

This preserves as much mask as possible, and it is the new method:

From a quick look they appear to be almost identical, but if you focus, the second one appears to be more “sparkly”.

The first method, however, is still superior in the sense that it is able to morph the phosphors width gradually, were the second just dumbly add colors.

I am trying (and failing) to find a way to have the second method to acts like the first, but with the same precision needed to not sacrify the mask:!

5 Likes

It looks really good, you are doing an amazing job. Which game is that? I like the colour…:smiley:

2 Likes

Thanks, still tinkering alot on that. Maybe I’m going to reimplement everything to overcome the complexity.

The game is Dynamite Dux :slight_smile:

4 Likes

After a lot of tinkering, I came to the conclusion that using the old code and just tweaking its exposed parameters leads to very similar results.

The mask saturation and steepness is high and being not picky as my previous attempts it is forgiving versus final monitor characteristics and bad calibrations.
Plus, phophors are allowed to grow and no extra code is needed, so all in all, I flushed everything lol.

Will also probably convert maxmask* presets that were pushed to the repo that were using the flushed code to use the tweaked parameters.

Basically, I just pushed the input gain to a very high value to reach mask saturation, disable any HALO, just used a bit of bloom to smooth things and tweaked min phosphor width to the minimum and max to a value that would balance the big input gain.

Sorry for the noise!

5 Likes

Is there a proper solution for cores that flip the shader upside down? (and other directions too).

Rotating the bg_over is easy, same for the spot, but since the bezel doesn’t have evenly matched brightness/contrast on its sides, it looks off when rotated. And there’s no parameter to fix it.

But I wonder if all of this can be fixed in RetroArch’s settings? It’s weird that some cores have this problem while others don’t.

1 Like

You have to flip the bezel texture and make a preset with an override.
That’s a long standing bug in retroarch and I don’t feel comfortable to workaround it if that implies lowering the shader performance by adding an option for that.

I think you can switch drivers from/to Vulkan/GLcore and see if the flip issue is solved.

In that case you can override the video driver in retroarch.

1 Like

What about the bezel file/image? Maybe it can be edited to look right from all angles. The other flipped features can be easily fixed with an override.

Sure, it can be edited to look specular and so freely flippable, but the bezel would look worse. Again, since the bug is not in koko-aio, it is something that needs to be addressed by Retroarch; I’m not going to change the defaults that looks right as they are now to workaround the problem.

Just to be clear, the bezel is treated by the presets the same as other images, so you can modify it and include in the preset, i don’t see big issues here.

1 Like

Yeah I didn’t notice that at first, I’ll make flipped copies for my setup. Thanks.

2 Likes

@Starman99x

If I may expand on this. The “luminance” channel (RED) of the inner bezel image is shaded differently on the sides, top, and bottom. (Still %100 RED but at a different value.)

I have flipped straight and curved default bezels in my Duimon-koko-aio repo. I also have rotated versions where the shading is applied relative to the final orientation.

They can be found in the "Duimon-koko-aio\Graphics\_bezel\flipped" folder.

If you are interested in using wildcards to automatically flip based on the core and video driver you can look in my "Duimon-koko-aio\res\base\_flip" folder for examples.

5 Likes