
Although they are bright, they are not as bright as the phone makes them out to be. Still playing around with my monitor’s brightness settings.
I think my original settings may indeed be too bright for extended viewing, especially in a dark room. If I lower the “mask dark” parameter to 0.00, keep “mask light” at 2.00 and lower “mask/scanline fade” to 0.50, I still get a little higher than 175 cd/m2 peak brightness, which is even closer to the peak brightness of a typical CRT. Contrast is a bit too high though, so I’ll probably keep tweaking.
Here are some quick shots I took this morning 


4 Likes
@Umwelt - yeah we have been talking about these things for a while around here you see… I just assumed that you had read it all. I have been kind of “campaigning” against the xVM look, and what I mean is explained in more detail somewhere. I didn’t mean ‘block’ in the literal sense, more like as in ‘getting in the way’. Other expressions I used were ‘devour’ and ‘eat up’. Innacurate as they might be, I hope they would make my point clear. Full image vs sliced up might be a valid way to express the same idea.
@Nesguy - after all the shit I have given you, I am now a fan of your preset. You should have started posting camera photos from the beginning  It is very much as you said, sitting between a PVM and a high-end trinitron. Could you please post the chain again? I messed up the one I got the other day, and I really feel like trying it on the Samsung TV, which is brighter (and much bigger, should look good from the ‘magical viewing distance’).
3 Likes
I was skeptical at first but his preset is very nice. I will definitely keep an eye out to any adjustments. Hope you keep us updated Nesguy!
1 Like
Pics posted by Arviel earlier look really nice. They remind of a NEC XM29 monitor, which is the only shadow mask monitor IMO that can compete with some of the best Sony monitors.
1 Like
I tried to replicate Nesguy’s shader and modified it so it would produce reasonable brightness levels without the need for a strongly backlit screen. Which of course means that the resulting output will not be neatly calibrated as his is. But I think the look is close enough for us to compare it with my easymode preset in more or less equal conditions. It is not meant to be a technical comparison, or a beauty contest or anything like that. I’m just trying to put into images all the stuff we have been talking about. Feedback and reviews will be of course welcome.
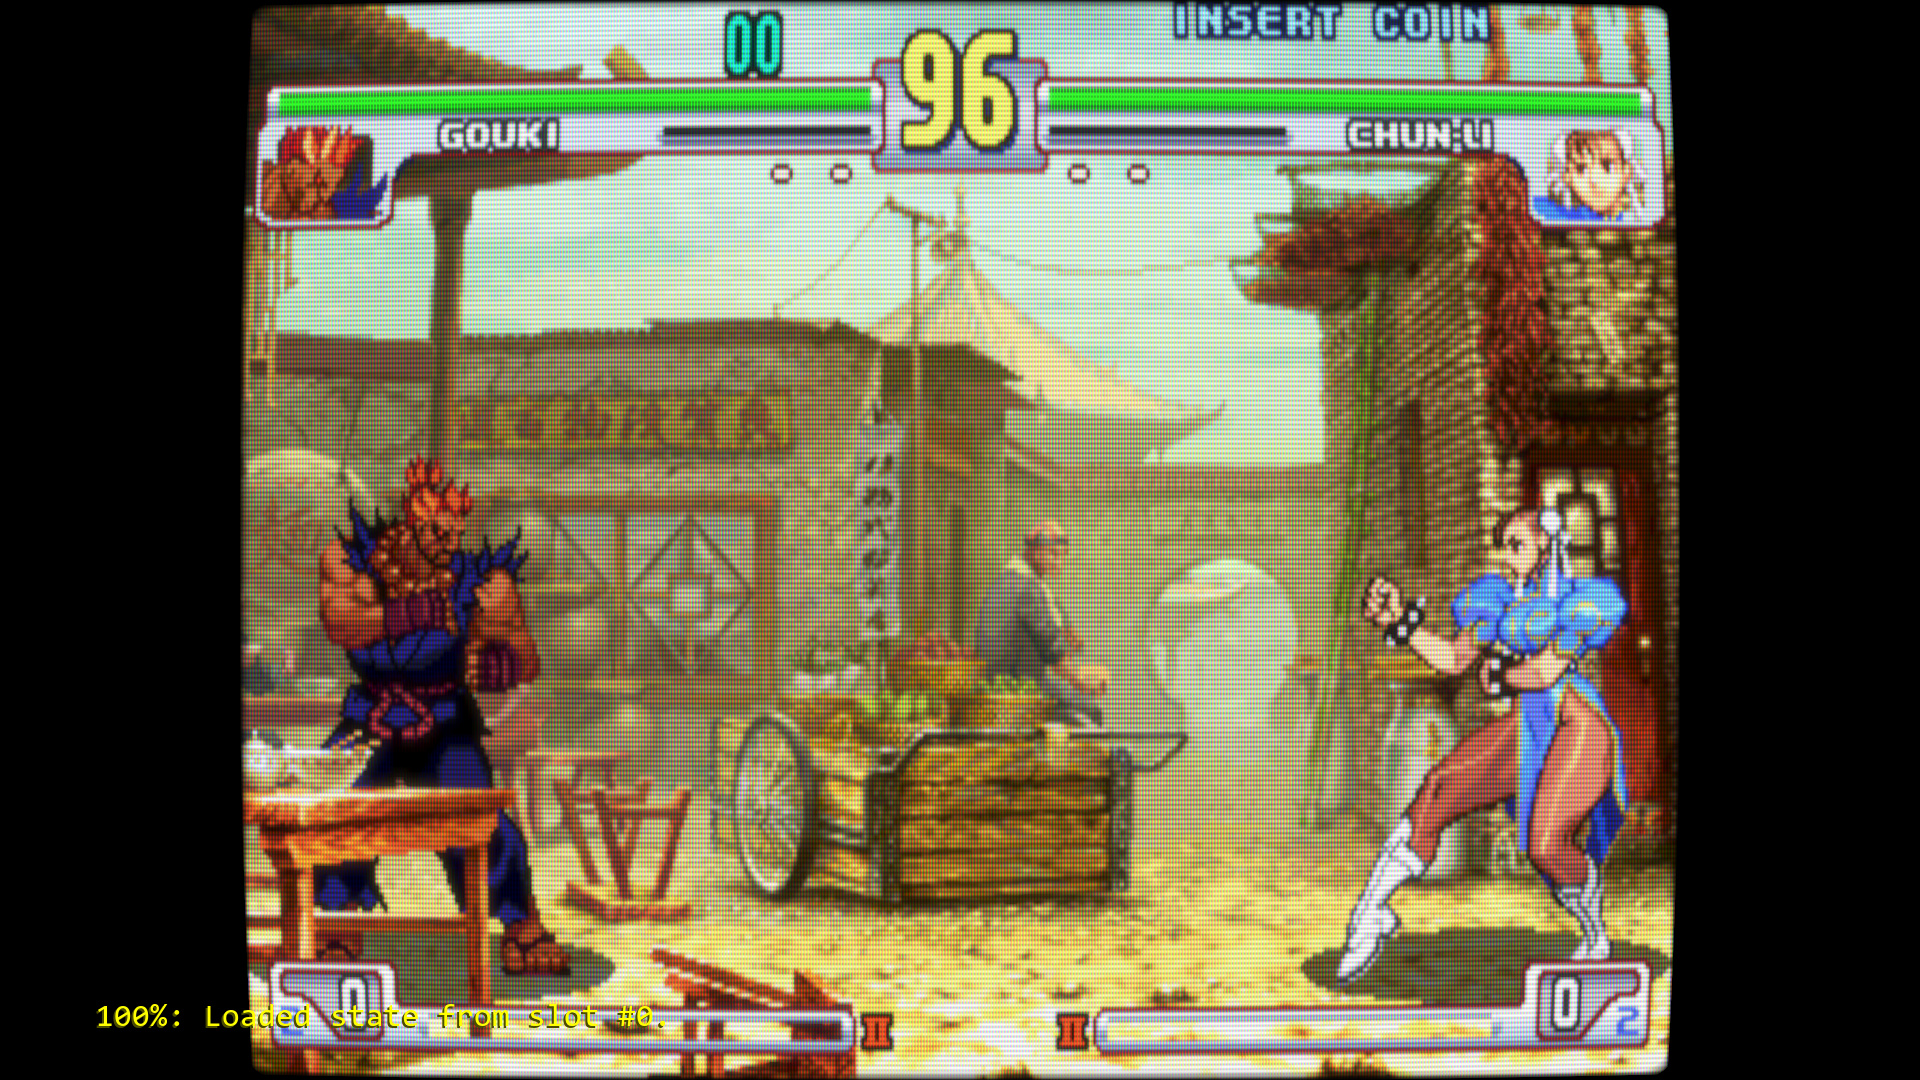
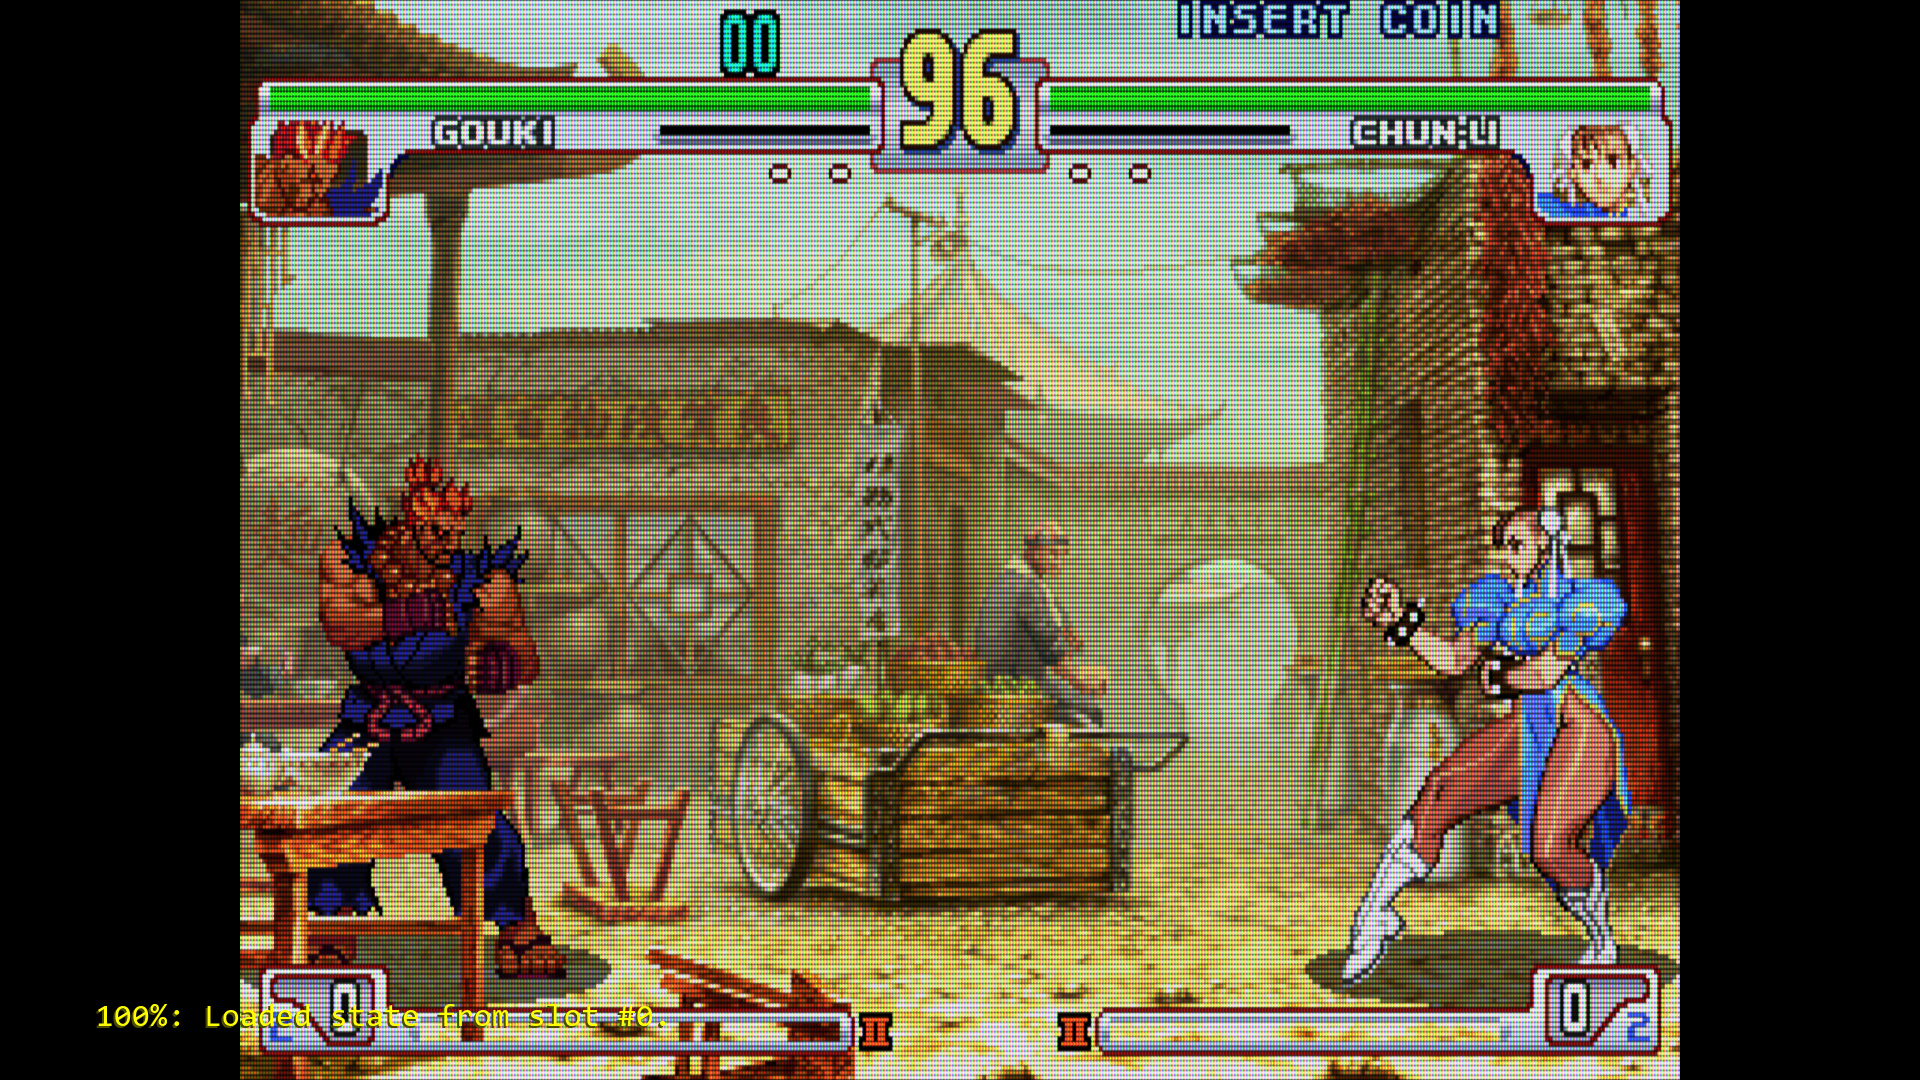
As per usual, images should be seen without scaling, so right click-view image after opening them or simply download.
3 Likes
I like the second one better.
Could you possibly share both shader presets?
That way we can compare them “live” on our own screens (and with our own preferred games, which we know by heart), which IMO will be much more reliable for a fair comparison and good feedback than comparing two still images.
1 Like
Here’s the link to the combined shader file:
I’m stacking this with the “image-adjustment” shader (located in “misc”) for gamma correction. Not sure if it matters but I put image-adjustment as the first pass, zfast_crt+dotmask as the second pass.
Under video settings:
-disable bilinear filter/video smoothing.
-enable integer scale
-set aspect ratio to “custom.” A 6x5 scale works well for SNES and NES at 1080p, cropping the top and bottom area of the image that falls outside of the “safe zone” for CRTs (5% off the top and bottom).
Important! There are some limitations when using the mask this way: the horizontal scale must be a multiple of 3 to avoid artifacts that resemble color bleed from the phosphors not lining up right with the pixels.
Unfortunately, there is no good way to avoid this with PSX and Genesis. Scaling to 6x6 with either will crop too much of the image at 1080p, and going to 3x3 results in sacrificing a huge amount of screen space to letterboxing/pillarboxing. The only way to avoid these compromises is with 1440p or 4k resolution.
Here are the changes I’ve made to the parameters. Everything else has been left at the default setting.
BLURSCALEX = “0.000000”
BRIGHTBOOST = “1.000000”
HILUMSCAN = “8.000000”
ia_monitor_gamma = “2.200000”
ia_target_gamma = “2.400000”
LOWLUMSCAN = “9.000000”
MASK_DARK = “0.000000”
MASK_FADE = “0.650000”
maskDark = “0.000000”
maskLight = “1.500000”
shadowMask = “2.000000”
shader filter set to “nearest”
With my display backlight maxed out I get a little over 175 cd/m2 peak brightness, which is sufficient for a room with average lighting and equal to the peak brightness of the average CRT. If the resulting image is too dark on your display after maxing out the backlight, you’ll need to adjust the “maskDark” and/or “MASK_FADE” parameters.
Increasing “BRIGHTBOOST” or "maskLight " will increase the contrast. If your display is already calibrated for maximum contrast, increasing these parameters will result in too much contrast and possibly lead to clipping in bright scenes.
1 Like
No way to do spoilers (i.e., collapsed sections), AFAIk. You can add scrollbars to things by enclosing them in code brackets (the icon that looks like </> up at the top of the editor)
1 Like
Trying out your new settings and playing with the brightness some more. Again looks a lot better in person, the image is not as bright.
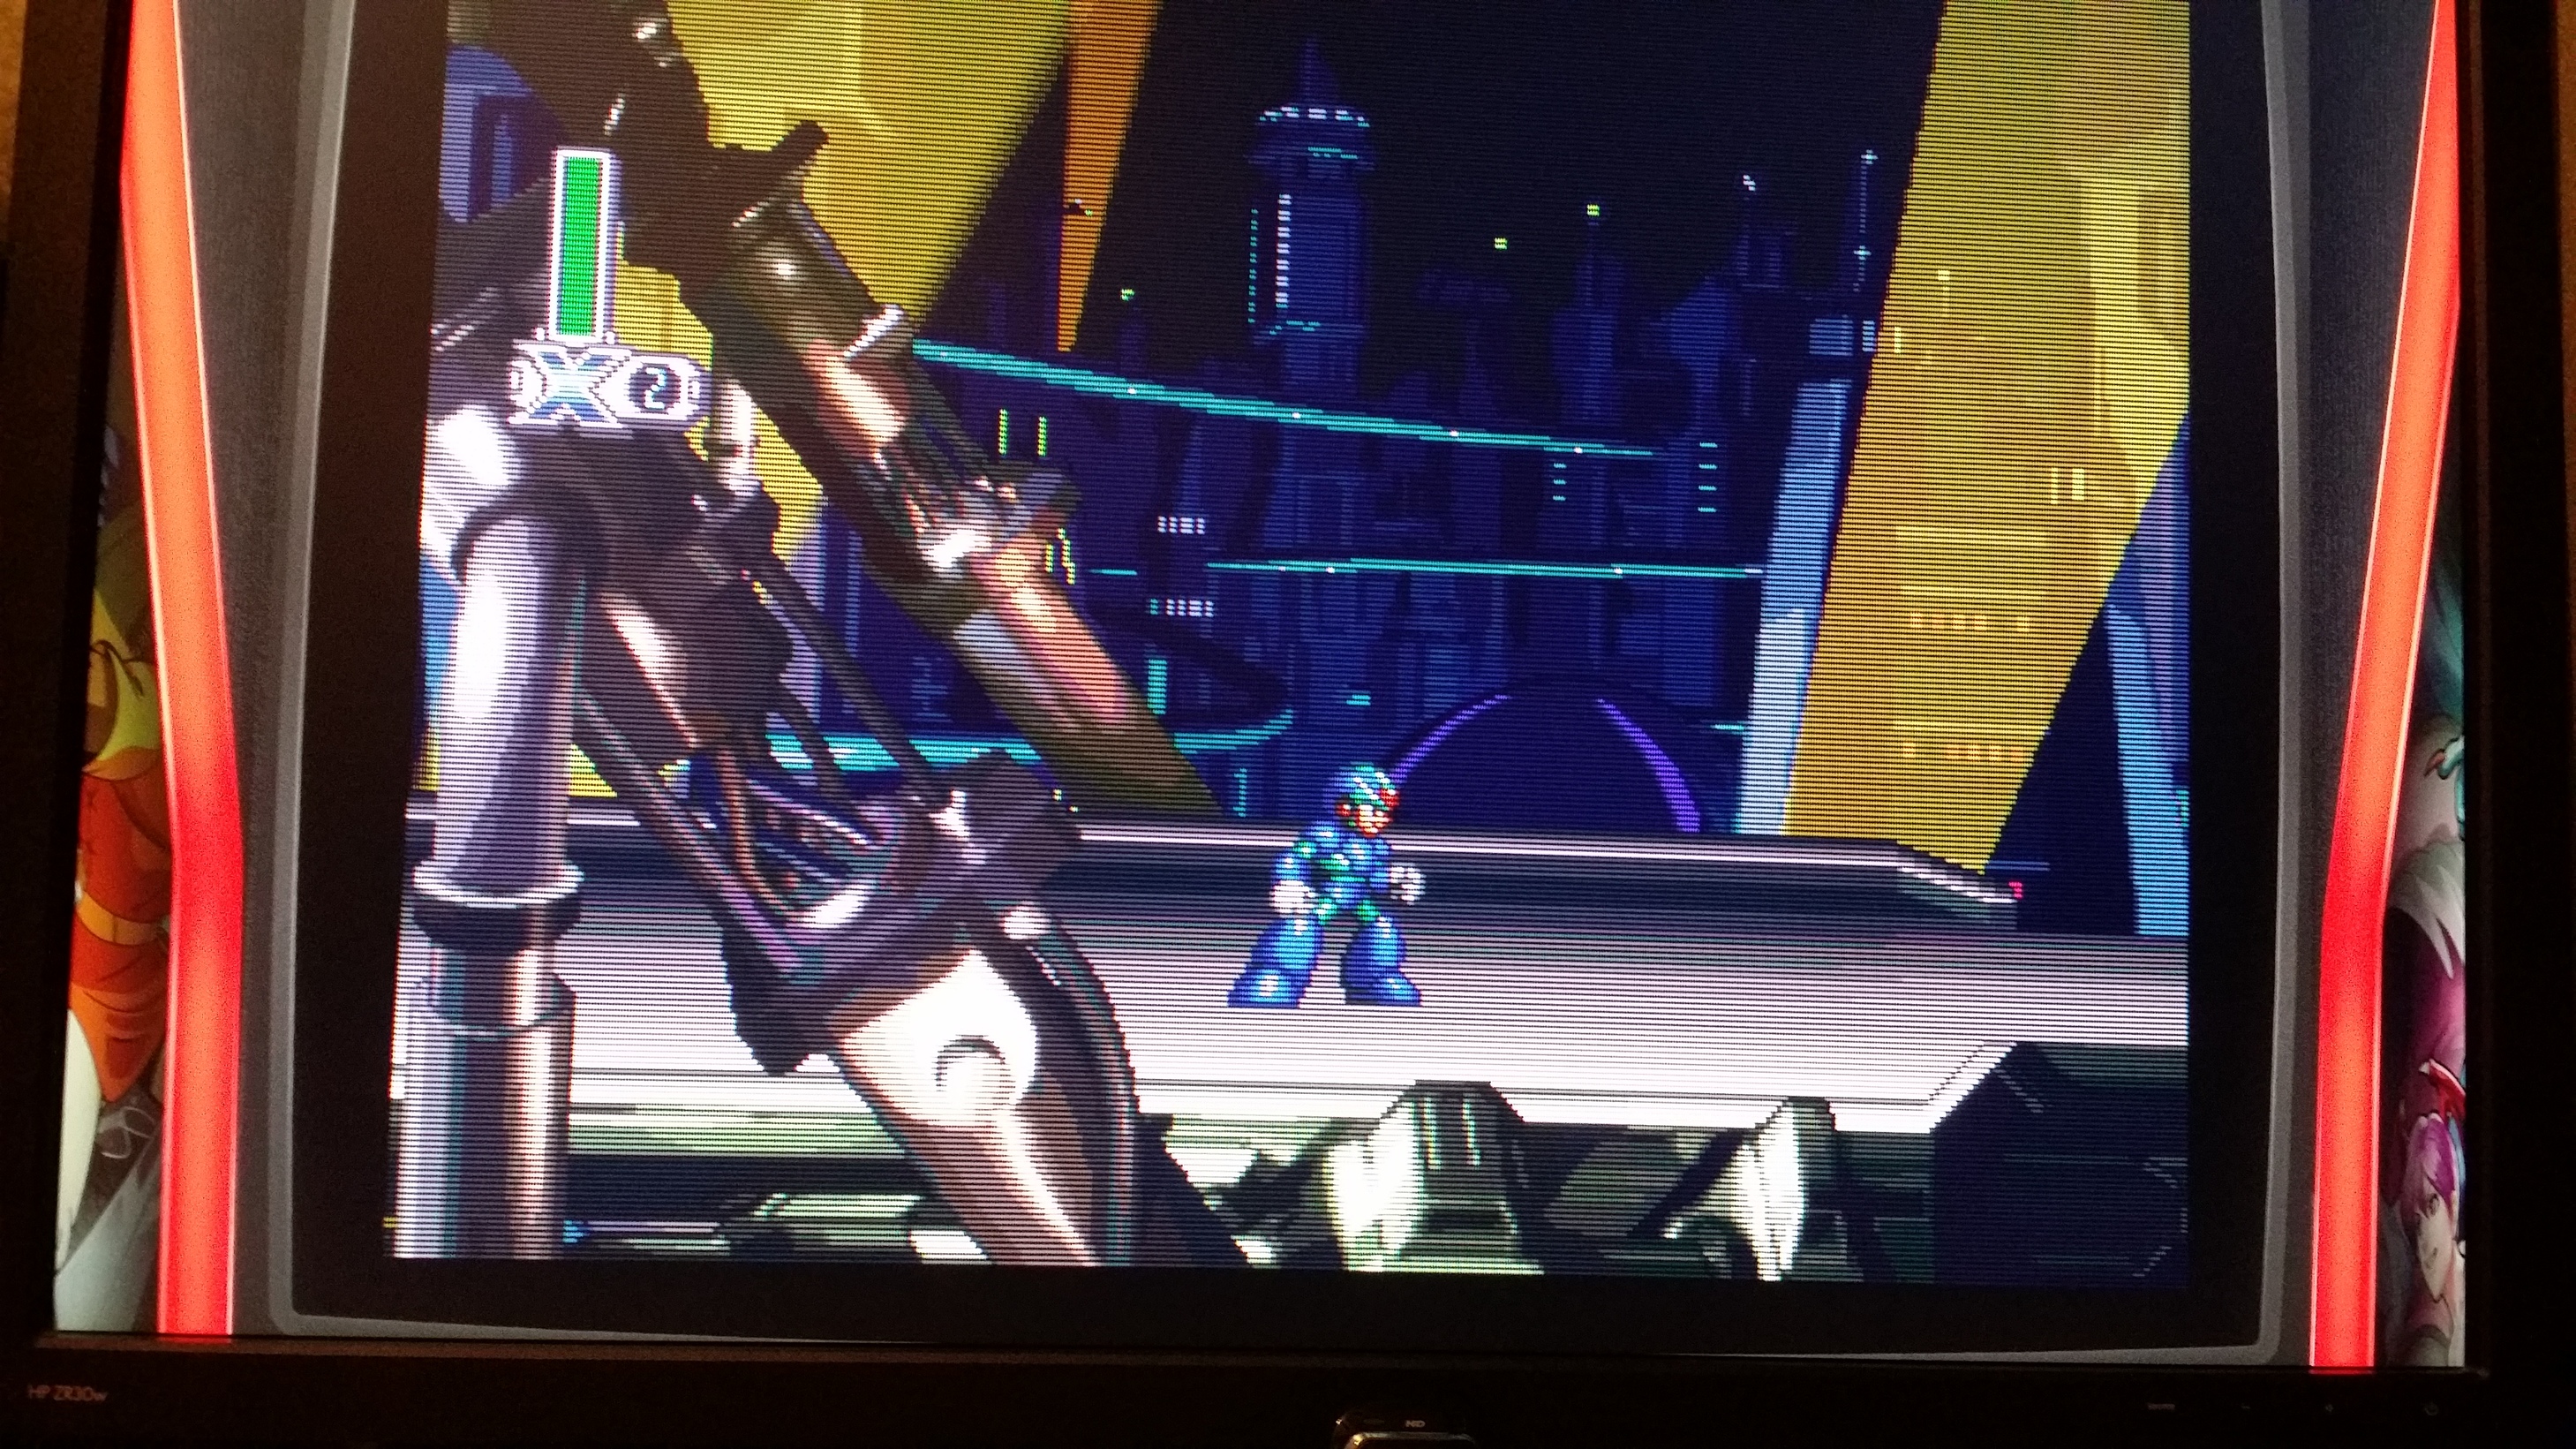
Yeah, it’s very difficult to get a photo that’s both in focus and bright enough; all my photos come out either blurry and bright or in-focus and too dark. I made several attempts this morning to get some shots of Super Metroid, which has a challenging color palette. None of my photos were satisfactory. 
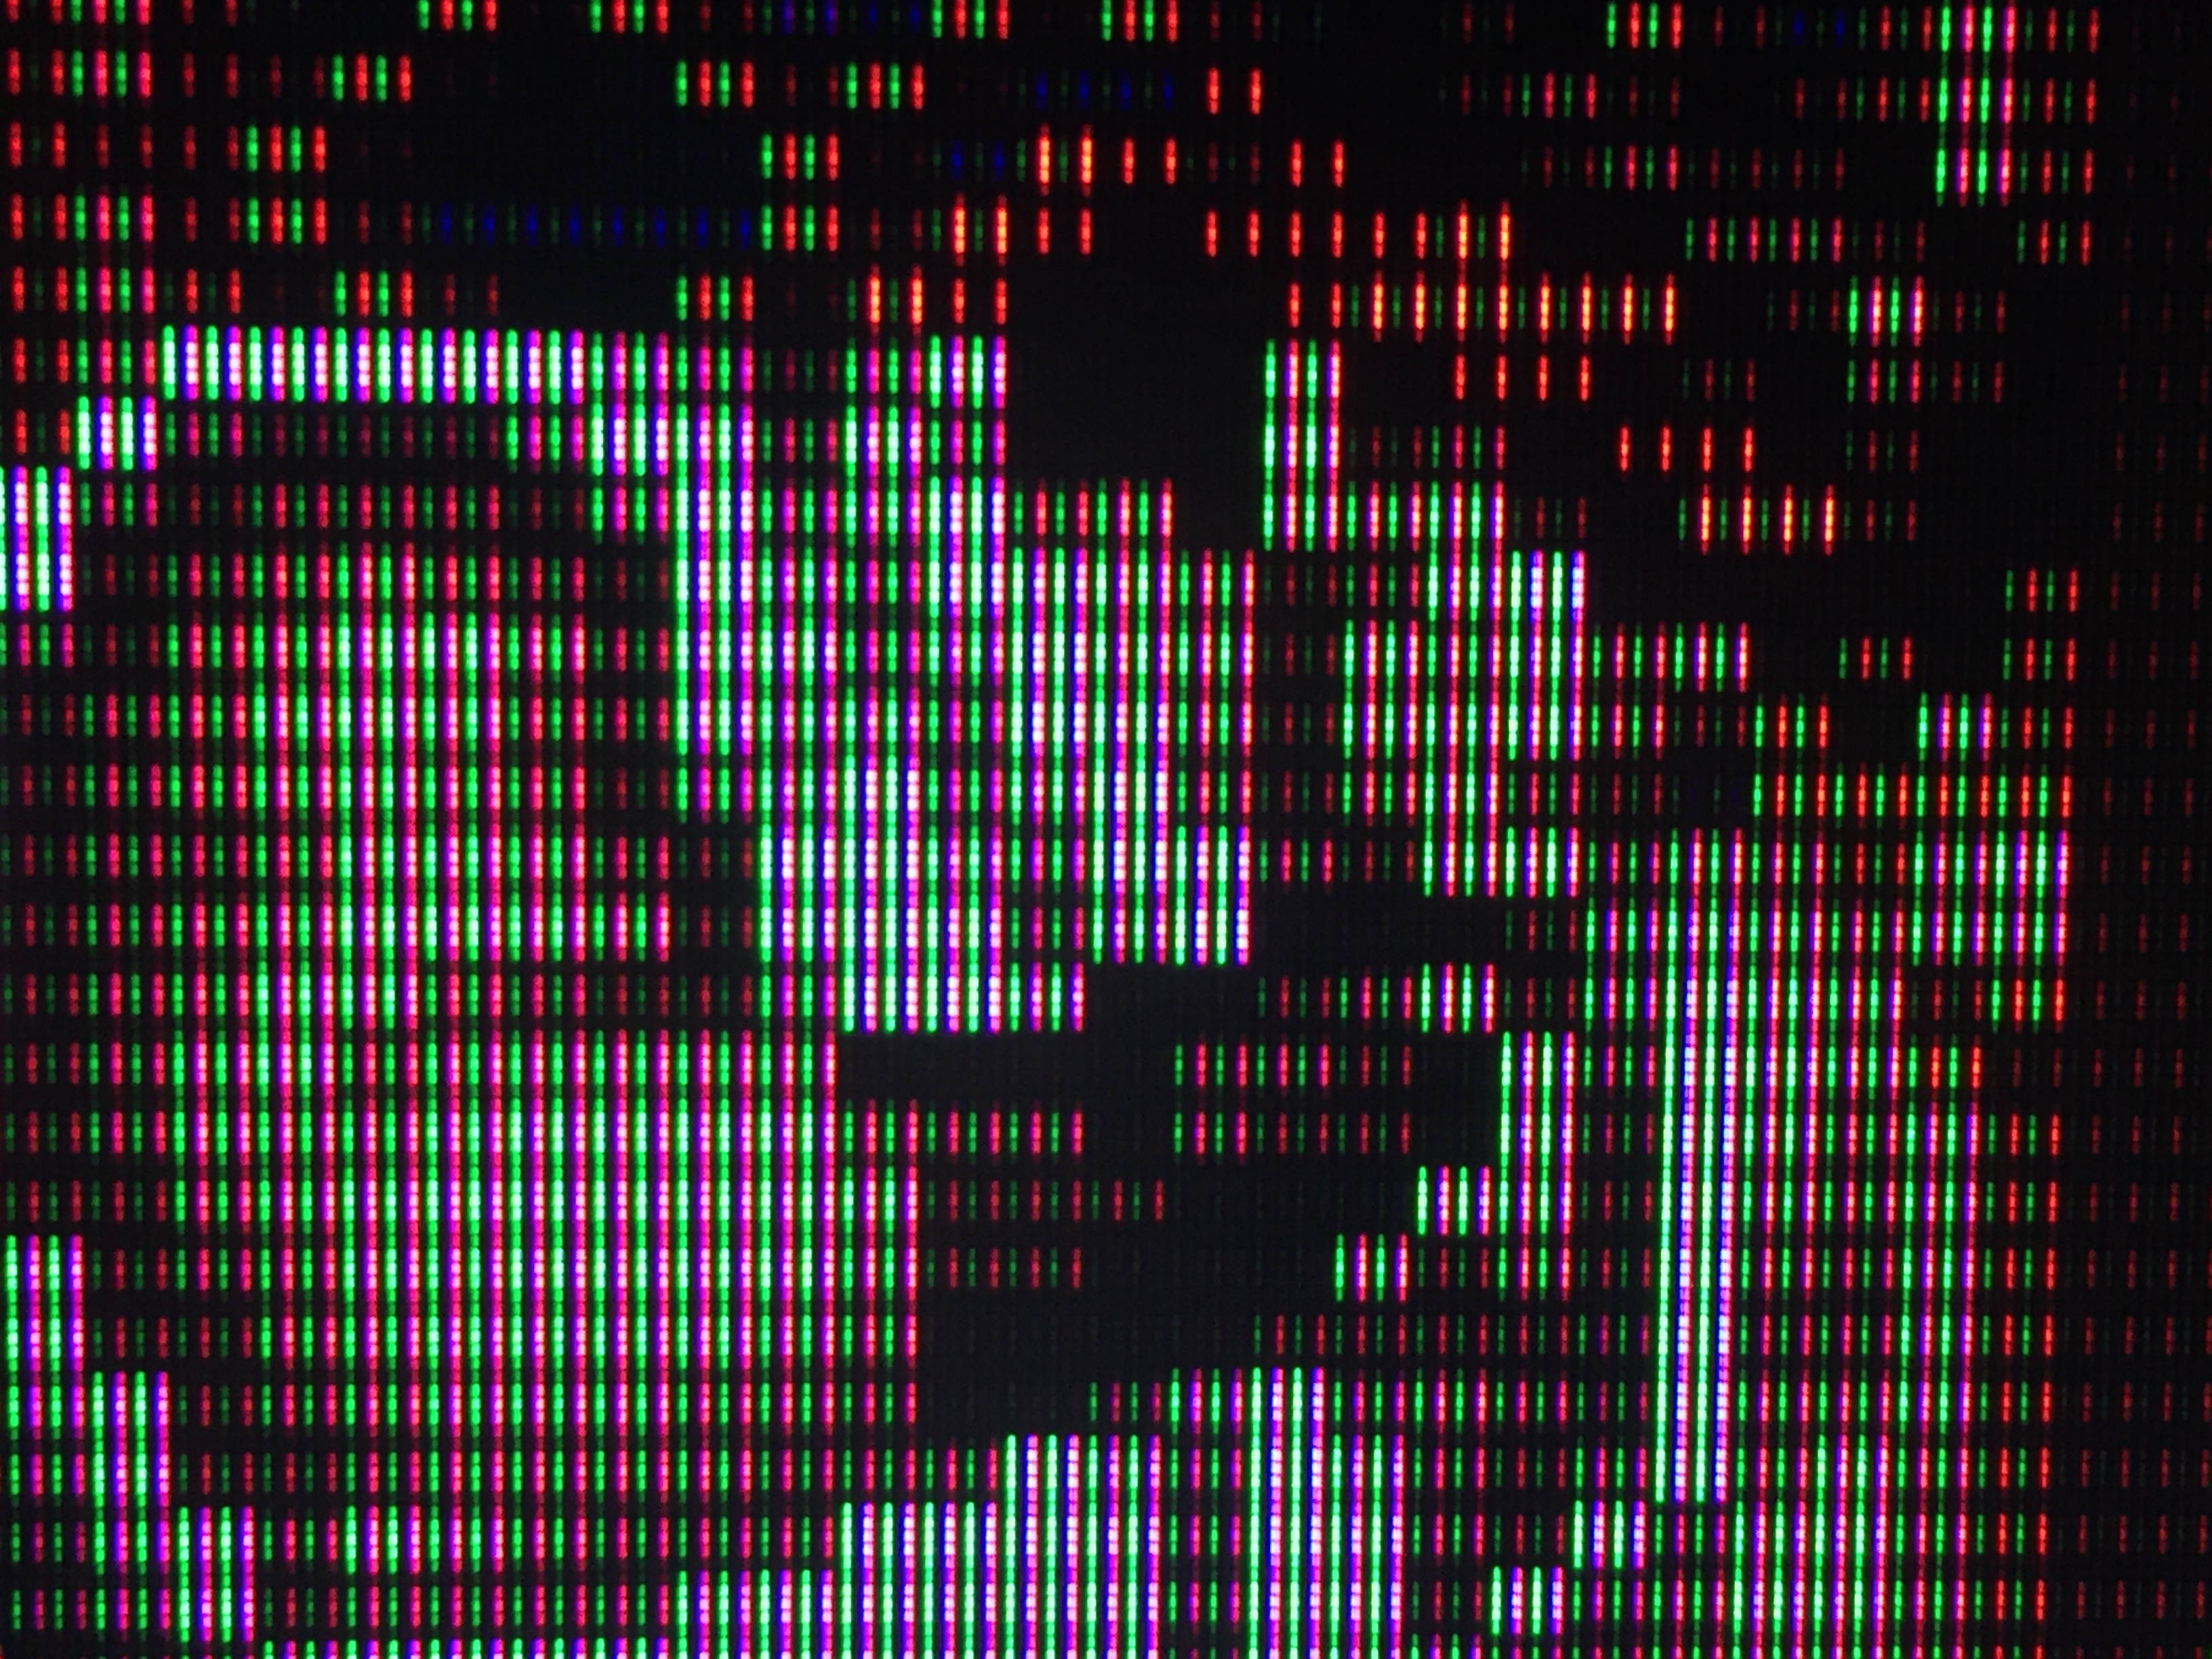
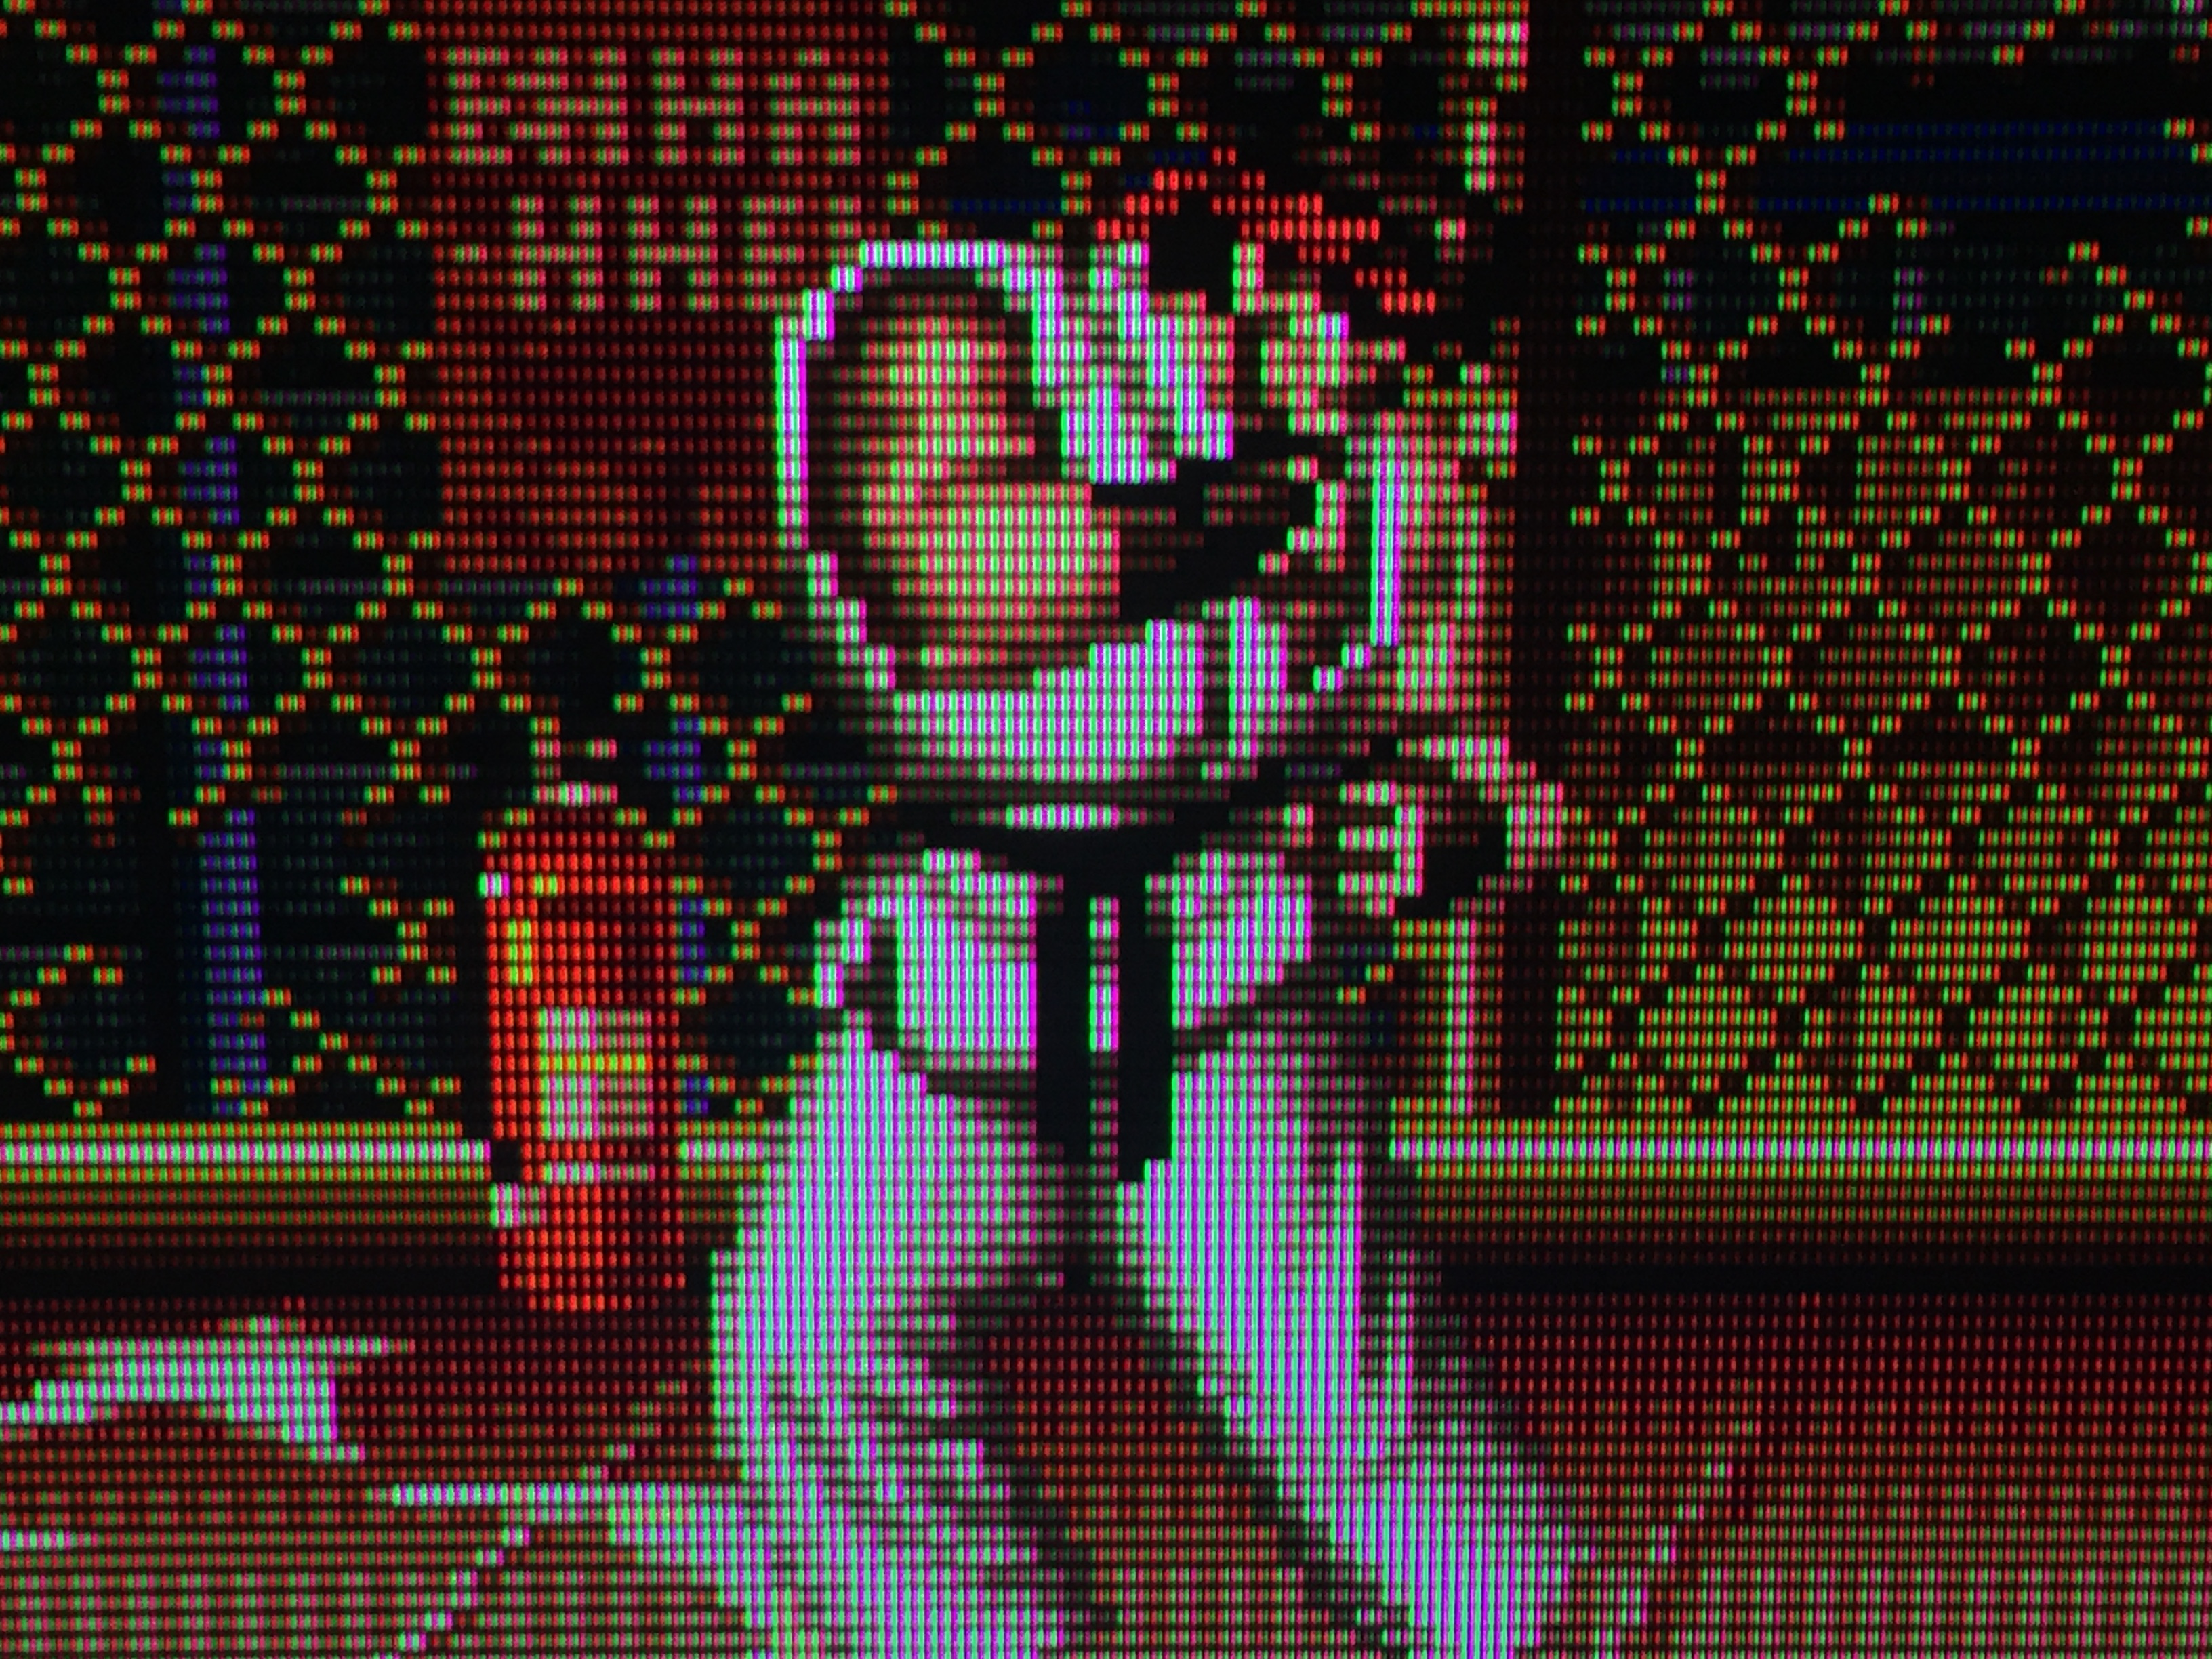
Some updates to my shader settings. I’ve found that a very slight amount of blur more accurately captures the transitions from light to dark pixels on a CRT than pure nearest neighbor filtering. The problem is that bilinear filter and most blurs are too heavy handed, excessively smearing the edges between light and dark colors, which destroys the contrast around highlights and makes the image somewhat flat and dull (not to mention the horrible effect it has on scanlines).
With Zfast CRT we can add a very slight amount of horizontal blur; this makes the transitions less harsh and closer to how they appear on a CRT without ruining the highlights and excessively blurring the image.
For gamma correction, I’ve also added the “image-adjustment” shader.
EDIT: changed x-axis blur from 0.10 to 0.00, updated screenshot.
BLURSCALEX* = “0.000000”
*A value of 0.20 clearly results in too much blur IMO. The shot below is using a setting of 0.00, which is still softer than the CRT. Ultimately, this will vary depending on the display used, viewing distance, and individual preference.
BRIGHTBOOST = “1.100000”
Upped bright boost a bit; contrast still looks good on my display.
HILUMSCAN = “8.000000”
ia_monitor_gamma = “2.200000”
ia_target_gamma = “2.400000”
LOWLUMSCAN = “9.000000”
MASK_DARK = “0.000000”
MASK_FADE = “0.700000”
maskDark = “0.100000”
Raised maskdark and mask fade a bit. I’m still measuring around 185 cd/m2 peak brightness on my display with the backlight at 100%. Since different displays have different max brightness levels, these settings need to be tailored to the individual display being used.
maskLight = “1.500000”
shadowMask = “2.000000”
shader filter set to “linear”
The first shot below is Retroarch with my new settings, the second shot is of an actual CRT hooked up to an RGB modded NES. The CRT is using a shadowmask, while the shader is emulating an aperture grille. As per usual, the backlight will need to be cranked up when viewing the shader with these settings.

2 Likes
I’m currently using a shader set up based off the preset you use, except I’ve swapped the image-adjustment.glsl with ntsc-colors.glsl. For reasons…
I’ll try and get some photos soon.
2 Likes
Hi, your shader is made for a 1080p or 4k display? Could you do an equivalence for games that have a native 480p resolution (like dreamcast, ps2, etc) ? Thank you.
These settings are for 1080p and work best at a 6x5 integer scale. If the horizontal scale isn’t a multiple of 3 you get color bleed from the mask. You can still use this with a 4K display but it will probably need some tweaking.
I’m not quite sure what you’re going for-
480p doesn’t display scanlines. You can disable the scanlines and keep everything else the same by altering the following settings:
HILUMSCAN = “0.000000”
LOWLUMSCAN = “0.000000”
You’ll also need to adjust the maskdark, masklight, mask_fade, and brightboost parameters to get the mask as dark as possible while still maintaining an adequate level of brightness on your display. Since different displays have different max brightness levels, I can’t really help you with that. I would use a light meter and try to maintain at least 175 cd/m2 brightness when displaying a white screen with the shader applied. Fudoh’s 240p test suite has a white screen test pattern you can use for this. If you don’t have a light meter available, there are smart phone apps that can get the job done.
1 Like
I didn’t understand. For example, GameCube doesn’t display scanlines on a CRT TV?
That’s correct.
Only those systems which output at “240p” will have scanlines on a CRT.
“Scanlines” colloquially refers to the horizontal black gaps between visible lines when a CRT is displaying 240p.
With 480i, you can sometimes see moving horizontal lines on a CRT, but that’s not the same thing.
For GameCube and Dreamcast I apply the crt-hyllian-3d shader, so I can see the scanlines, unlike the crt-geom in which I can see only with the game paused. So it’s totally fake what hyllian-3d simulate?
Please, read:
Yeah, you can do a lot of weird stuff with shaders. CRT shaders are mostly designed with displaying 240p content in mind. If you want a more realistic 480p/480i look with shaders, almost all of them have parameters for adjusting the scanlines that allow you to disable them.